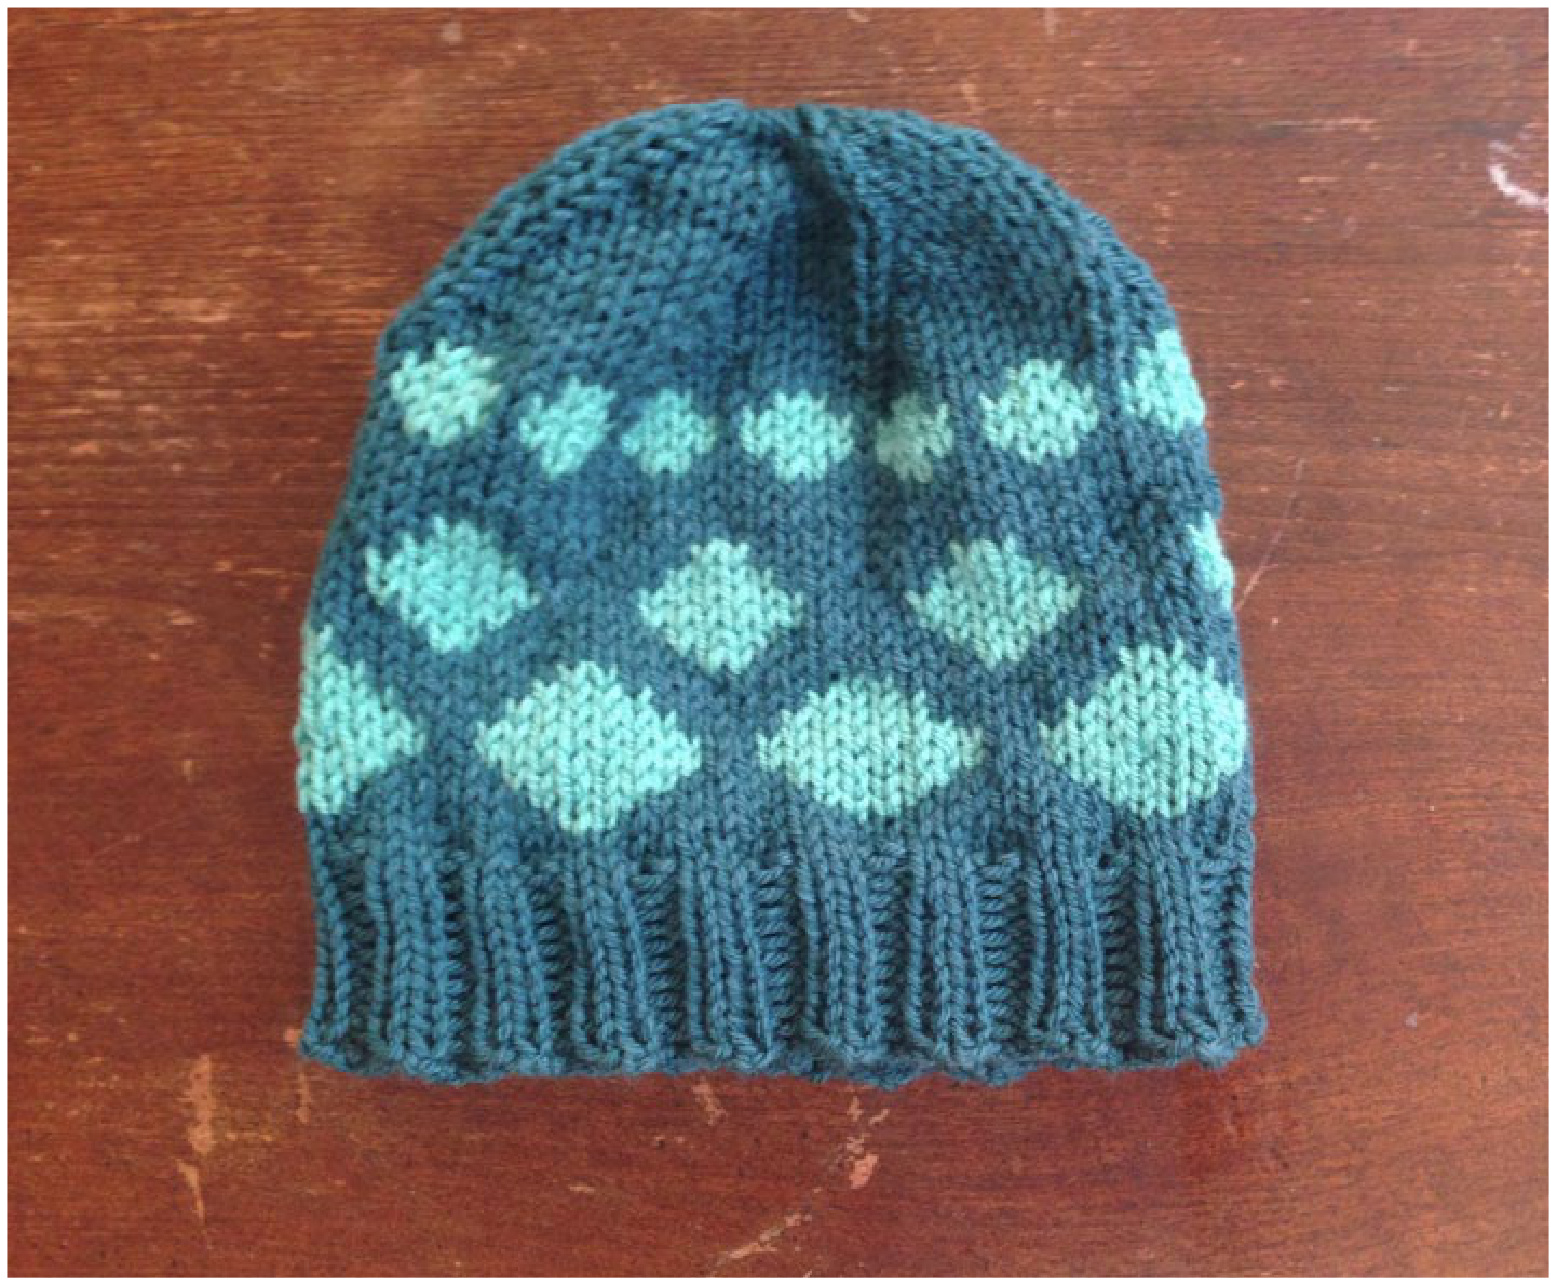
DInO EGG Hat
By: Carolynn Markey Kitty-ears.com moonofsilver@ gmail.com
instructions
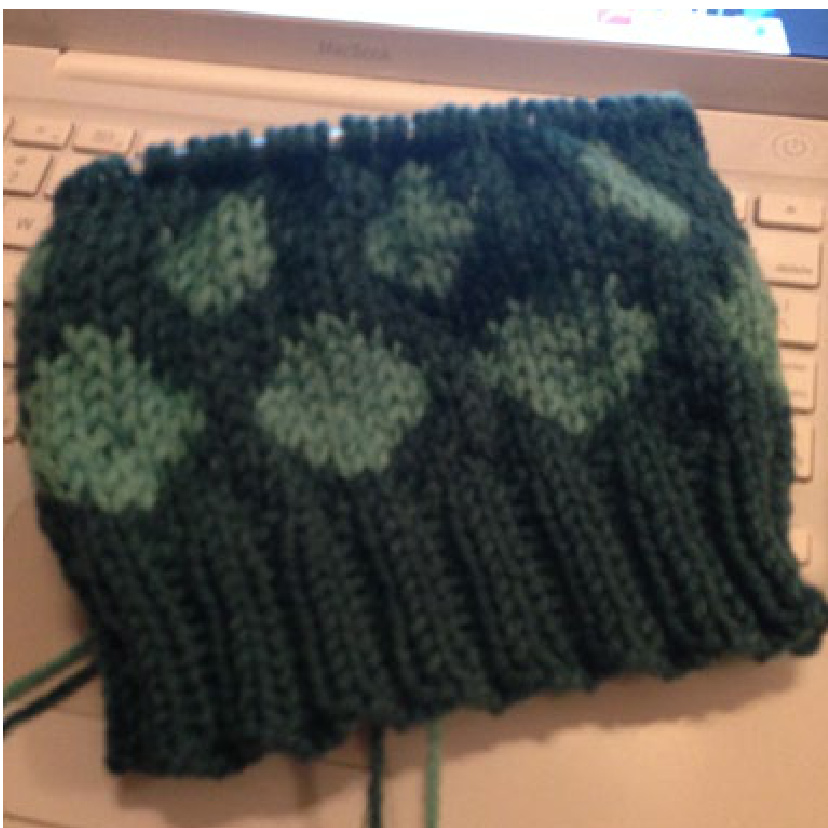
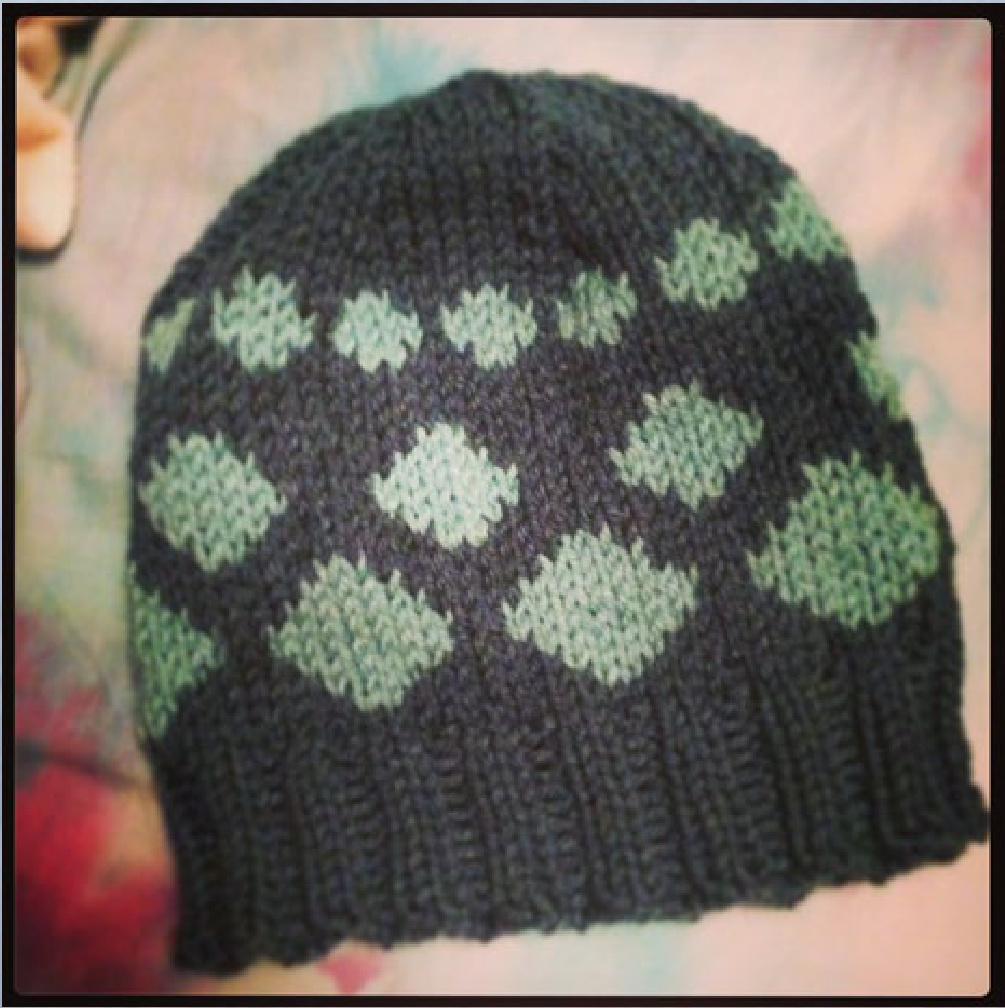
This tutorial will help you create a pair of fingerless gloves! K: KnitP: Purl K1tbl: This is a M1 stitch. After knitting a stitch, don't drop it from your needle, but knit into the back loop of the stitch to make one. Then drop the stitch as usual. Now you should have two stitches in the place of one. K2tog: Knit two together. Knit the next two stitches together like they are one stitch. This is a decrease stitch. The finished dimensions of the child hat: laid fat, 8 inches from brim to top, with a left to right measurement of by 7.5 when measured right above the ribbing, with no stretch applied to hat. Please keep in mind this is measured flat, so double numbers for full circumference. With medium stretch applied hat pattern (measured right above the ribbing again) will stretch to 8.5 inches. (any more stretch distorts hat.) Gauge: 4.5 stitches an inch (gauge is measured with the stranded knitting) as long as you are within 4-5 stitches an inch you will be fine. This pattern comes in one size: child Please note that because of color stranding, object has considerable less stretch then a garment knit from one ball of yarn.
You will need:
150 yards of main worsted weight yarn (I'm using Knit Picks Brava) 75 yards of contrast (the speckles) worsted weight yarn (I'm using Brava again) Size 7 and 8 inch hat-sized circular needles (4.5mm and 5mm needles) Size 8 (5mm) double point knitting needles Yarn needle
Pattern Child Size
1. Cast on 72 Stitches on your 4.5mm circular knitting needle. Use a long tail or crochet cast on, or any other cast on that gives a stretchy edge. 2. (K2, P2) until brim measures two inches. 3. Switch to 5.0mm circular knitting needles. On next round, K2 tog, K35, K2tog, and knit till end of round. You should now have 70 stitches on your needles. 4. Add your second color in preferred method. I just tie it on. 5. Follow small size chart on page 4. 6. After you finished last row of chart, cut the tail of your second color, leaving a long piece to weave in, and began decrease. Round 1: (K8, K2tog) all the way around Round 2: Knit all Round 3: (K7, K2tog) all the way around Round 4: Knit all Round 5: (K6, K2tog) all the way around Round 6: Knit all Round 7: (K5, K2tog) all the way around Round 8: Knit all Round 9: (K4, K2tog) all the way around Round 10: Knit all Round 11: (K3, K2tog) all the way around Round 12: Knit all Round 13: (K2, K2tog) all the way around Round 14: Knit all 7. Cut your yarn for main color, leaving a long tail. Place this piece of yarn on a yarn needle and pull it through all the remaining stitches on hat. Pull tight. Drop needle to inside (wrong side) of hat and weave in all ends. 8. Give to your child/ or other small person and hope they love it. :)
Chart
Repeat each row 10 times to make one round. Knit ever stitch except for very first stitch of round three (please see \*)
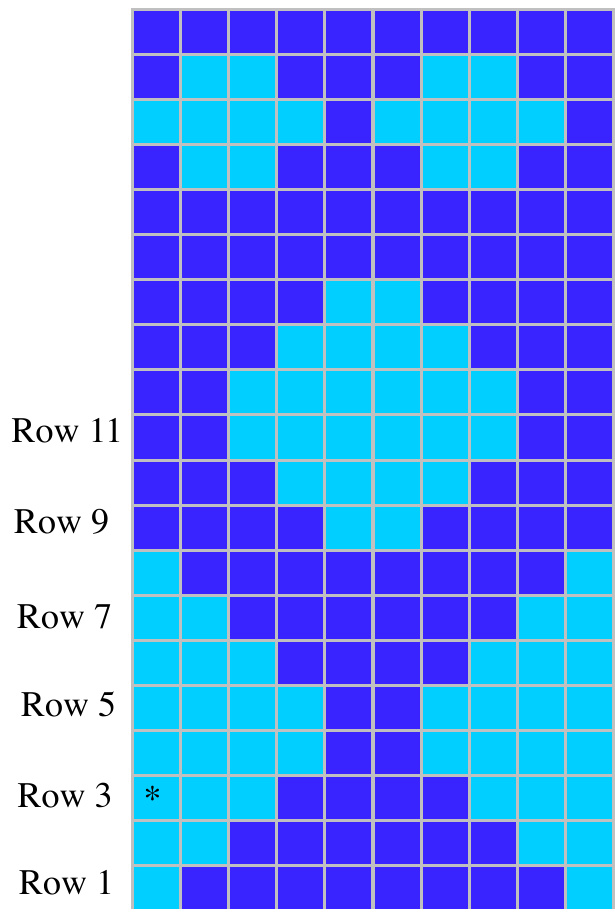
\* For this stitch and this stitch only, please slip the first stitch of pattern on row three. So, you usually repeat each row 10 times to make one round, but for row three, the first time you knit it, you will slip one, knit the 9 stitches from the pattern, before going on to knit row three again but now minus the slip 9 more times. You only slip that one stitch, don't repeat it. This will help smooth out that "jump" that can appear at the beginning of the row when knitting colorwork.
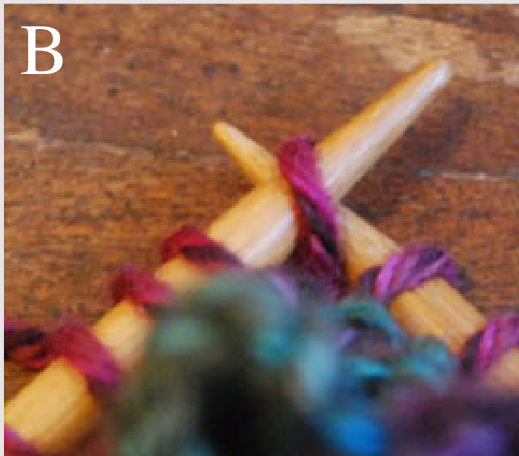
Casting ON The Crochet Cast-On
1) Start off with a slip knot and a normal stitch on your needle (A). 2) Put your second needle in between the stitches (B) The needle should be against the other needle, with the yarn below it.
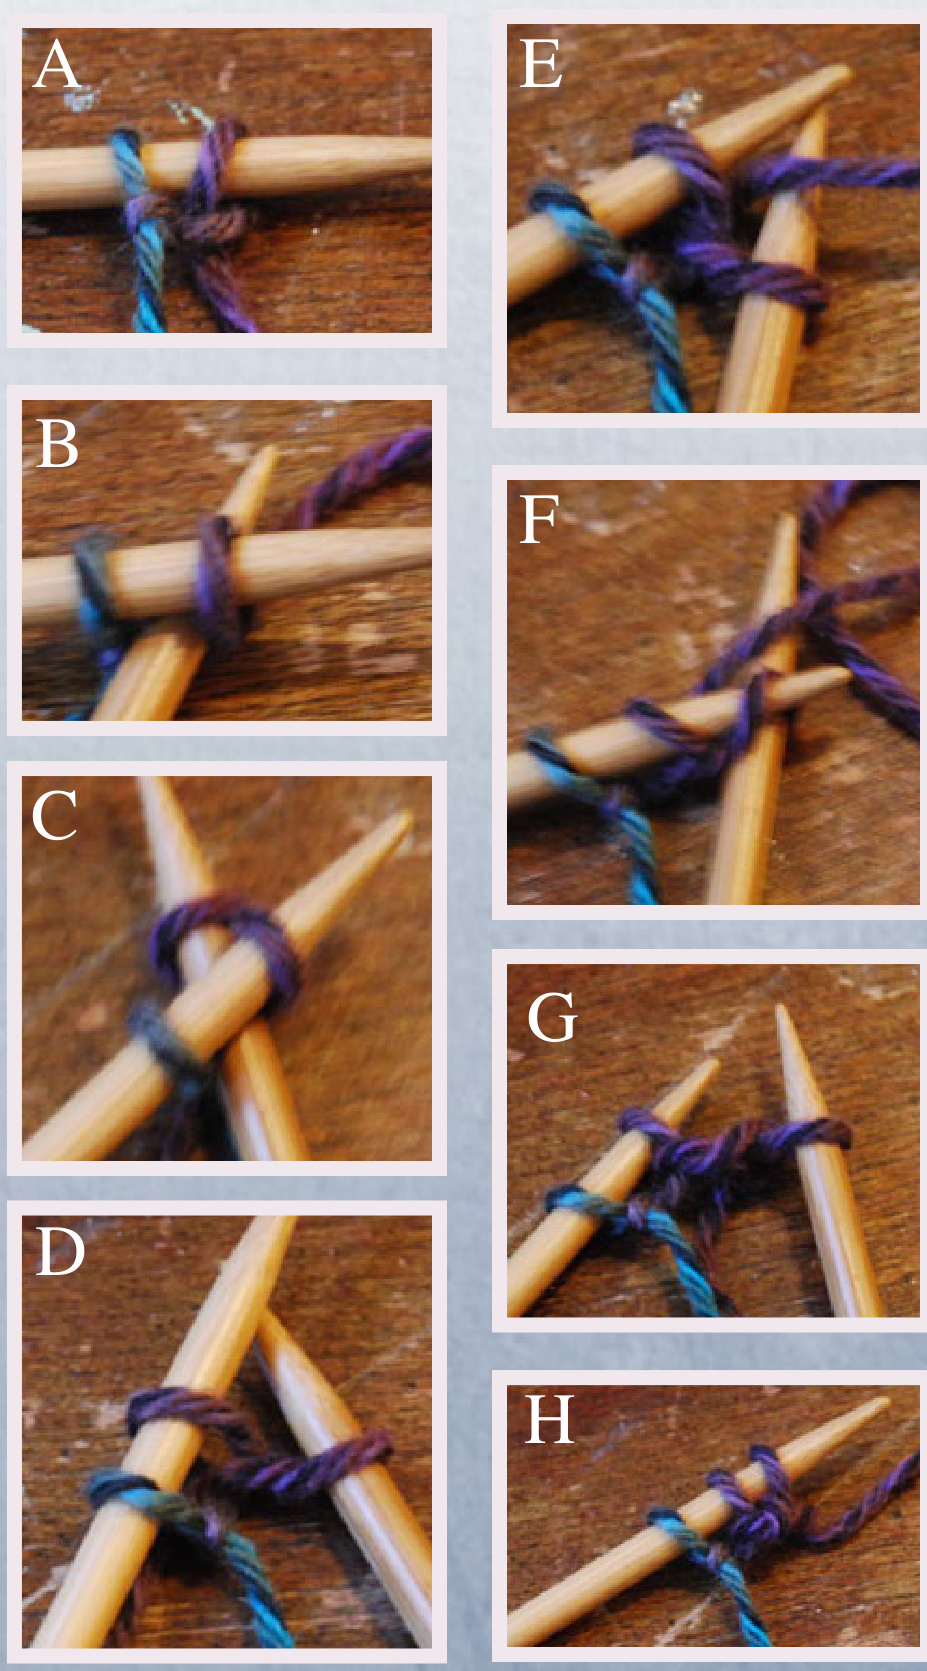
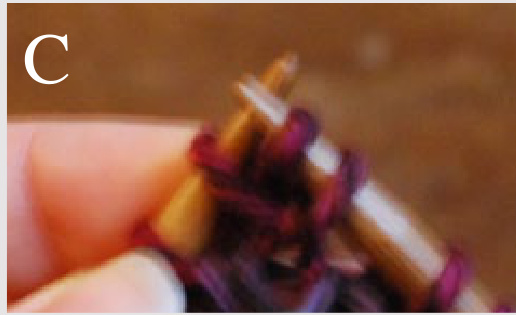
3) (C) Yarn over with your working yarn (NOT the tail) 4) Pull this yarn over through the two stitches. (D) 5) Yarn over on your second needle (NOT using tail) (E) 6) Now slip your first needle under the stitch on your second needle (F) and pull it over the yarn over that is also on your second needle, leaving the yarn over on the second needle (G) 7) You have now formed that third stitch. Slip it on to your left needle (H) and repeat from step 2 (B) to form more stitches. \*many use a crochet hook to do this, but I don't.
Joining in round
1) Cast on ONE extra stitch 2) Make sure your working yarn is coming off the right needle. 3) Take first stitch on left needle and pass as if to purl onto the right needle 4) Now take what was the first stitch but is now the second stitch on the right needle and pass it OVER that stitch you just slipped, and off the needle. (like a PSSO) 5) Pull your tails and working yarn to make it tight. Done!

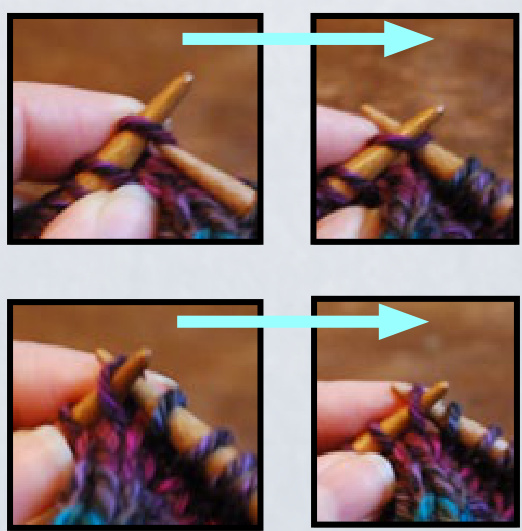
K2TOG
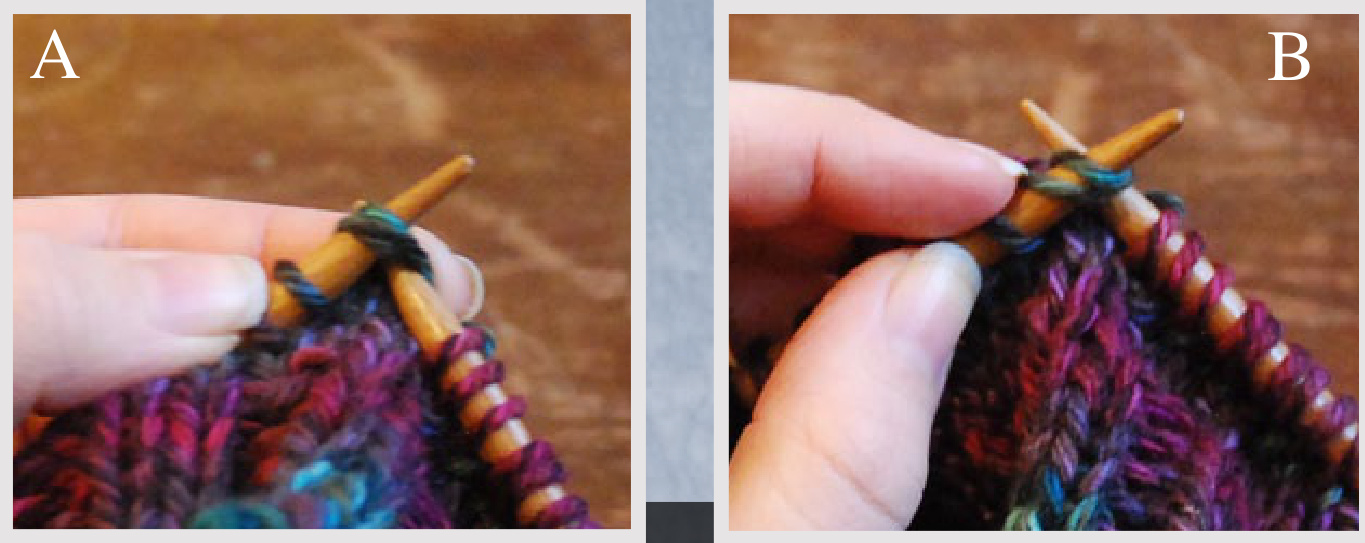
K2Tog means to knit two stitches together like they are one stitch. (A) You simply knit through two stitches like it is one. See how I make sure I have two stiches close together (B) and knit into them like they are a single stitch? This will leave only one stitch on your right needle when you are done. (C) and it makes a little "lean" (D) when finished.

KITBL

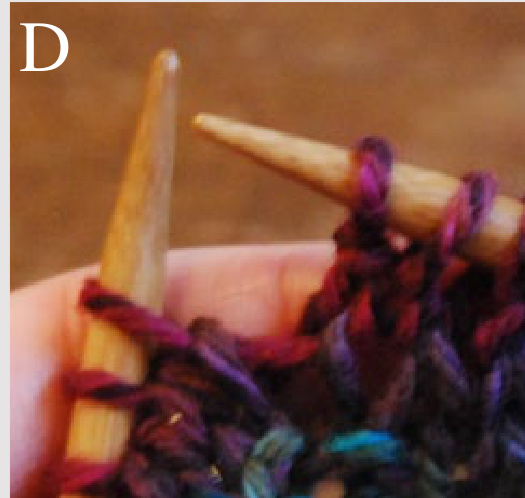
This is an increase stitch. It takes one stitch and makes it into two stitches. 1) Start off by knitting into the live stitch on your left, working needle: BUT don't slide the stitch off your left needle yet like a regular knit stitch. (A) 2) Knit again though this same stitch by taking your right needle and placing it behind the left needle (B) and knitting. Now you have two stitches on your right needle and the one stitch you knit into twice on your left needle (C) 3) Drop stitch three off your left needle (D) The back-knit stitch sort of looks like a purl stitch, see?
Extra Explanation:
You usually knit like this: by going front to back. However, when knitting through the back loop (KTBL) you slide your needle and knit like this: always staying behind the stitch.
Adding color
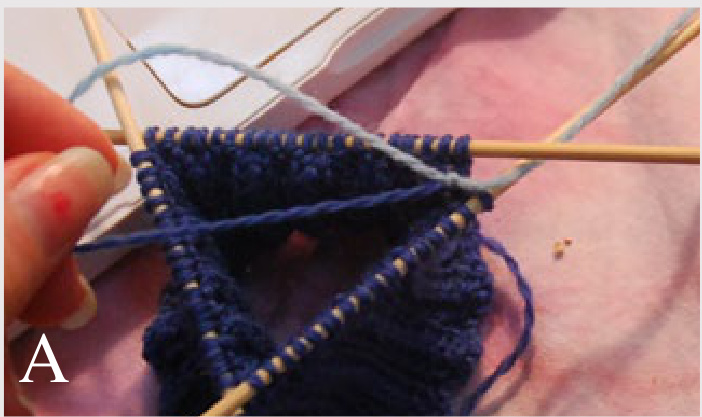
To add another color to your work, simply tie (A) the new color (light blue) to your working yarn (the dark blue). Make sure to leave a tail to weave in. When knitting, I hold one color on top of my hand, and the other one between my second and middle finger. (B) If you are new to colorwork, you can just let the non-used color droop behind your work and pick it up when needed..
finiSHInG
When you have completed all rounds on the pattern, you need to finish the top of your hat. 1) Cut your working yarn and thread it on a yarn needle (A). 2) Pull off the first double pointed needle exposing the live stitches (the one to the left of your working yarn) (B)
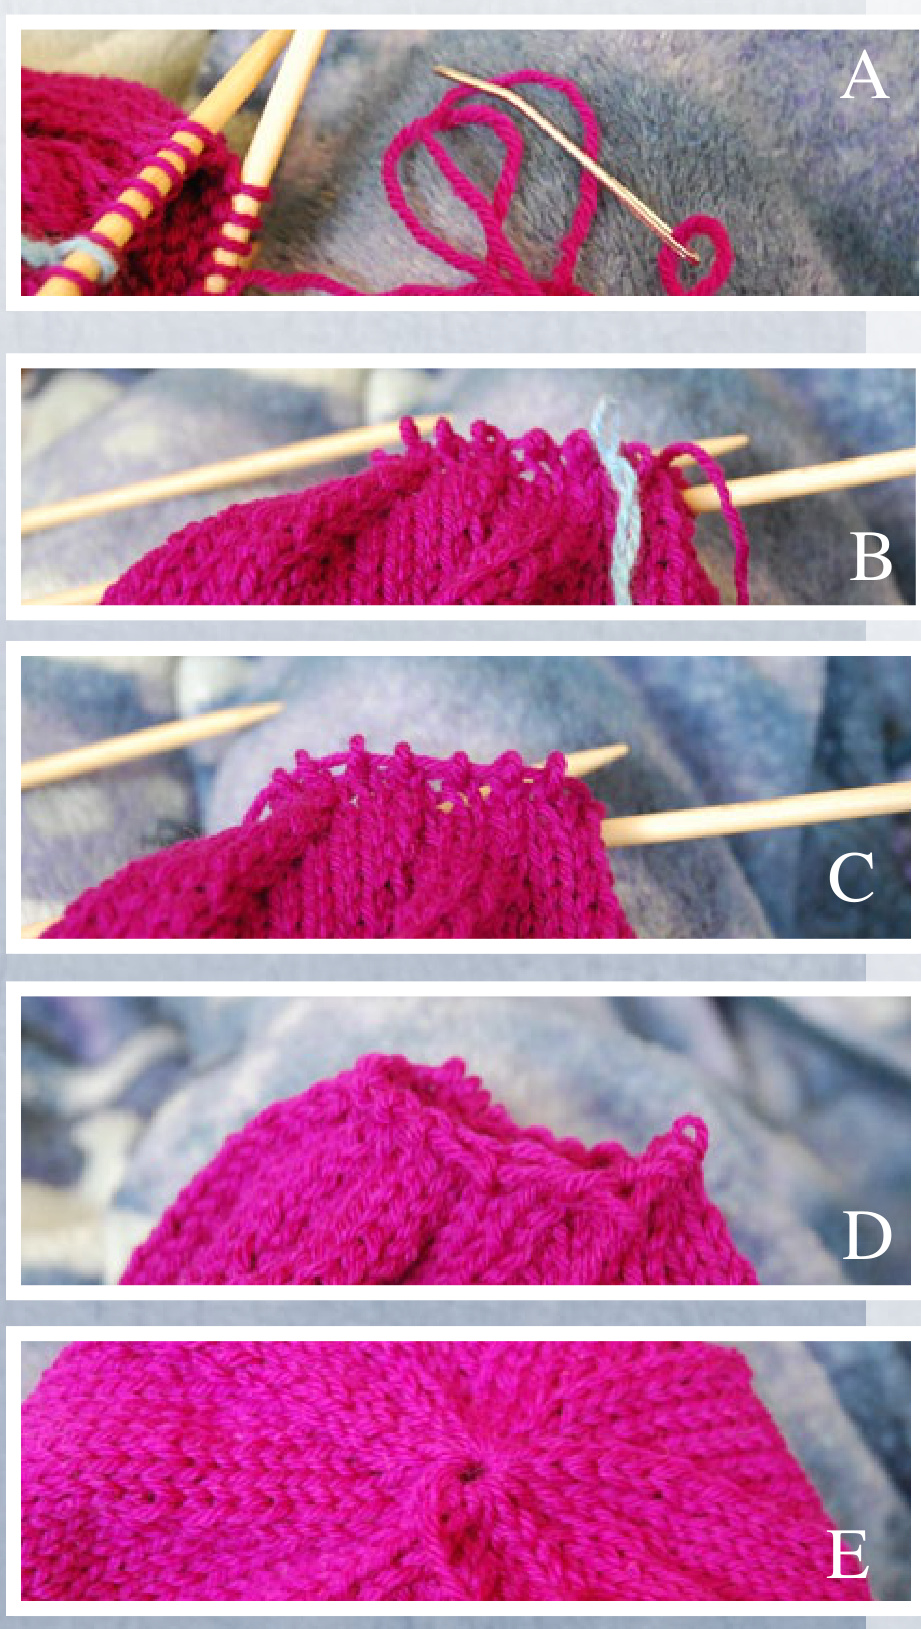
3) Pull the yarn needle and thread through those live stitches (C) 4) Pull off the next two double pointed needles and pull your yarn needle and thread through those live stitches until all stitches are threaded on your working yarn tail (D) 5) Pull your working yarn tightly to create a small hole in the top of your hat (E) and tuck the working yarn inside. If you are NOT adding a pompom, you can weave it in, but if you ARE adding a pompom, leave it free to tie your pom to the top.
The Skinny
You can sell any product made from this pattern. However, you may not alter or distribute this pattern in any way! Have any questions? Feel free to e-mail me at Moonofsilver@ gmail.com or chat with me on twitter @moonofsilver if you wish. Thank you so much for downloading this pattern, and I hope you love the item you create from it, and that it furthers your fiber art journey. Namaste!
Okitty-ears.com


