Purl Beret
December 14,2006 purl bee
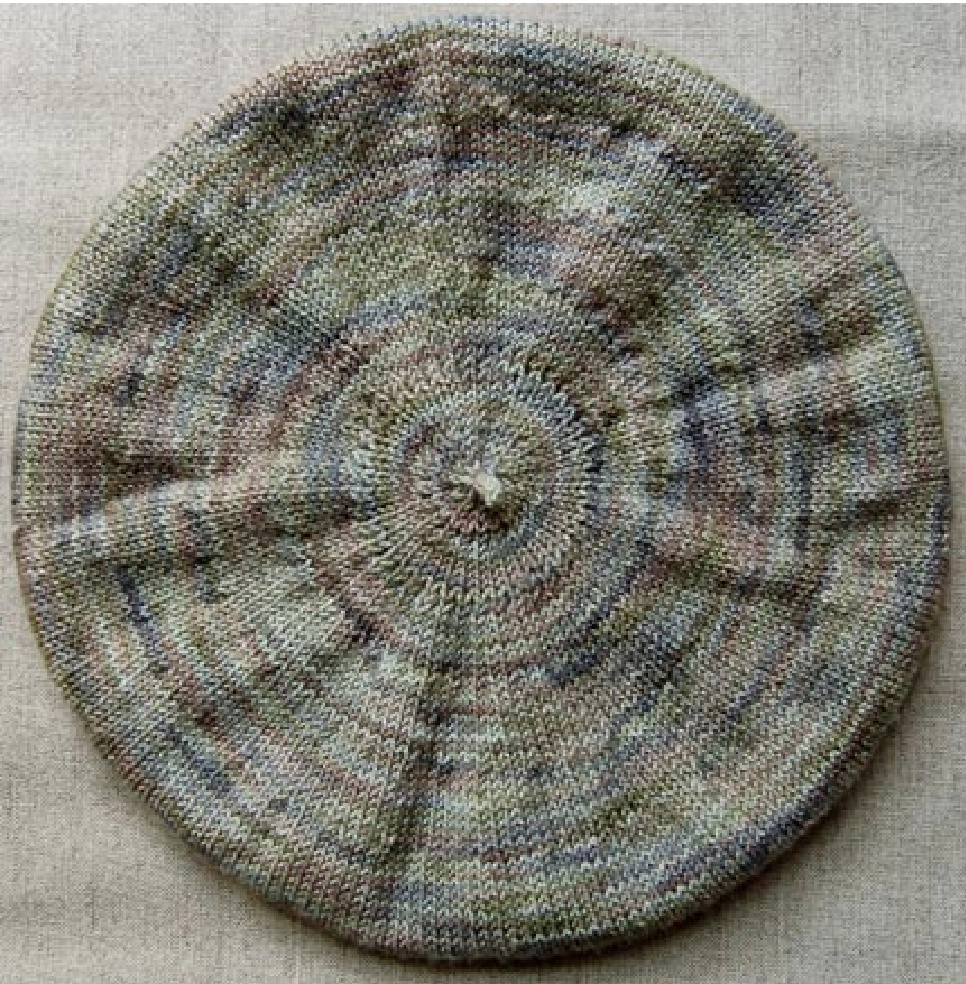
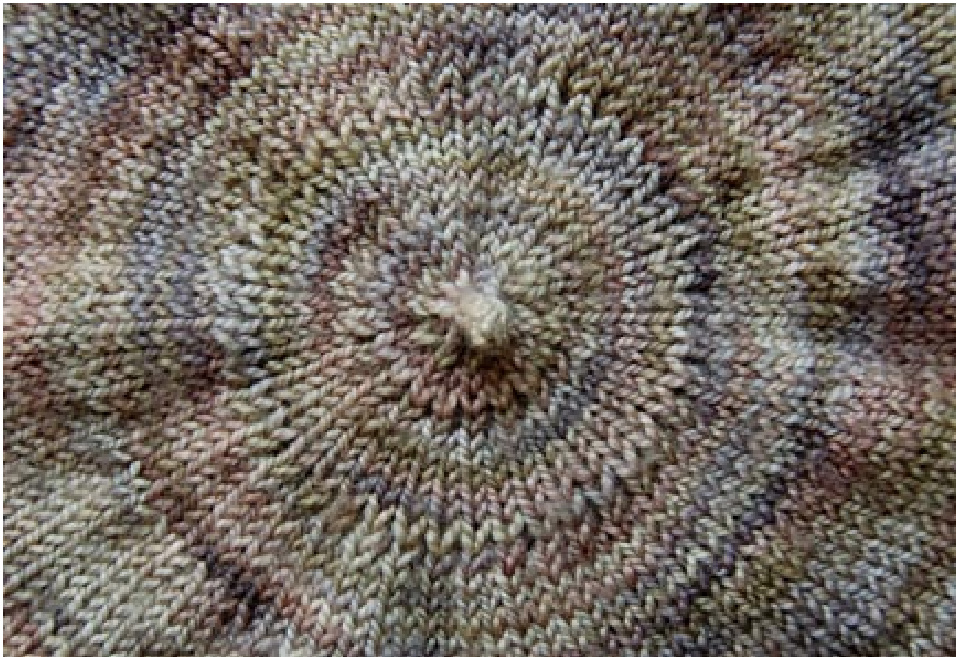
Koigu's handpainted yarn was a great choice for this project because it highlights the concentric circles of decreases that shape the beret. This pattern can be loose and floppy or petite and tidy. My Koigu beret turned out slightly bigger than I expected in the crown, but I like it (I've included notes to adjust the pattern to your taste below). I hope you enjoy this fast and easy pattern as much as I have. I'm working on a second beret right now! -- Isabelle
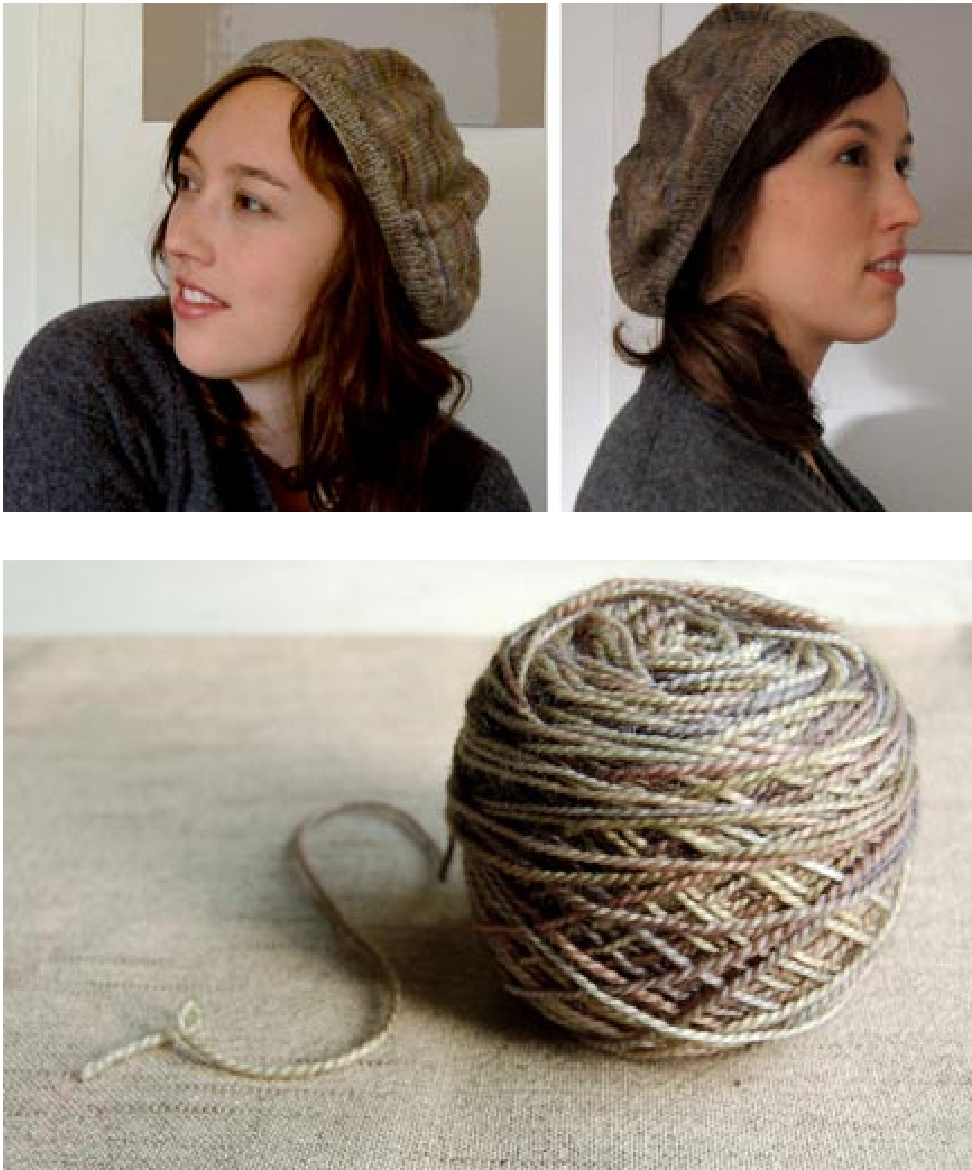
1 skein Koigu Painter's Palette Or another fingering weight yarn I used less than one skein of Koigu for my adult-size beret, or approximately 150 yards. \*\*Please note, if your gauge is any tighter than 7 stitches per inch you will need more than one skein! If you are unsure about your knitting, or think you want a slightly floppier beret, please make sure you have 2 skeins to Work with.
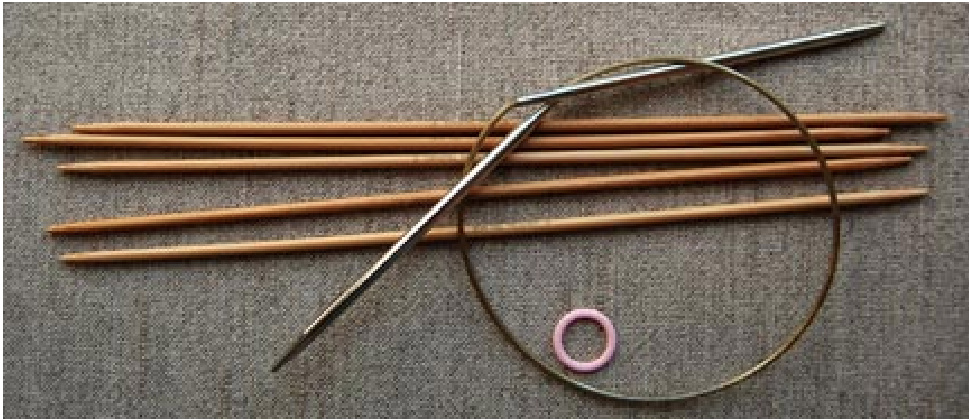
16-inch circular needles, US size 3 (I use Addi Turbos) 1 set of double-pointed needles, US size 3 or correct size for gauge (I use Crystal Palace bamboo dpn) stitch marker This pattern is sized for a medium adult head, or about 20 inches. The ribbed brim is stretchy, though, so it will fit 20 - 22 inch noggins with no problem. gauge: 7 stitches per inch Cast on 128 stitches, using circular needles. BRIM Join into a round; work Kl, Pl Rib stitch for one row. K1,P1 Rib Stitch: \*kl,pl,kl,pl,repeat from \* to end of row. When you reach the end of the row, place stitch marker. Look at the row you've just knit to make sure the stitches are not twisted around the circular needle. Continue K1,P1 Rib stitch for 7 more rows, or until the brim measures 1 inc h.
BODY
Increase Row: \*K2, ml,repeat from \* to end of row. 192 stitches. What is m1, or Make One? Knit until body measures 3 inches from the brim, about 27 rows, or 4 inches from beginning of hat. For a floppier beret knit until body measures 4 1/2 or 5 inches. CROWN As you begin to decrease stitches, the beret will no longer fit on the circular needles. Transfer stitches onto four double-pointed needles at this point. fway around (about 95 stitches, but you needn't count) k2 tog, k to end. 190 stitches. Decrease Row 1: \*K3,k2tog, repeat from \* to end of row. 38 stitches decreased. Knit 7 rows, 0r 1 inch. Decrease Row 2: \*K2,k2tog, repeat from \* to end of row. 38 stitches decreased. Knit 7 rows, 0r 1 inch. Decrease Row 3: \*K1,k2tog, repeat from \* to end of row. 38 stitches decreased. Knit 5 rows. Decrease Row 4: \*K2tog,repeat from \* to end of row. 38 stitches remaining. Knit 5 rows. Decrease Row 5: \*K2tog,repeat from \* to end of row. 19 stitches remaining. Repeat Row 5. 9 stitches remaining.
I-CORD STEM
Stem Row 1: \*K2tog, k1, repeat from \* to end of row. 6 stitches remaining. Transfer stitches to one double-pointed needle. Knit I-cord for three rows or desired length. What is an I-cord? Bind off; cut a tail long enough to weave in easily, about 8 inches. Try it on! Article originally appeared on Knitting Crochet Sewing Embroidery Crafts Patterns and Ideas! (http://www.purlbee.com/). See website for complete article licensing information.


