Blue Canary Creations
Robot Mittens
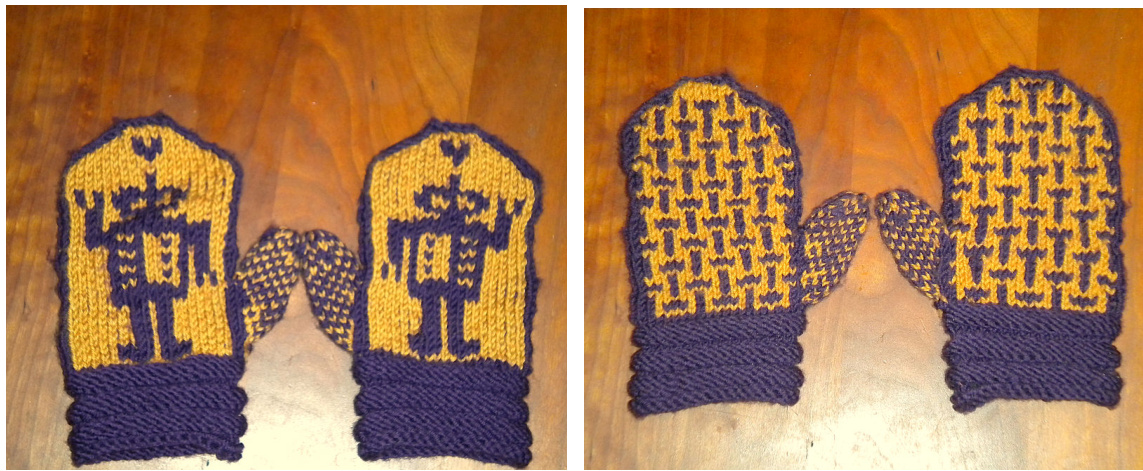
These robots fullof love for your little one. My son requested purple robots with hearts “so the girls will like them.' Any questions? Contact Jen Small: jenrsmall@yahoo.com, or bluecanarygirl on Ravelry. These mittens are knit in the round, with a thumb gusset on the side. After the cuff,the mittens are done in stranded (fair isle) work. I like to weave in the carried yarn every 3 stitches or so (I don't leave floats longer than 2 stitches on the back), especially because mittens get a lot of tugging on and off. SIZING To fit a 4 to 6 year old. Hand circurmference: 6 inches
MATERIALS
Main Color: Filatura di Crosa Zara purple Contrast Color: Filatura di Crosa Zara Chine gold NOTE: You canmake these withany K weght yarnfora soft mitten.Fora stiffer mitten, us worsted weht yarn at the same gauge.
TOOLS
●1 set dpns size 3 (US), or size needed to get gauge or size needed to get gauge ·1 stitch marker ? Stitch holders or scrap yarn Tapestryneedle
GAUGE
7 stitches/inch in fair isle
CUFF
Cast on 34 sts in CC, join in the round Knit 1 round plain [Knit 4 rounds, purl 4 rounds] Repeat [-] 2 more times for a total of 3 purl rings Knit 1 round plain, increasing 8 sts evenly around. 42 sts. Start mitten chart (below).
MITTEN
Follow chart, starting thumb on the side on the second round of the chart. I followed the general instructions in Mittens To Order: http://www.ravelry.com/patterns/ibrary/mittens-to-order. I did the gusset and the thumb in a 1x1 checkerboard pattern, as in that pattem. The increase pattern I did was, increase on every round for 4 rounds, then every other round till I had 15 sts. Try to keep a nice CC line on either side of the thumb gusset. Increase the gusset to 15 sts for the thumb, put it on a stitch holder, and finish the body of the mitten. At the top of the mitten, do one round of CC at the end, then do a 3 needle bindoff in CC, decreasing even in the CC row (you will end up with 5 cast off sts at the top of each mitten). If you wanted to make the mittens a little bit smaller, you could make them les pointy, and cast ofsooner, with a flater top.
THUMB
Put the 15 sts held for the thumb onto 3 needles, and pick up 1 stitch in the gap on the mitten side. Then join yarns and continue the 1x1 checkerboard paern in the round for about an inch. Do 3 decreases evenly spaced around. Knit another round in checkerboard without decreasing, then do one more set of 3 evenly spaced decreases. Break yarn and thread both strands on a tapestry needle. Run the needle through all the stitches, pull tight, and tie it off.
FINISHING
Weave in all ends, and make a second mitten, placing the thumb on the other side!
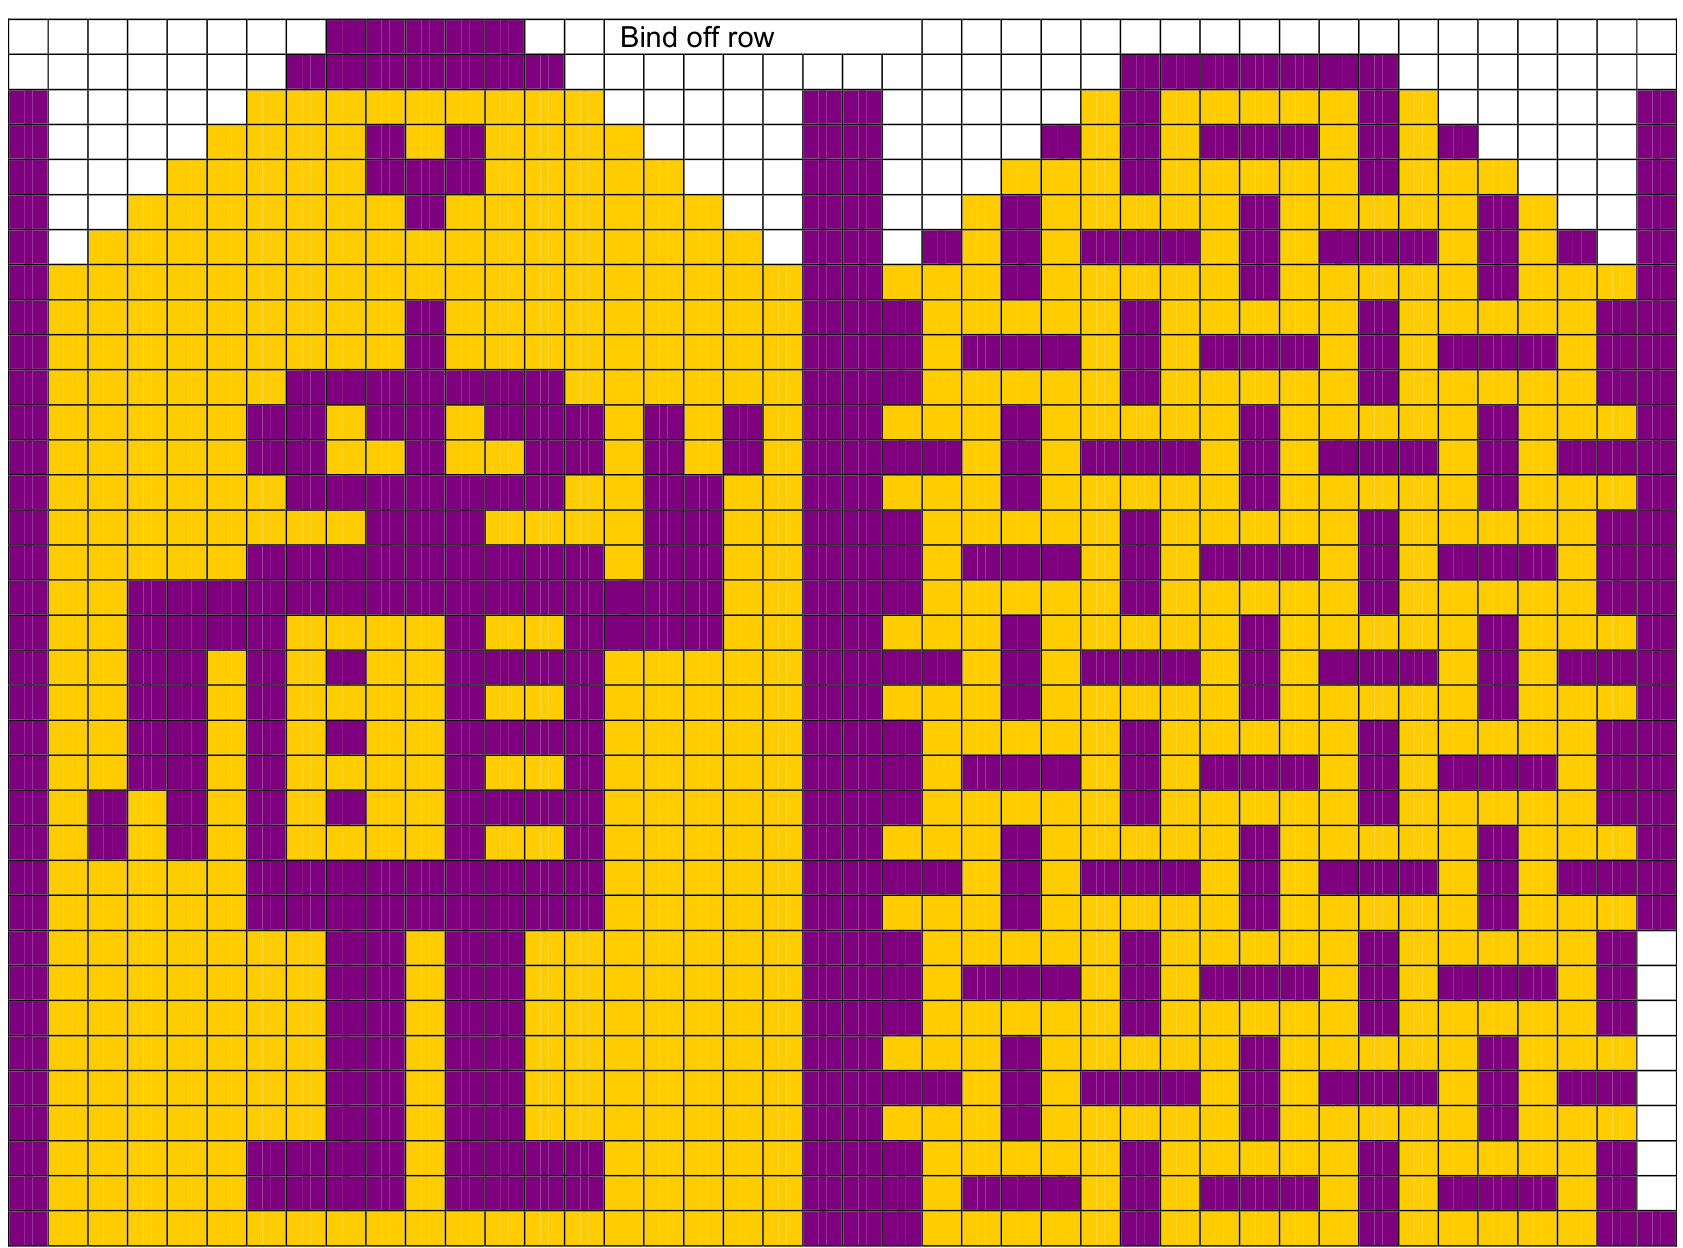
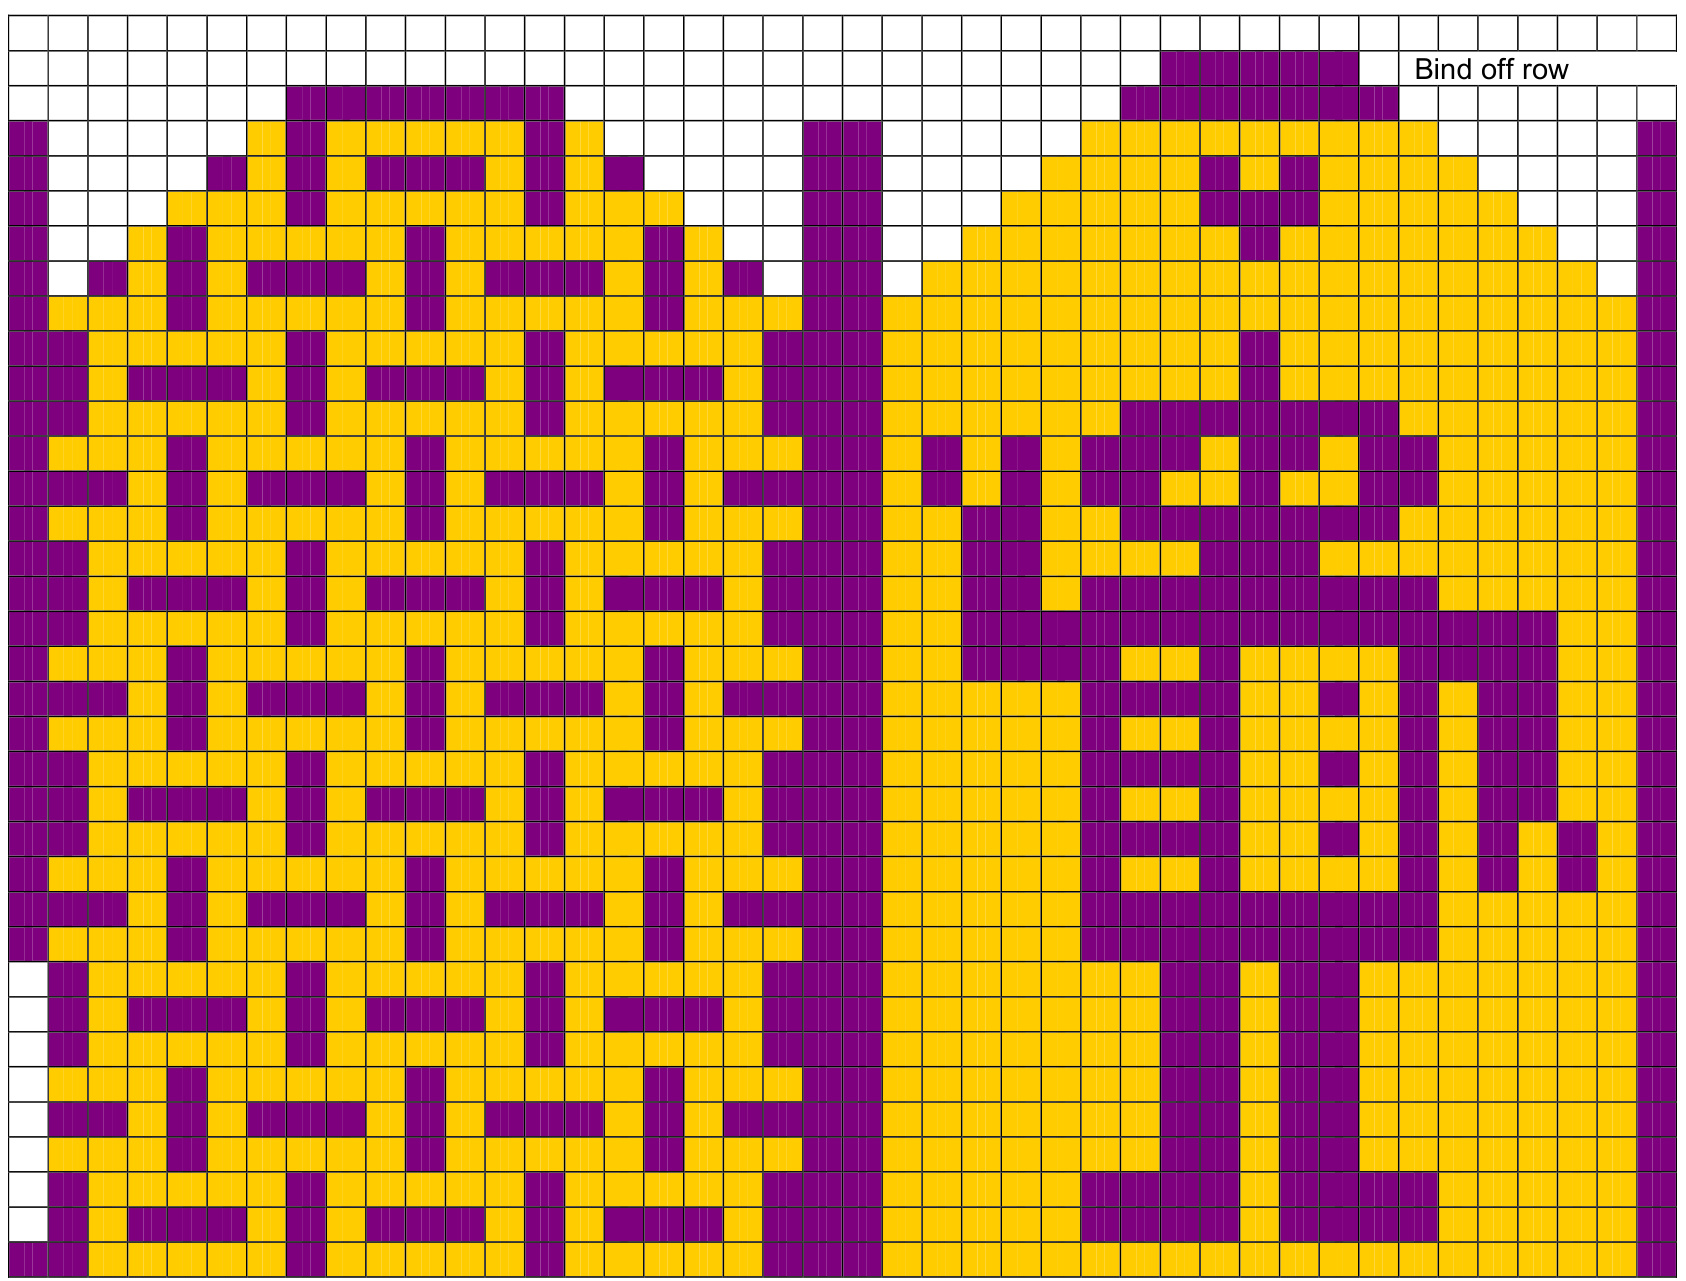
CHART
Here's a chart for each mitten. Where the side stitches are missing, that is where the thumb goes.