Amigurumi Flute Patternfor fine & worsted weight yarns By Jana Rogers
JanaRogers 2011 Please do not reproduce this pattern with out the author's consent.
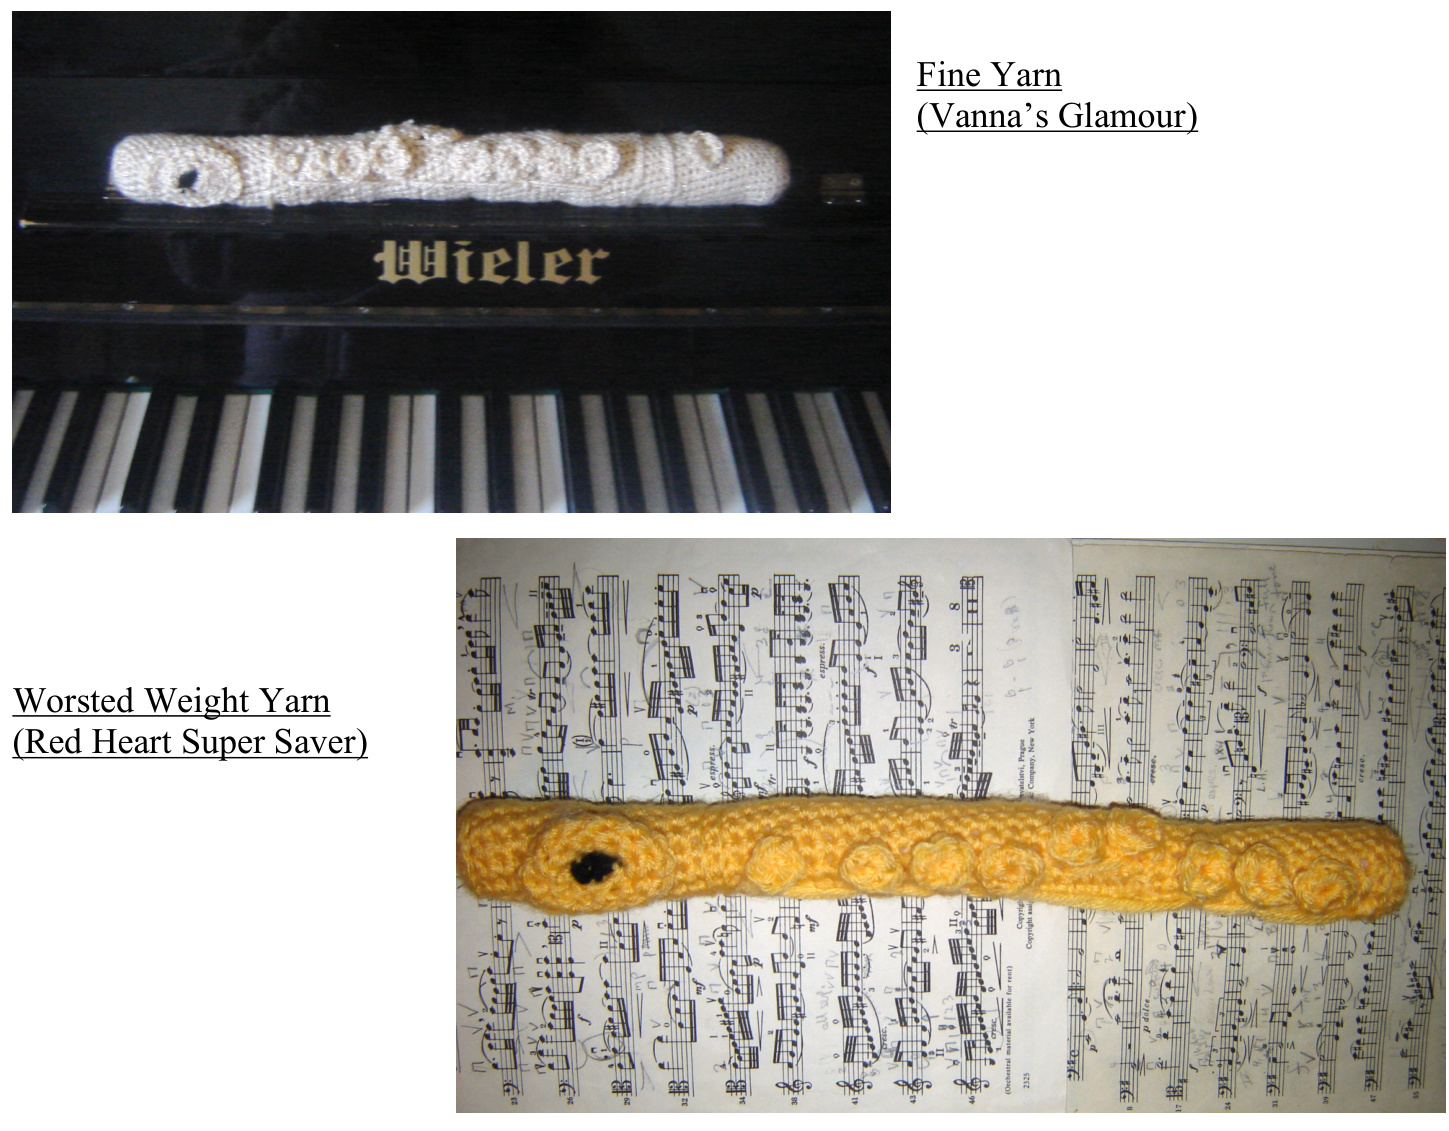
Amigurumi Flute Pattern for Fine Weight Yarn
(Pattern written for worsted weight yarn is below) Materials Vanna’s Glamour yarn, topaz color (Lion Brand) Scrap of black yarn Fiberfill Yarn Needle Size D Crochet hook Stitch Marker Wood dowel- optional Body of the Flute Chain 2. Round 1: 12 sc in 2"d ch from hook. <Or magic ring 12> Working in continuous spirals: Round 2. - 2 SC in each SC around. 24sc. Round 3- in back loops only SC around. 24 sc. \*You may want to insert a wood dowel so that your flute has rigidity and stuff around. Stuff as you go.\* Rounds 4 to about round 103 or until flute measures about 14 inches in length- SC around in BOTH loops. 24 sc. . Round 104- SC around in backloops only. 24sc. Round 105 - Dec around. 12 stitches. Round 106- Dec. around. 6 stitches. Round 107- Dec around . 3 stitches. Sew together and finish off. Keys-Main keys- make 10 Ch 2. Round 1- 6 sc in 2nd ch from hook. <Or magic circle 6> Round 2- 2sc in each sc. 12 sc. sl st to first sc and finish off with tail for sewing Small key- make 2 Ch 2 Round 1- 6 sc in 2"d ch from hook <Or magic circle 6> sl st to first sc and finish off with tail for sewing Lip Plate- Make 1 With black yarn Ch 2 Round 1- 6 sc in 2"d ch from hook <or magic circle 6> Changing to gold in last stitch Round 2- sc in 2 st. 2 HDC in next st. sc in next 2 st. 2 HDC in next St. 8 st. total. Round 3- sc in 3 st. 2HDC in next st. sc. In 3st. 2HDC in next st. 10 st. total. Round 4- sc in 3 st. 2 HDC in next 2st. sc in 3 st. 2HDC in next 2 st. 14 st. total. Round 5-sc in 2st, 2 HDC in next 2 st. sc in 5 st. 2 HDC in next 3 st. 2 sc. 18 st. total. Round 6- sc in 4 st. 2 sc in next 3 st. sc in 5st. 2 sc in next 3. Sc in 3 st. 24 st. total. Sl st in next st and finish off with long tail. Embroider on 1 straight line around about 3 inches from end. Then another straight line about 1/2 inch away. Embroider 1 straight linke around about 10 inches from end. Then another straight line about 1/2 inch away. Sew on lip plate around the 2"d round to the first portion of the flute. Sew on the two small keys to the middle section of the flute, sewing only the middle of the keys on to the body. Sew on rest of keys according to chart below- sewing on the center of the key only. Then embroider on a straight line connecting the larger row of keys, Lastly embroider on a straight line connecting the two forward keys Head joint body joint foot joint Lip Plate two small keys larger keys

Amigurumi Flute Pattern for Worsted Weight Yarn
Materials Red Heart Super Saver - Yellow Fiberfill Yarn Needle Size F Crochet hook Stitch Marker Wood dowel - optional Scrap of black yarn Body of the Flute Chain 2. Round 1: 6sc in 2nd ch from hook. <Or magic ring 6> Working in continuous spirals: Round 2. - 2 SC in each SC around. 12sc. Round 3- in back loops only SC around. 12 sc. Rounds 4 to 23 SC around in BOTH loops. 12 sc.. \*You may want to insert a wood dowel to give your flute rigidity and stuff around\* Round 24- SC around in backloops only. 12 sc. Round 25- SC around in both loops. 12 sc. Round 26- SC around in backloops only. 12 sc. <stuff this portion with fiberfill> Round 27- SC around in BOTH loops. 12 sc. Round 28 to Round 50 - SC around, 12 sc. <stuffing with fiberfill as you go> Round 51- SC around in backloops only. 12 sc. Round 52- SC around in backloops only. 12 sc. Rounds 53 to 66- SC around- 12sc<stuffing with fiberfill as you go> Round 67- SC around in backloops only. 12sc. Round 68- Dec around. 6 stitches. Round 69- Dec. around. 3 stitches. Sew together and finish off. Keys Main keys- make 9 Ch 2. Round 1- 6 sc in 2nd ch from hook. <Or magic circle 6> sl st to first sc and finish off with tail for sewing small key- make 2 Ch 2 Round 1- 4 sc in 2nd ch from hook <Or magic circle 4> sl st to first sc and finish off with tail for sewing Lip Plate- Make 1 Round 3- 2sc in 1"t st. sc in each of next 2 st. 2 sc in next st. sc in each of next two st. 8 sc total. Round 4- 2 sc in each of next 2 st. 1 st in each of next 2 st. 2 sc in each of next 2 st. 1 st. in each of next 2 st. 12 sc. total. Round 5-1 sc in next st. 2 sc in next sc. Sc in next 4 st. 2 sc in next st. Sc in next 5 st. 14 Sttotal. Sl st in next st and finish off with long tail. Sew on lip plate around the 2"d round to the first portion of the flute. Sew on the two small keys to the middle section of the flute, sewing only the middle of the keys on to the body. Sew on rest of keys according to chart below- sewing on the center of the key only. Then embroider on a straight line connecting the larger row of keys, Lastly embroider on a straight line connecting the two forward keys


