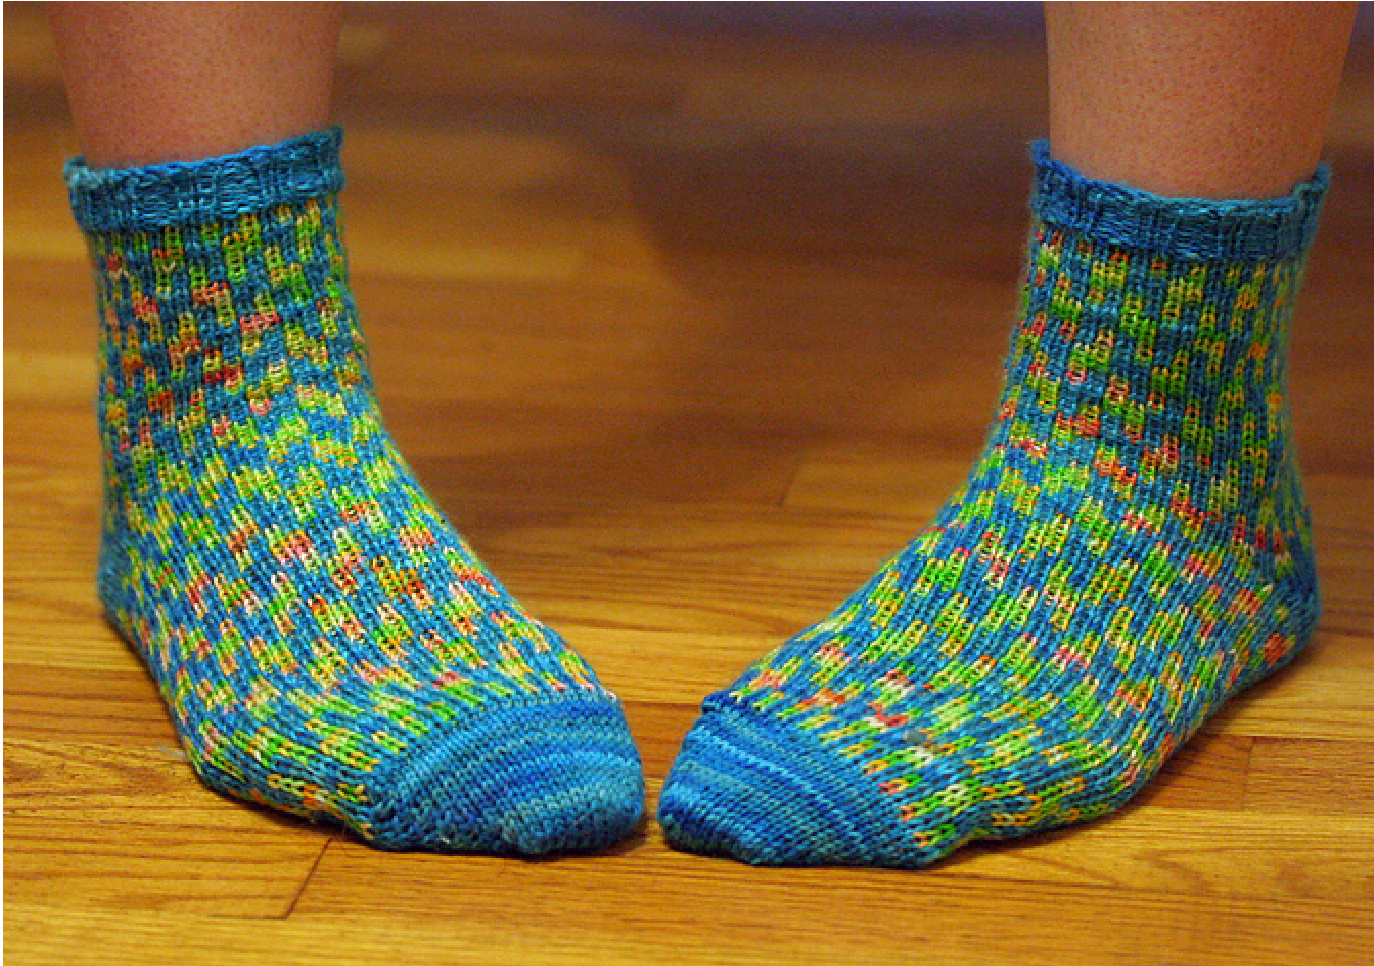
Celebration Socks
Read the entire pattern carefully before beginning!
Materials:
Fine gauge (5/16" from center of one peg to center of the next) sock knitting loom or adjustable knitting loom Children's/small women's socks: 50g of solid or semisolid fingering weight yarn, 50g of contrasting fingering weight yarn (multicolor works great, but is not mandatory). Men's/large women's socks: 100g of solid or semisolid fingering weight yarn, 100g of contrasting fingering weight yarn (multicolor works great, but is not mandatory). You will not actually use all 200g unless you make VERY large socks, but you will need more than 50g of each yarn. Loom knitting hook Fabric measuring tape Tapestry Needle Two size 1 Double-Pointed Needles (DPNs) Two or more stitch markers (anything you can use to mark specific pegs is fine) Gauge: 14 stitches and 18 rows = 2 inches in fair isle pattern. Size: To calculate the number of pegs you will need, use the following steps: 1. With your foot flat on the floor, measure around the ball of your foot with a fabric measuring tape. 2. Multiply the measurement (in inches) by 7 (if you are knitting on a larger/smaller gauge loom, replace 7 with the number of stitches per inch you knit on your loom). 3.Multiply the resulting number by .85. 4. Round to nearest multiple of 4 (pattern is repeated over 4 stitches).
Pattern abbreviations and techniques:
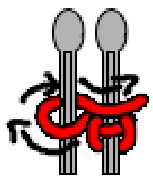
K - Knit. Use either the knit stitch, the u stitch, or the flat stitch here, whichever works best for you (all three give the same end stitch, in different levels of snugness). DO NOT use the e-wrap stitch. P-Prl W&T - Wrap & Turn. Bring the yarn in front of the peg, wrap it around to the back, bring it back through between the wrapped peg and the previously knitted peg, and resume knitting back in the direction you just came from. (See image) Leave wrap on peg. When you reach a previously wrapped peg that needs a knit stitch, knit all loops as one. MC - Main Color (the yarn you are using for the solid cuff, heel, and toe sections) CC - Contrasting Color (the yarn you are using as the second color in the fair isle sections)
sl or slip stitch - Bring the working yarn behind the peg(s) being slipped, then back in front of the next stitch being knit with that color. DO NOT pull the yarn tightly when doing so - you want the float (the strand running behind the slipped pegs) to rest against the back of the slipped pegs, but not be stretched tight across them.
Fair Isle on a knitting loom
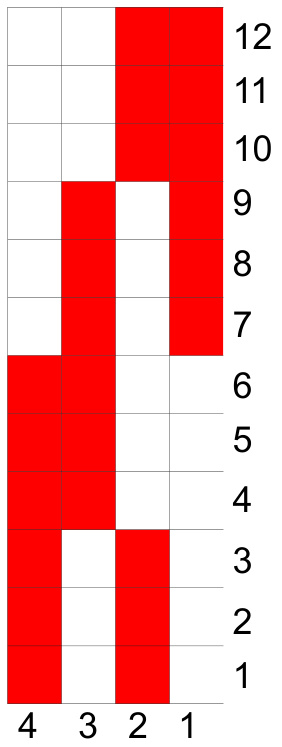
For each fair isle row, pick up your MC strand and knit all MC stitches in that row while slipping all CC stitches. Drop the MC strand, pick up the CC strand, and work your way around again, knitting all CC pegs for that row and slipping all MC pegs. Do not increase your row count until you have knit BOTH colors for a row, and always knit the MC stitches for a row before the CC stitches. If you need to cross your working yarn over the color not in use (the “resting yarn"), move the resting yarn towards the inside of the loom, so the working yarn crosses between the resting yarn and the peg. Alternately, you can stop just short of crossing colors and switch to the color in “front", but be sure you're not advancing to the next row before peg 1 if you choose this route. Fair Isle chart - Chart is worked from bottom to top, right to left. White squares are knit in MC, red squares areknit in CC.
Written fair isle instructions:
Rows 1-3: [K1, sl1] in MC, repeat to end of row. [sl1, K1] in CC, repeat to end of row. Rows 4-6: [K2, sl2] in MC, repeat to end of row. [sl2, K2] in CC, repeat to end of row. Rows 7-9: [sl1, K1] in MC, repeat to end of row. [K1, sl1] in CC, repeat to endofrow. Rows 10-12: [sl2, K2] in MC, repeat to end of row. [K2, sl2] in CC, repeat to endofrow. Remember, do not increase your row count until you have knit both MC and Cc for that row!
Pattern Directions
Place stitch markers on your first peg and the peg on the first-half side of the halfway mark (for my 48-peg sock, the markers went on peg 1 and peg 24). Additional markers to help track the fair isle pattern are helpful, but not mandatory. Cast on a multiple of 4 stitches with MC. Cuff: K2, P2, until cuff measures 1" (approximately 10 rows). K onerow Leg: Begin working the fair isle chart or written instructions, alternating MC and CC for each row. Repeat rows 1-12 until leg measures 4' or desired length. End leg with row 12. (Note: chart is worked from right to left regardless of knitting direction. If you are knitting left to right, your peg 2 is still peg 2 on the chart, even though it's in the opposite direction, and so on.) Heel: This will be worked over half your pegs, using MC only. Decrease rows - K all pegs up to the center peg you placed your stitch marker on. Lift the stitch off of that peg, W&T, and replace the stitch above the wrapped loop. K back in the opposite direction up to peg 1 Lift the stitch off peg 1, W&T, and knit back again. Continue the W&T, back-and-forth process, wrapping the last unwrapped peg in the row each time, until 2/3 of your heel pegs are wrapped (if your heel peg count doesn't divide perfectly by 3, round to the nearest whole number to figure out how many wrapped pegs you need on either side - 25 heel pegs would have 8 wrapped on either side and 9 unwrapped in the middle, and so on). Your final W&T will be in the Peg 1 section of wraps. Increase rows - Once you've got all your decrease wraps done, K to the first wrap in the wrapped section that includes your center peg. K all loops of that peg as one, W&T the next peg (no lifting required this time), and K your way back in the other direction. Continue working back and forth, knitting off one wrapped peg at the end of each row, until all heel pegs have one loop (when you knit off the loops on your marked center peg and on peg 1, lift off the next peg and W&T, to avoid holes at the corners of your heels). Foot: Resume working the pattern repeat as written in the leg instructions. Continue repeating_ rows 1-12 until the sock measurement from the back of the heel to your current row is approximately 1 1/2-2" less than the length of your foot (tip of big toe to back of heel). Cut CC, leaving a 6-inch tail. K one row in MC. Toe: Repeat the heel instructions with MC. After completing decrease & increase rows, K 1 full row, then transfer all stitches to your two DPNs. All stitches from peg 1 through your marked center peg go on the first needle, and all stitches from the unmarked center peg through the last peg go on the second needle. Cut your yarn, leaving an 18-24" tail to graft the toe. tapestry needle, use the Kitchener stitch to close the toe. Weave in all yarn ends


