Rainbow Brite Fingerless Mittens
by Ellen Botilda This is a design based on the sleeves on Rainbow Brite's dress, but with an adult woman and practicality in mind. I made mine to give to my sister (27 years old this year!), but like them so much I want to make my self a pair as well, and thought maybe others would too. It's my second design, and I hope you willike it! I'm going to assume you are not new to knitting and can place needles, knit in the round in the way you prefer, increase and decrease without further instructions. With that said, here is how I madethem!
You will need:
Needle: 3.5mm ( I do magic loop and use Prym circular ) DK yarn 120 m/50 gram: You will need approximately: Blue 35 grams Green 14 grams Purple 11 grams Red 9 grams Yellow 9 grams Or so my scale told me when weighing the skeins after I was done knitting. But keep in mind that I did not weigh the skeins before knitting and that the weight can vary between different yarns. Darning needle, to tie in the ends, and if you want to do some duplicate stitching.
How it's made:
Cast on 54 stitches with the Green yarn. You will be knitting cuff down and turn the cuff inside out before knitting the hand part, so keep in mind that what first is your outside, will be the inside on your finished mitten. (Might make a difference in how you place your yarn changes and loose ends.) Join in the round and knit 10 rounds. Then purl 6 rounds (The pattern is actually knit 7 rounds and purl 7 rounds from here on out, on the cuff, but the 7th purl round is done in the next colour), change colour to the Blue yarn, and purl one round. Now you will knit 7 rounds, but on the first knit round with a new colour you will be decreasing 4 stitches evenly spread. Purl 7 ( change to Purple on the 7th round) Knit 7 and decrease 4 on the first round. Purl 7 ( change to red on the 7th round) Knit 7 and decrease 4 on the first round Purl 7 ( change to yellow on the 7the round) Knit 7 but ONLY DECREASE 2 on the first round! Purl 7 ( change back to Blue on the 7the round) There should be 40 stitches on your needles. Now turn the cuff inside out. Slip the first stitch and continue to knit 4 rounds.
Thumb gusset:
sset is not the most common one, but it is a very nice fit and worth the effort. Knit 15 stitches, then pick up a new stitch, or knit in front and back loop of the next stitch increasing one. Knit to the end of the round. Knit 14 stitches .The next 3 stitches are the base for your thumb gusset. The first 14 and the last 4 stitches ( of the first 20, that's how I place them) are never involved in the gusset. You might want to place markers. Increase one stitch on each side of the 3 gusset stitches = 5 gusset stitches. Knit to the end of round. You will now increase on the far ends of the gusset, every other round until the gusset is 9 stitcheswide. So knit 1 round and then increase again and keep going like this until you have the 9 stitch gusset. Now starts the second part of the thumb gusset increase. It will be more or less the same ( increase every other round) but the increase will be made on each side of the center stitch of the gusset! Do this until the gusset is 15 stitches all together. Knit 2 rounds and then put the thumb gusset stitches on a spare needle or thread to be picked up and knit when the mitten is done. Cast on 4 new stitches instead of the gusset. On the next round knit 13 stitches and then knit the 14th together with the first of the new cast on stitches. Knit 2 and then knit the 4th cast on stitch with the first of the next stitches. Knit to end of round. You will now have 40 stitches again. Knit another 12 rounds and then cast of. Isn't it pretty already?
The thumb:
Pick up the 15 stitches of the gusset and another 8 from where you made new ones. Knit 8 rounds, decreasing 2 stitches evenly on round 3 , 5 and 7. Bind of and look at your pretty mitten! Weaveinends.
Optional:
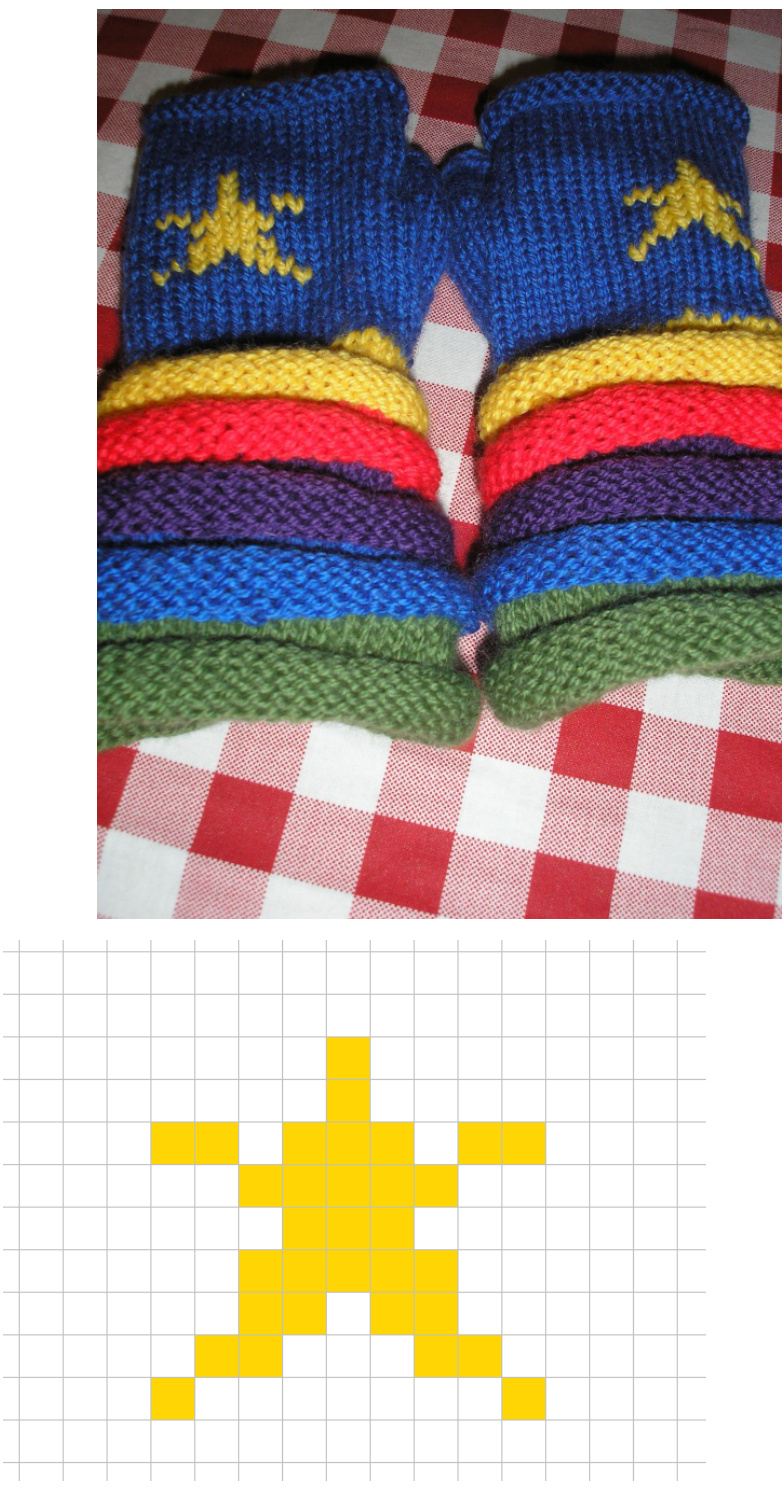
If you want the star on your mitten, put it on your hand and decide where the middle is. Count nine stitches up from the cuff and then four to the side. This is where I placed the lowest point of my star. Duplicate stitch or embroider, what ever you are comfortable with. Make mitten number 2 and ware them with pride! Let there be spring again! Made with love by Ellen Botilda