
Photos
Description
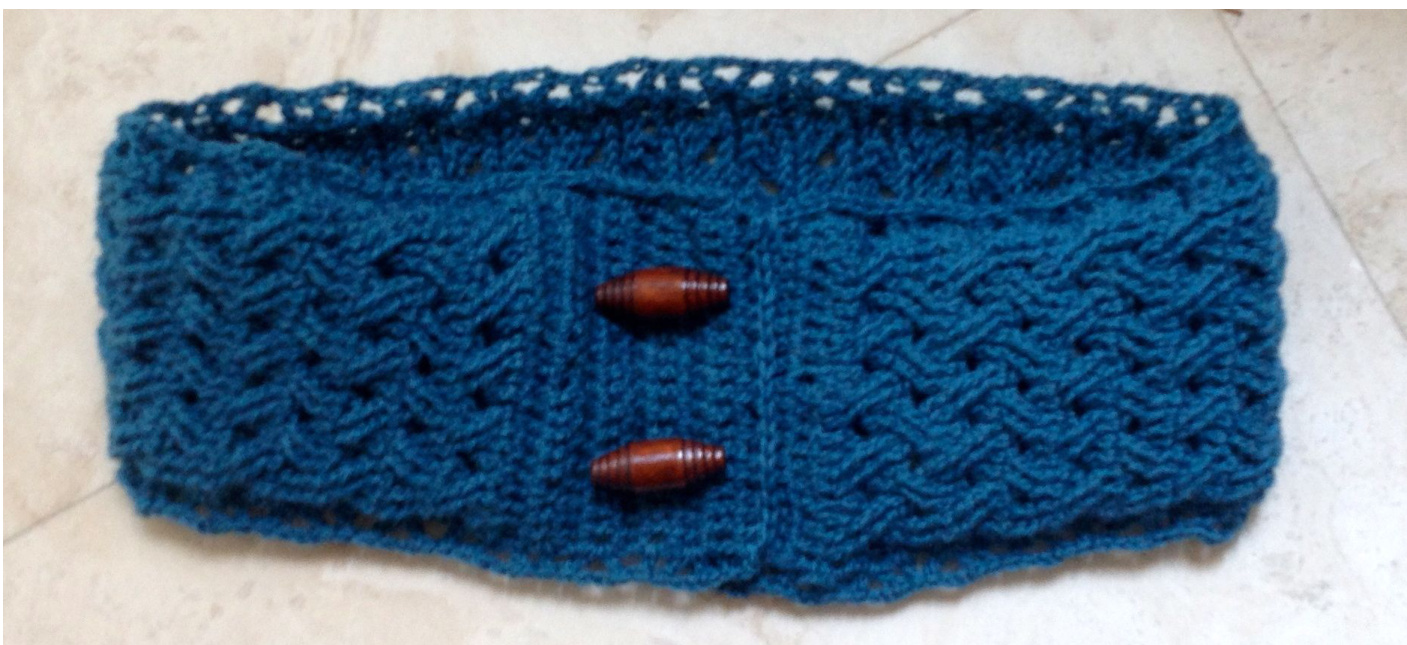
The classic crosshatched cable design of this warm cowl has a collegiate feel. Classic wood buttons add a touch of sophistication and old-world charm.
Materials
1 skein of Lion Brand Sock-Ease, color: Snow Cone (438 yards)
Supplies
2.75 mm Crochet Hook, Size C
Cowl Dimensions:
Cowl: 11 inches by 4 inches (22 inch circumference)
Abbreviations and Terminology Single Crochet (sc) (moves right to left)
Double Crochet (dc) Double Crochet Front Post-Stitch (FPS): Yarn over, insert hook around next stitch (insert from front to back, and then back to front), yarn over, and pull through, yarn over, pull the first loop under the second, and discard 1 loop, yarn over, pull the first loop under the second and third and discard 2 loops, yarn over, pull the first loop under the second and third and discard 2 loops Double Crochet Back Post-Stitch (BPS): Yarn over, insert hook around next stitch (insert from back to front, and then front to back), yarn over, and pull through, yarn over, pull the first loop under the second, and discard 1 loop, yarn over, pull the first loop under the second and third and discard 2 loops, yarn over, pull the first loop under the second and third and discard 2 loops Triple Crochet Front Post-Stitch (TFPS): Yarn over twice, insert hook around stitch (insert from front to back, and then back to front), yarn over, and pull through, yarn over, pull the first loop under the second, and discard 1 loop, yarn over, pull the first loop under the second and third and discard 2 loops, yarn over, pull the first loop under the second and third and discard 2 loops, yarn over, pull the first loop under the second and third and discard 2 loops. Triple Crochet Back Post-Stitch (TBPS): Yarn over twice, insert hook around stitch (insert from back to front, and then front to back), yarn over, and pull through, yarn over, pull the first loop under the second, and discard 1 loop, yarn over, pull the first loop under the second and third and discard 2 loops, yarn over, pull the first loop under the second and third and discard 2 loops, yarn over, pull the first loop under the second and third and discard 2 loops. Braid Stitch 1 (BS1): Skip three post stitches, TFPS in the next three post stitches, triple crochet front post-stitch (TFPS) in the skipped post stitches (make sure to work the skipped TFPS, in front ofthe previous three TFPS stitches) Braid Stitch 2 (BS2): Skip three post stitches, TFPS in the next three post stitches, triple crochet front post-stitch (TFPS) in the skipped post stitches (make sure to work the skipped TFPS, in behind of the previous three TFPS stitches)
Cowl Pattern:
Cowl Diagram:
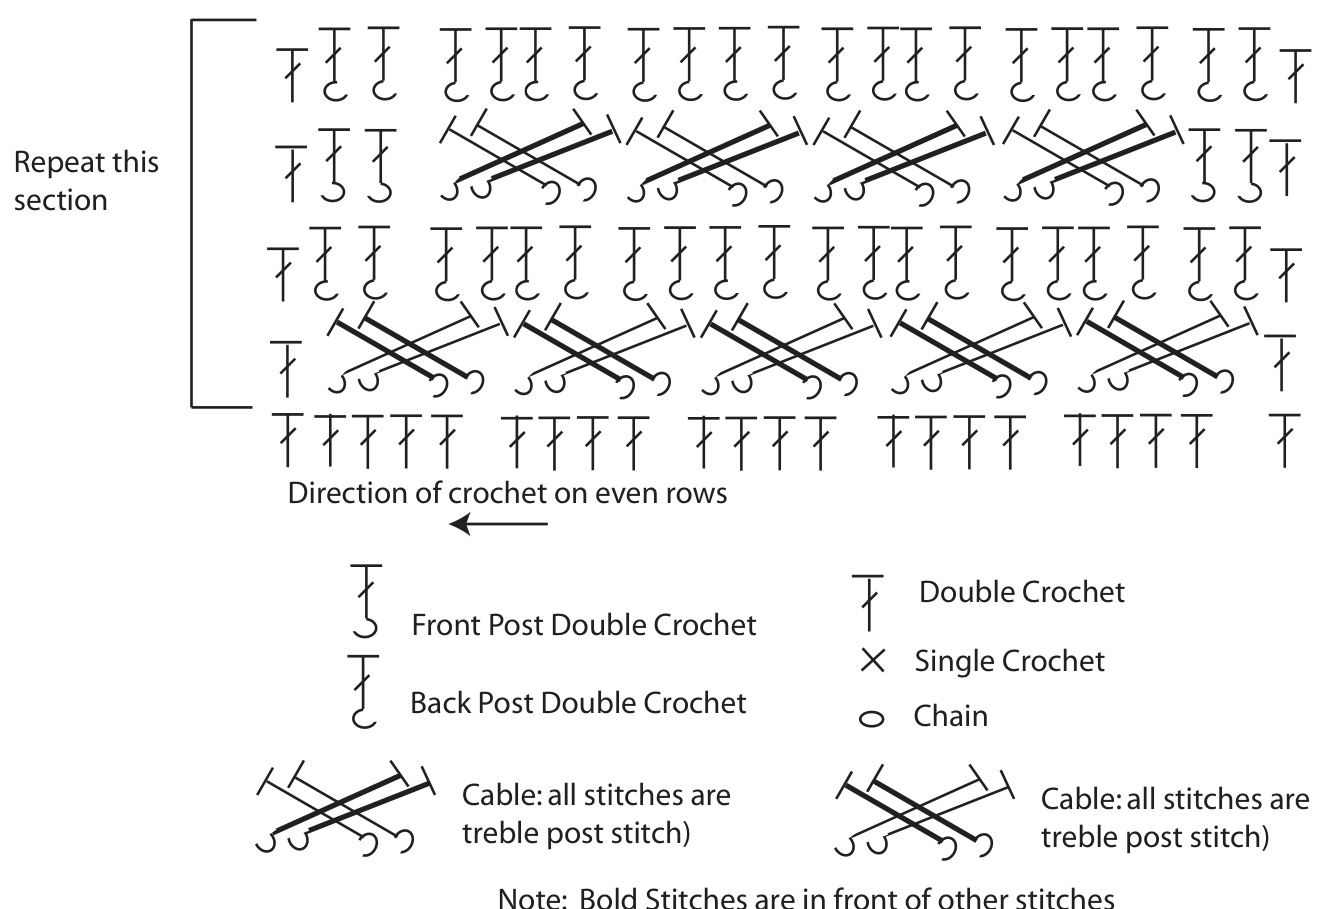
Diagram Instructions:
Repeat row 1 nine times. Then perform row 2-5 18 times or until the cowl is the desired length. End the cowl by repeating row 1 six times. Join the edges of the cowl with a sewed seam. Join the ends of the rectangular shape to form a loop. Overlap the ends of the rectangle and sew through the two layers of fabric at the edge on the right side. Sew together: Cut about 8 inches of the yarn, thread the tapestry needle and sew the ends of the rectangle together, tie off and weave in the yarn ends.
Cowl Written Instructions:
A couple of things to keep in mind: Post-stitches will always be continued from row to row, a post-stitch is never dropped from the design. The number of post-stitch should always be the same from row to row, whether they are within a cable or standing alone. Try to be careful to distinguish between the BS1 and BS2 stitch, it can be confusing to keep track, so make use of the diagrams, which clearly show the direction of the cables. Also don't worry too much, I have made at least couple mistakes in every scarf I have ever made, and almost no one notices them. Row 0: Chain 25 (including starting loop), dc in the forth chain from hook, and dc across (22 dc, 1 chain) Row 1-9: Chain 3, dc evenly across, turn. Note: this section is the plain (no cables) section where the buttons will be sewn on. Row 10: Chain 3, dc, BS1 five times, dc, turn. Row 11: Chain 3, dc, BPS twenty times, dc turn. Row 12: Chain 3, dc, FPS, FPS, BS2 four times, FPS, FPS, dc, turn. Row 13: Repeat row 11. Rows 14 - Row 86: Repeat rows 10-13 18 times or until the cowl is the desired length. Row 87 - Row 93: Chain 3, dc evenly across, turn. Note: this section is the plain (no cables) section where the buttons will be sewn on. Join the ends of the rectangular shape to form a loop. Overlap the ends of the rectangle and sew through the two layers of fabric at the edge on the right side. Sew together: Cut about 8 inches of the yarn, thread the tapestry needle and sew the ends of the rectangle together, tie off and weave in the yarn ends. Cowl Lace Edging: Add the crochet lace edging to both sides of the cowl (the top and bottom) Round 1: Join yarn near the joining of rectangle ends, chain 3. Proceed along the edge of the previous work, crocheting the following pattern in the [] brackets repeatedly: [dc, skip 1 stitch gap, (dc, chain 3, dc.), dc]. The () stitches are all performed in one single gap between the stitches, forming a "V" shape. When you complete the round slip stitch with beginning sc.
Attach Buttons:
OAttach the buttons to the section of the cowl where there are no cable stitches. Toggle buttons are recommended. Joann's is a good store on the west coast of the US to find the buttons that match your cowl, as they have a great button selection. Alternatively, the internet always has a great selection. Attach the buttons to the surface of the cowl, they do not open or undo the cowl but are only sewn on the surface of the cowl for style.


