Arachnophobia
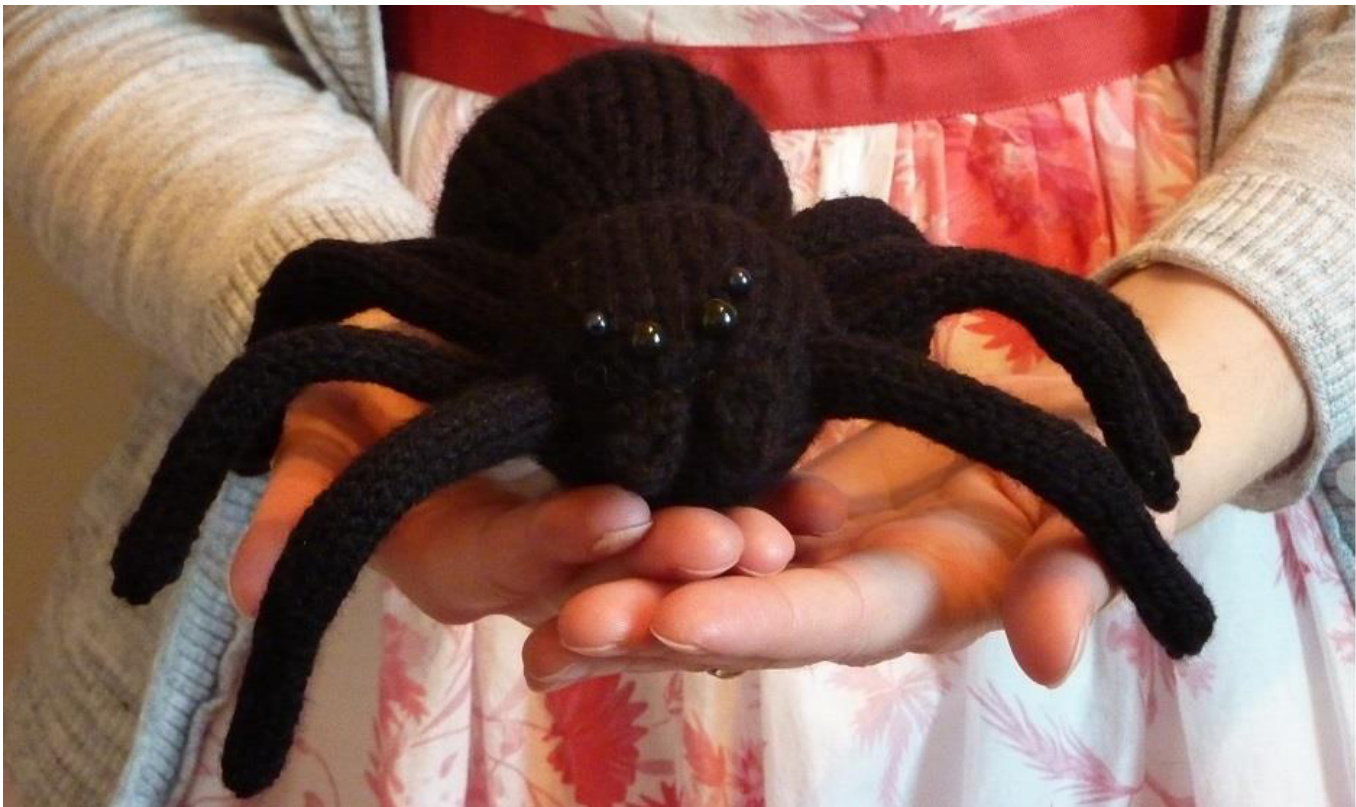
While the head and body of this arachnid is an easy knit, his eight legs are a bit more time consuming and fiddly. But you'd have to agree with me that he's worth the effort! @
Materials:
4.5mm double pointed needles - for the body and head 3.5mm needles - for the fangs 3.25mm double pointed needles - for the legs Chunky yarn - for the spider's head, body and fangs DK yarn - for the legs 4 beads - 2 larger ones and 2 smaller ones - for the spider's eyes Eight pipe-cleaners Tapestry needle for weaving in ends Stuffing Gauge: Doesn't really matter as long as the stitches aren't loose. You don't want the stuffing to showthrough.
Abbreviations:
Kfb - increase by knitting into the front and back of the stitch K2tog - decrease by knitting two stitches together as one stitch P2tog - decrease by purling two stitches together as one stitch Sts-stitches
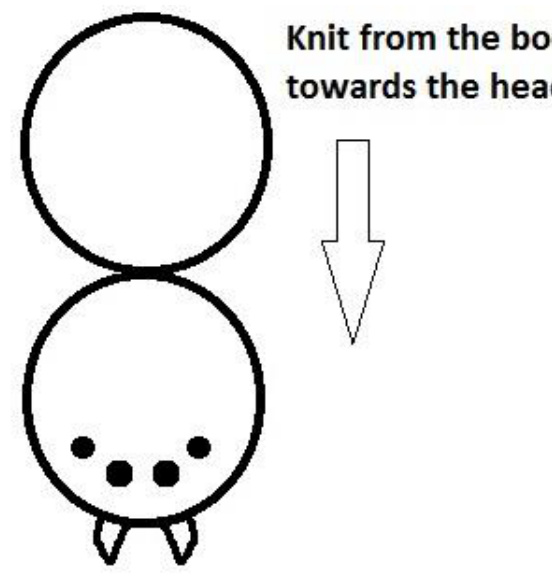
Head and Body Pattern Instructions: Chunky yarn, 4.5mm needles Cast on 6 stitches, join in the round. \*[Kfb] x6 (12sts) Knit 1 round [Kfb, k1] to end (18sts) Knit 1 round [Kfb, k2] to end (24sts) Knit 1 round \*[Kfb, k3] to end (30sts) Knit 1 round [Kfb, k4] to end (36sts) Knit 5 rounds [K2tog, k4] to end (30sts) Knit 2 rounds [K2tog, k3] to end (24sts) Knit 2 rounds. Ad the stuffing to the body and continue to knit and stuff as you go. [K2tog, k2] to end (18sts) Knit 2 rounds [K2tog, k1] to end (12sts) [K2tog] x6 (6sts) Knit 1 round Follow pattern from \* to \* (30sts) Knit 5 rounds [K2tog, k3] to end (24sts) Knit 2 rounds. Ad the stuffing to the head and continue to knit and stuff as you go. [K2tog, k2] to end (18sts) Knit 1 round [K2tog, k1] to end (12sts) [K2tog] x6 (6sts) Break the yarn and pull through the remaining stitches to close. Pattern desian Coovriaht @ Revati Poole. 2013. All Riahts Reserved.
Spider legs - make 8:
DK yarn, 3.25mm needles Note: You can knit the four outer legs longer than the four inner ones if you want. You can also knit the legs with chunky yarn to create thicker legs. Cast on 8 stitches, join in the round. Knit a few rounds, then fold a pipe cleaner to desired spider leg length and insert into the middle of the knitting, then continue knitting in the round around the pipe cleaner until half way up. Or, you can knit the leg tube first and push the pipe cleaner into it afterwards, however, I find knitting around the pipe cleaner easier. Then: K2tog, k4, k2tog (6sts) Knit around the pipe clean until the end then: [K2tog] x3 (3sts) Break yarn and pull through remaining stitches.
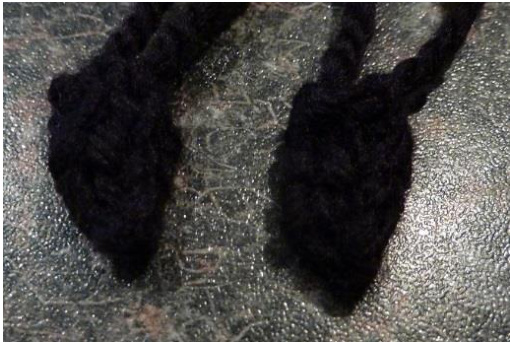
Fangs - make 2:
Chunky yarn, 3.5mm needles
Right fang
Left fang Cast on 3 sts Knit 1 row P1, p2tog (2sts) Knit 1 row P2tog Cut yarn and pull end through. Cast on 3 sts Knit 1 row P2tog, p1 (2sts) Knit 1 row P2tog Cut yarn and pull end through.
To make up:
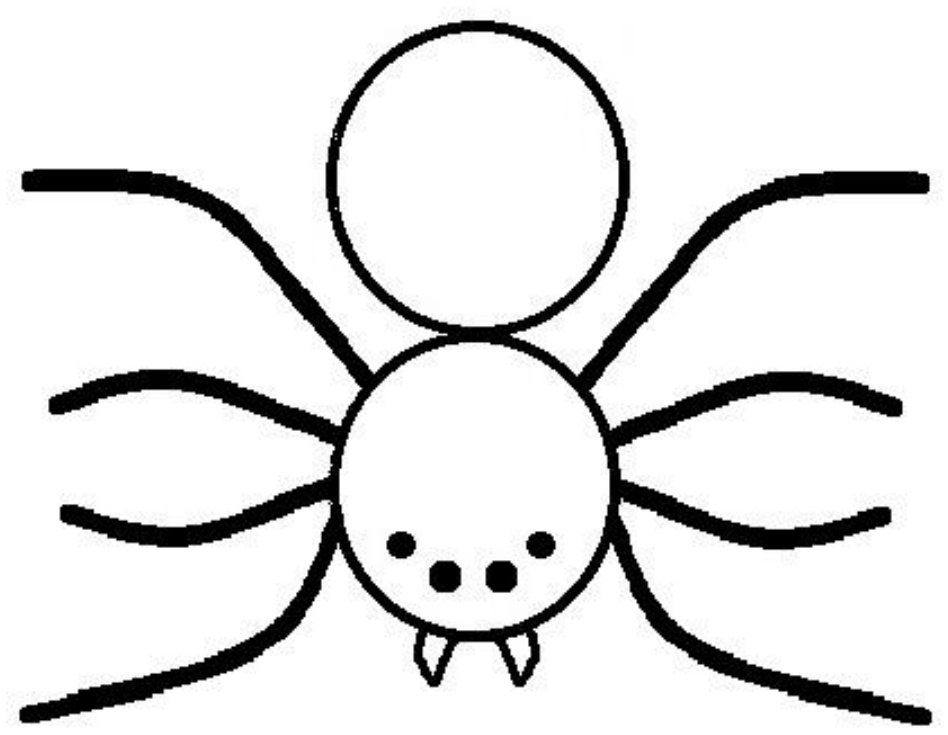
Place the 8 legs in the desired position on the head section of the spider and attach the legs (e.g. sew on the legs with the left over yarn). I poked the end of the pipe-cleaner into the spider to give added stability. Don't forget to bend the legsso thespider stands up abit. Sew on the 4 beads to the head section of the spider, the two larger beads close together and the two smaller beads on the outer side. Attach the fangs to the head and weave in any yarn ends.
Have fun with your new spider pal! @


