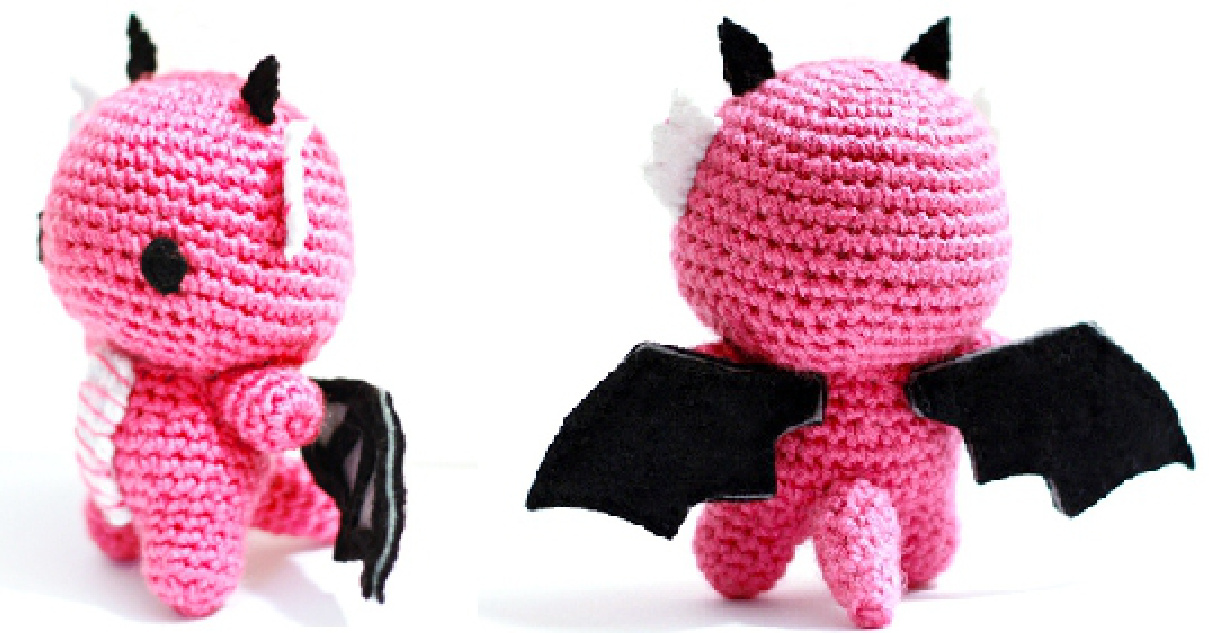
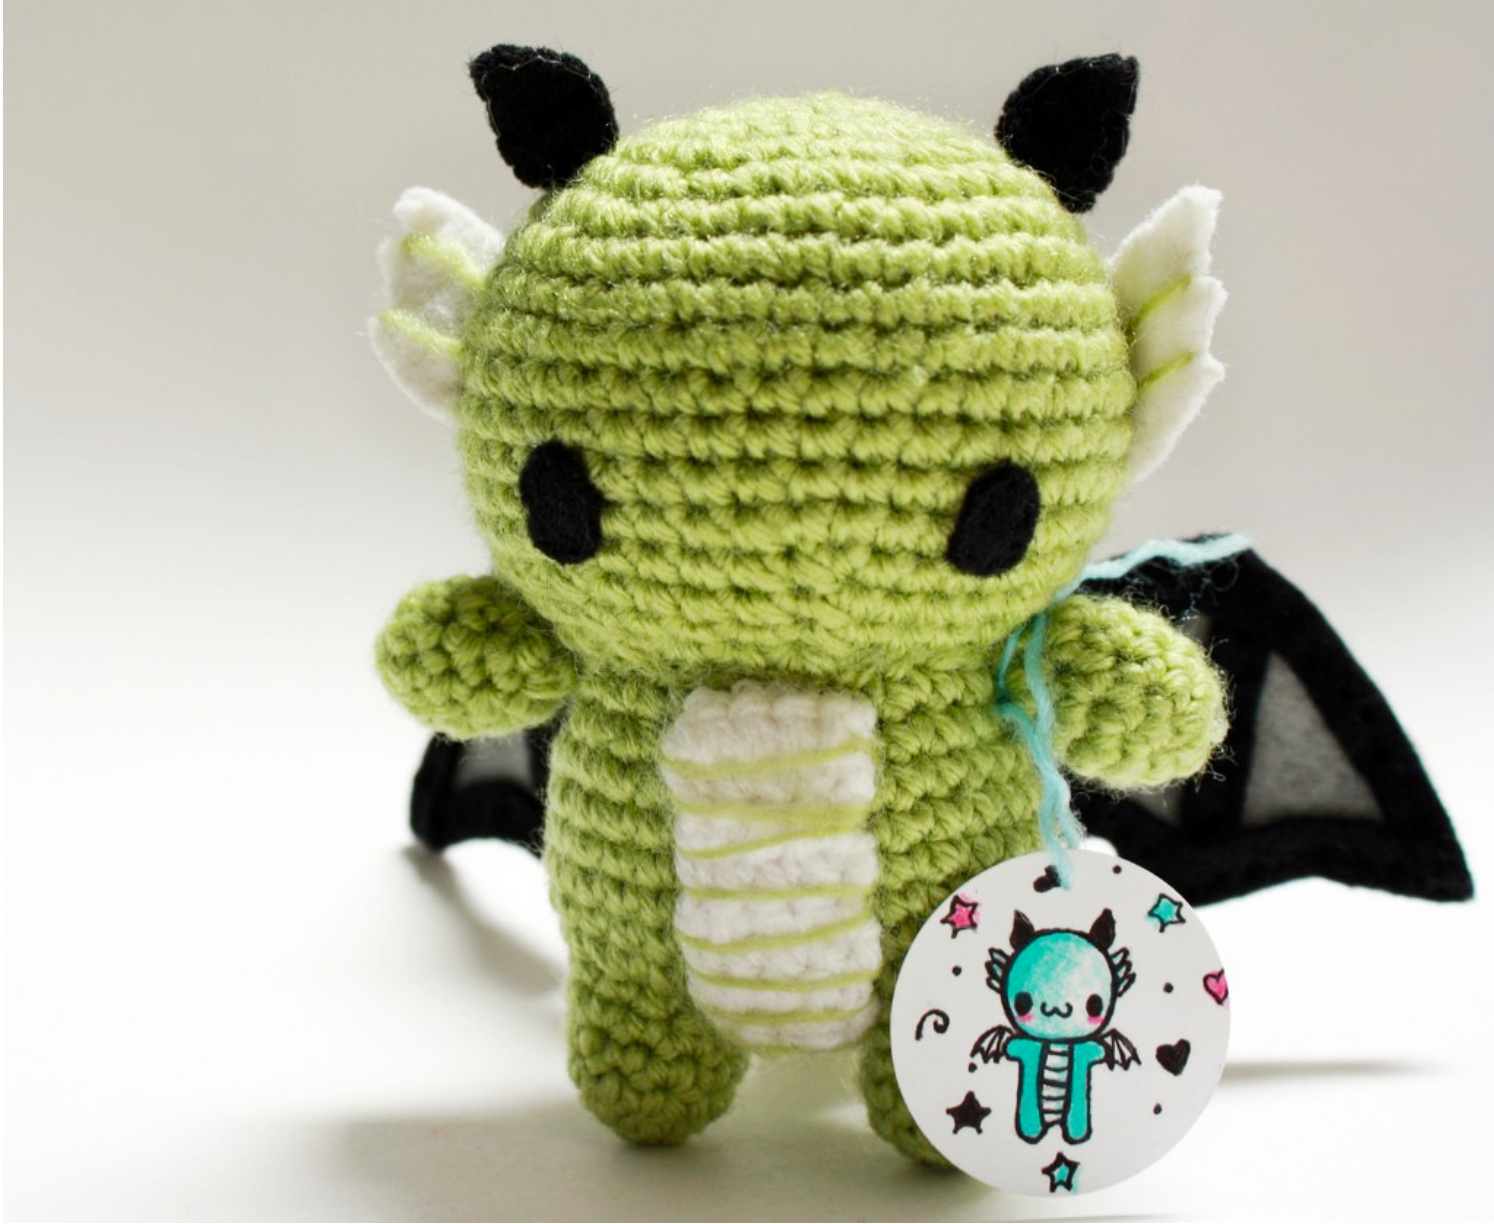
BABY DRAGON AMIGURUMI PATTERN by adorably kawaii
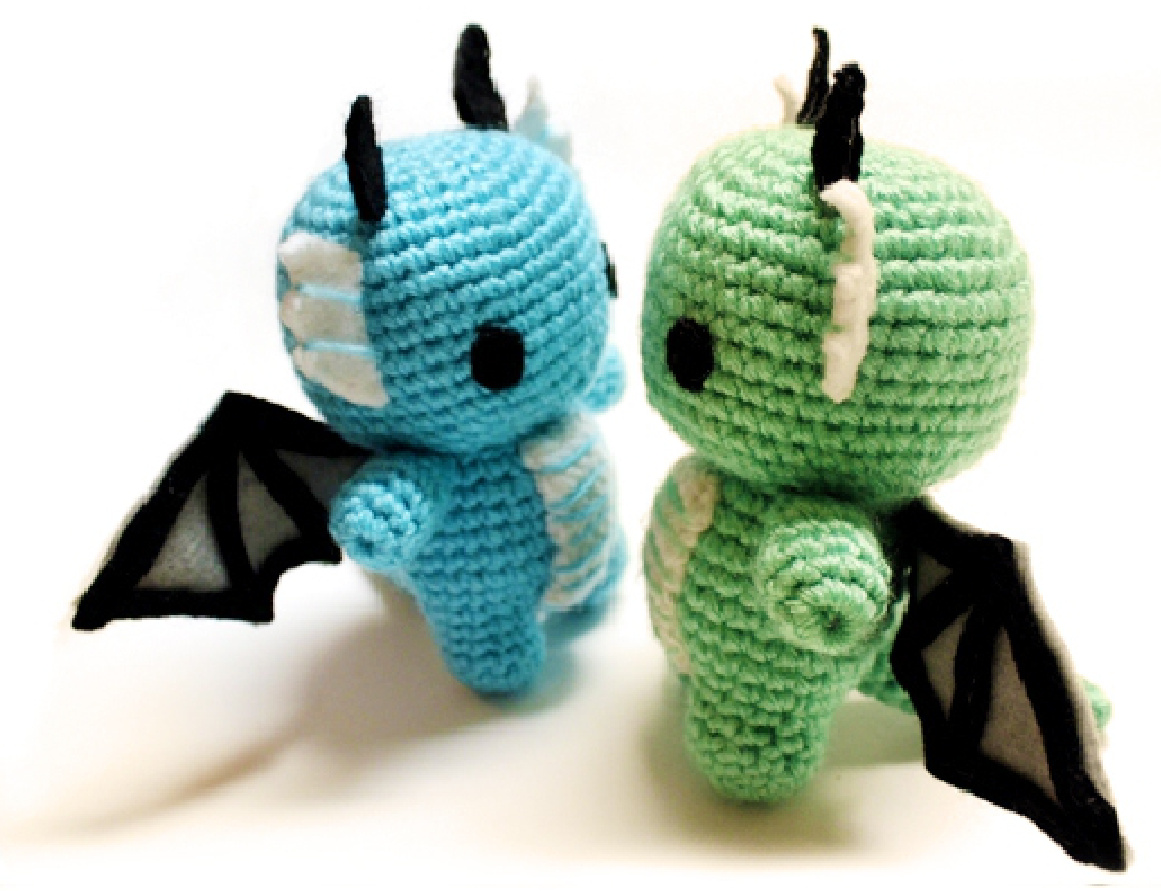
I designed this dragon amigurumi in 2009. I've used this pattern many times to create my dragons. I've also had it tested by several people of different experience/skill levels for errors and the clarity of the instructions. I hope you enjoy this pattern.
Size:
Approximately 4.5-5" (11-12.5cm) tall and 2.5-3" (6-7.5cm) wide from arm to arm. Results will vary depending on your tension and your yarn & hook choice.
Note on Gauge/Tension:
It's important to make sure the hook size you're using is the appropriate size for your yarn as well as for your tension. Tension varies from person to person and from day to day. It can change slightly throughout the project and result in larger or smaller stitches and rows which can affect proportions and the overall size.
Materials:
Worsted weight yarn in the color of your choice (main color) & white (contrasting color). Yarn suggestions: Lion Brand Vanna's Choice, Lion Brand Vanna's Choice Baby, Loops & Threads Impeccable Solids, Red Heart Soft Yarn, Caron Simply Soft. E/3.5mm hook Felt in black, gray, and white Yarn needle Embroidery needle Embroidery thread in black and white Stuffing
Abbreviations:
| Ch | Chain |
| Sc | Single Crochet |
| 2 sc | 2s single crochet increase |
| Sc2tog | 2 single crochet decrease |
| +$ IS | Slip stitch |
| S+(s) | Stitch(s) |
| Rnd | Round |
| Rep | Repeat |
| MC | Main color |
| cc | Contrasting color |
Stitches:
| Chain | Yarn over and draw through look on the hook. |
| Single crochet | Insert the hook into the stitch, yarn over, draw up a loop, yarn over, and draw yarn through both loops on the hook. |
| 2 single crochet increase | Two single crochet stitches into one stitch. |
| 2 single crochet decrease | Yarn over, draw up a loop in each of the next two stitches, yarn over, and draw yarn through all three loops on the hook. |
| Slip stitch | Insert hook into the stitch, yarn over, draw up a loop, and then draw through the loop on the hook. |
Magic Ring:
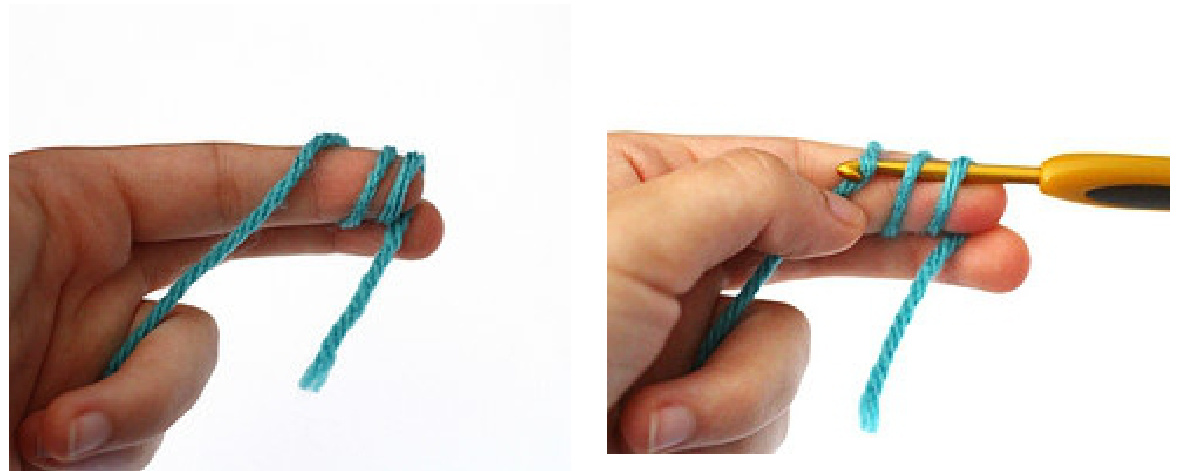
A few inches from the end of the yarn, wrap two loops over your finger. While the loops still on your finger, insert the hook from right to left into the loops and pull the working yarnthrough.
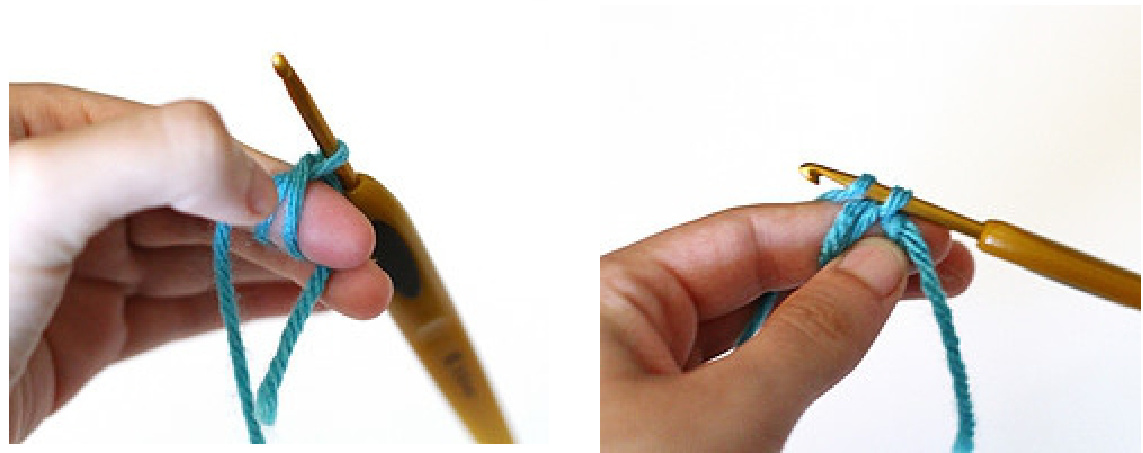
Carefully take the loops off your fingers and chain one. This doesn't count as the first stitch.
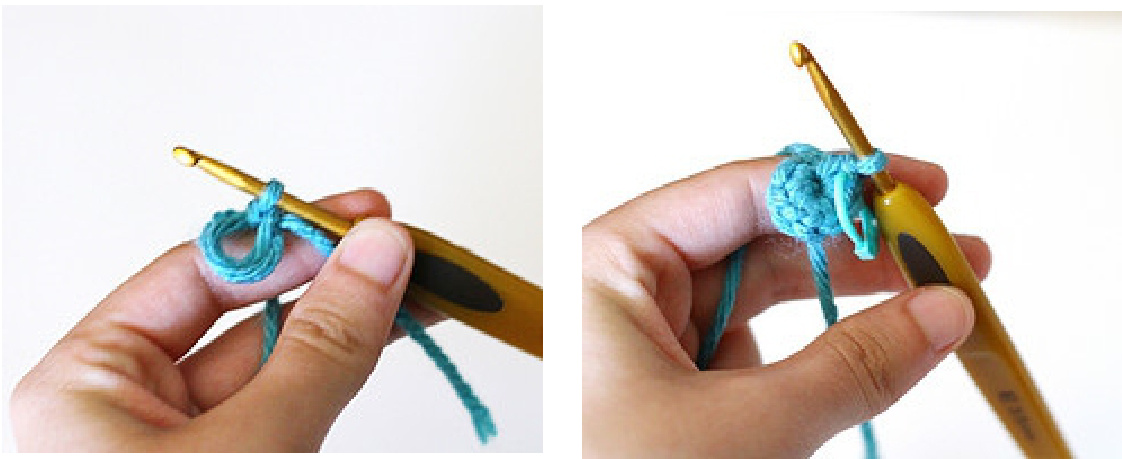
Insert the hook into the two loops again and pull up a loop. Yarn over and draw through both loops. This counts as the first single crochet stitch. Continue for the rest of the stitches. Then pull the yarn tail to close the hole.
Head:
With MC, 6 sc into magic ring.
| Rnd | WrittenInstructions | Stitch Count |
| L | 2 sc in every st. | 12 sts |
| 2 | *2 sc in st, sc in next st* rep to end. | 18 sts |
| 3 | *2 sc in st, sc in next 2 sts* rep to end. | 24 sts |
Cut yarn and stuff.
| 4 | *2 sc in st, sc in next 3 sts* rep to end. | 30 sts |
| 5 | *2 sc in st, sc in next 4 sts* rep to end. | 36 sts |
| 6 | *2 sc in st, sc in next 5 sts* rep to end. | 42 sts |
| 7-12 | Sc in every st. | 42 sts |
| 13 | *Sc2tog, sc in next 4 sts* rep to end. | 35 sts |
| 14 | *Sc2tog, sc in next 3 sts* rep to end. | 28 sts |
| 15 | *Sc2tog, sc in next 2 sts* | 21 sts |
Legs (Make 2):
With MC, 6 sc into magic ring. Sl st in next st and cut yarn, leaving tails for sewing.
| Rnd | Written Instructions | Stitch Count |
| 1 | 2 sc in every st. | 12 sts |
| 2-4 | Sc in every st. | 12 sts |
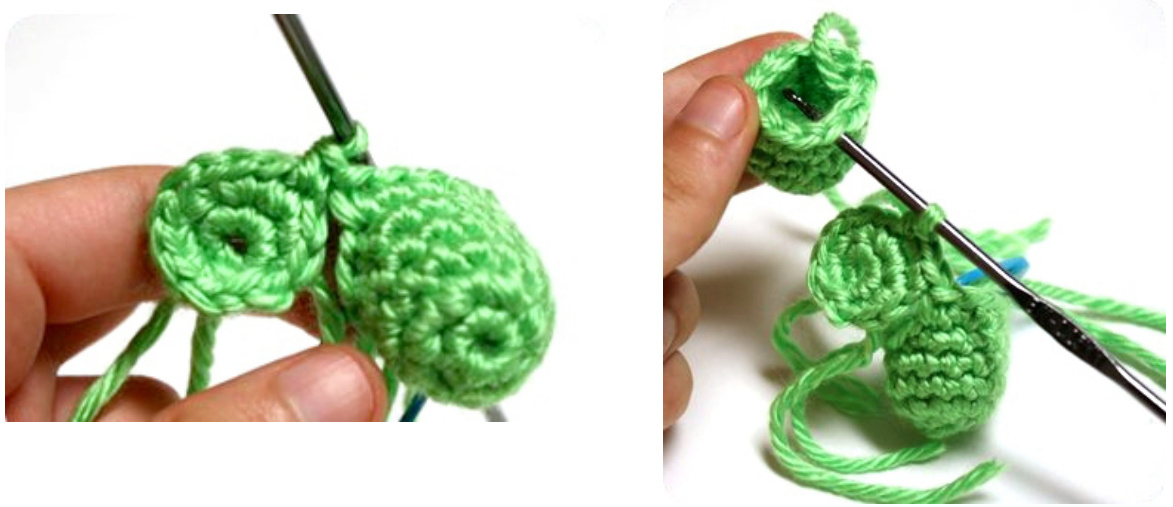
Body:
With MC, 6 sc into ring.
| Rnd | Written Instructions | StitchCount |
| 1 | 2 sc in every st. | 12 sts |
Sl st in next st and cut yarn.
Rnd 2: Make a slipknot on the hook. On one of the legs, insert hook into the third st from the left of the sl st. Place a marker in that st.
sts. On the body piece, sc in the third st on the left of the sl st
Sc in the next 2 sts. On the other leg piece, sc in the third st from the left of the sl St+。
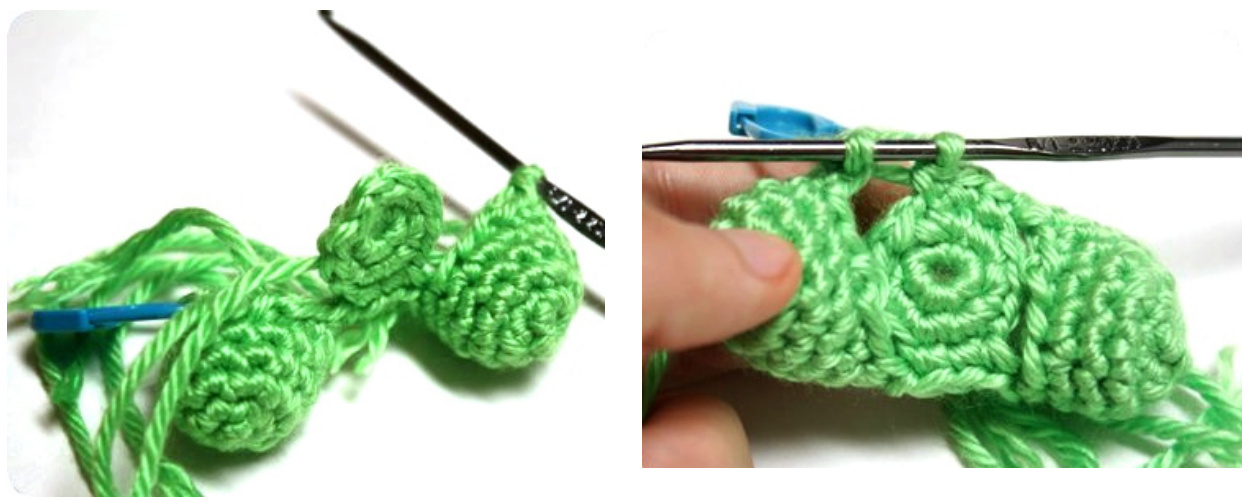
Sc in the next 8 sts. Sc in the 3 sts in the center of the body piece, then sc in the marked st to complete the rnd. (24 sts)
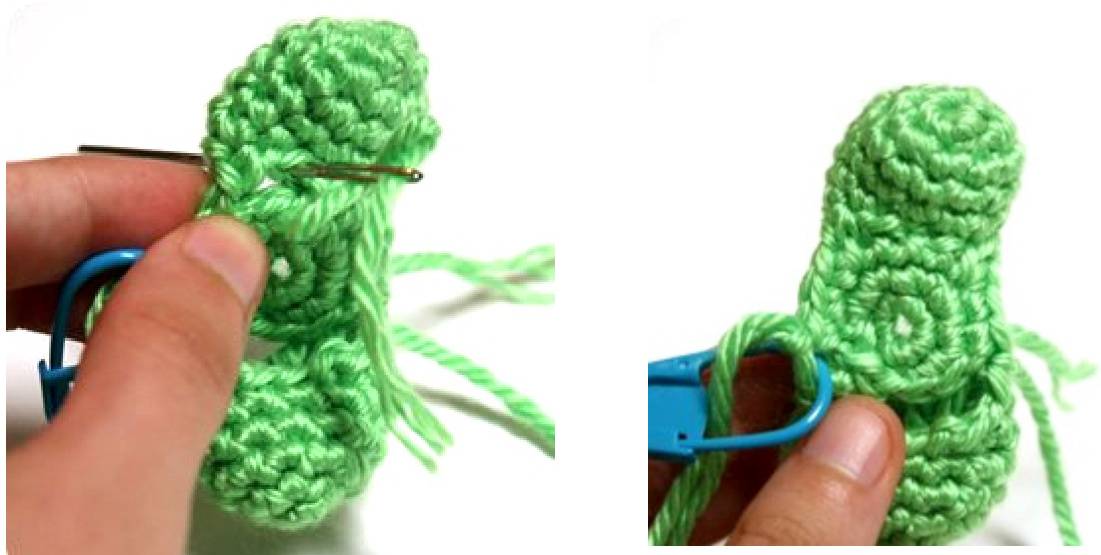
Sew together the holes with the yarn tails.
| Rnd | WrittenInstructions | StitchCount |
| 3 | *2 sc in st, sc in next 2 sts* rep to end. | 32 sts |
| 4-8 9 | Sc in every st. *Sc2to9, sc in next 3 sts* | 32 sts |
| rep to last 6 sts; sc2to9, sc in next 2 sts, sc2tog. | 25 sts | |
| 10 | Sc in every st. | 25 sts |
Sl st in next 3 sts and cut yarn. Stuff.
Scales:
With CC, ch 5.
| Row | WrittenInstructions | StitchCount |
| 1-8 | Sc in next 4 sts. Ch 1, turn. | 4 sts |
| 9 | Sc in 4 sts. | 4 sts |
Cut yarn, leaving a tail for sewing. Use one strand of the MC yarn and sew horizontal lines in between each row. Then pin the scales piece onto the body and sew it.
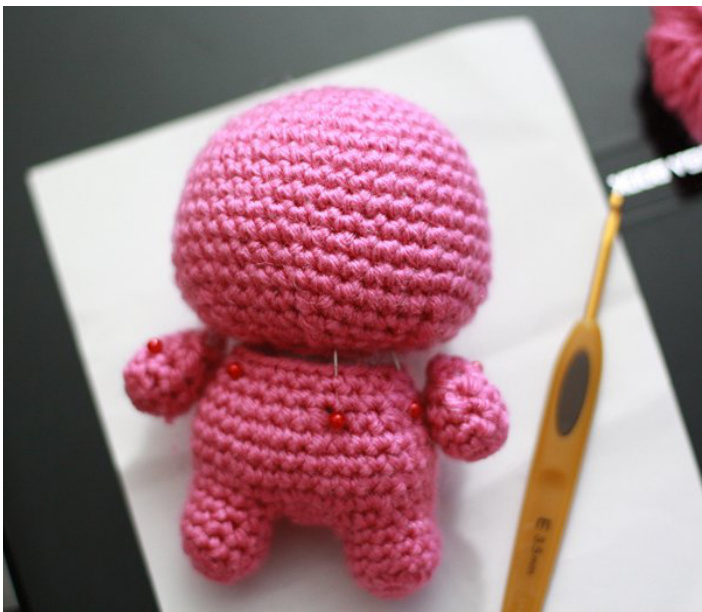
Arms (Make 2):
With MC, 9 sc into ring.
| Rnd | Written Instructions | Stitch Count |
| 1-4 | Sc in every st. | sts |
| 5 | Sc2tog, sc in next 5 sts, sc2tog. | 7 sts |
Cut yarn, leaving a tail for sewing. Stuff and sew onto the body. Then sew the head onto the body.
Tail:
With MC, 9 sc into ring.
| Rnd | Written Instructions | StitchCount |
| 1-6 | Sc in every st. | 9 sts |
| 7 | Sc2tog, sc in nex+ 5 sts, sc2tog. | 7 sts |
| 8-9 | Sc in every st. (Start stuffing at this point) | 7 sts |
| 10 | Sc in next 5 sts, sc2tog. | 6 sts |
| 11 | Sc2tog, sc in next 2 sts, sc2tog. | 4 sts |
Sl st in next st. Cut yarn and weave in the tail. Use some MC yarn to sew the tail onto thebody.
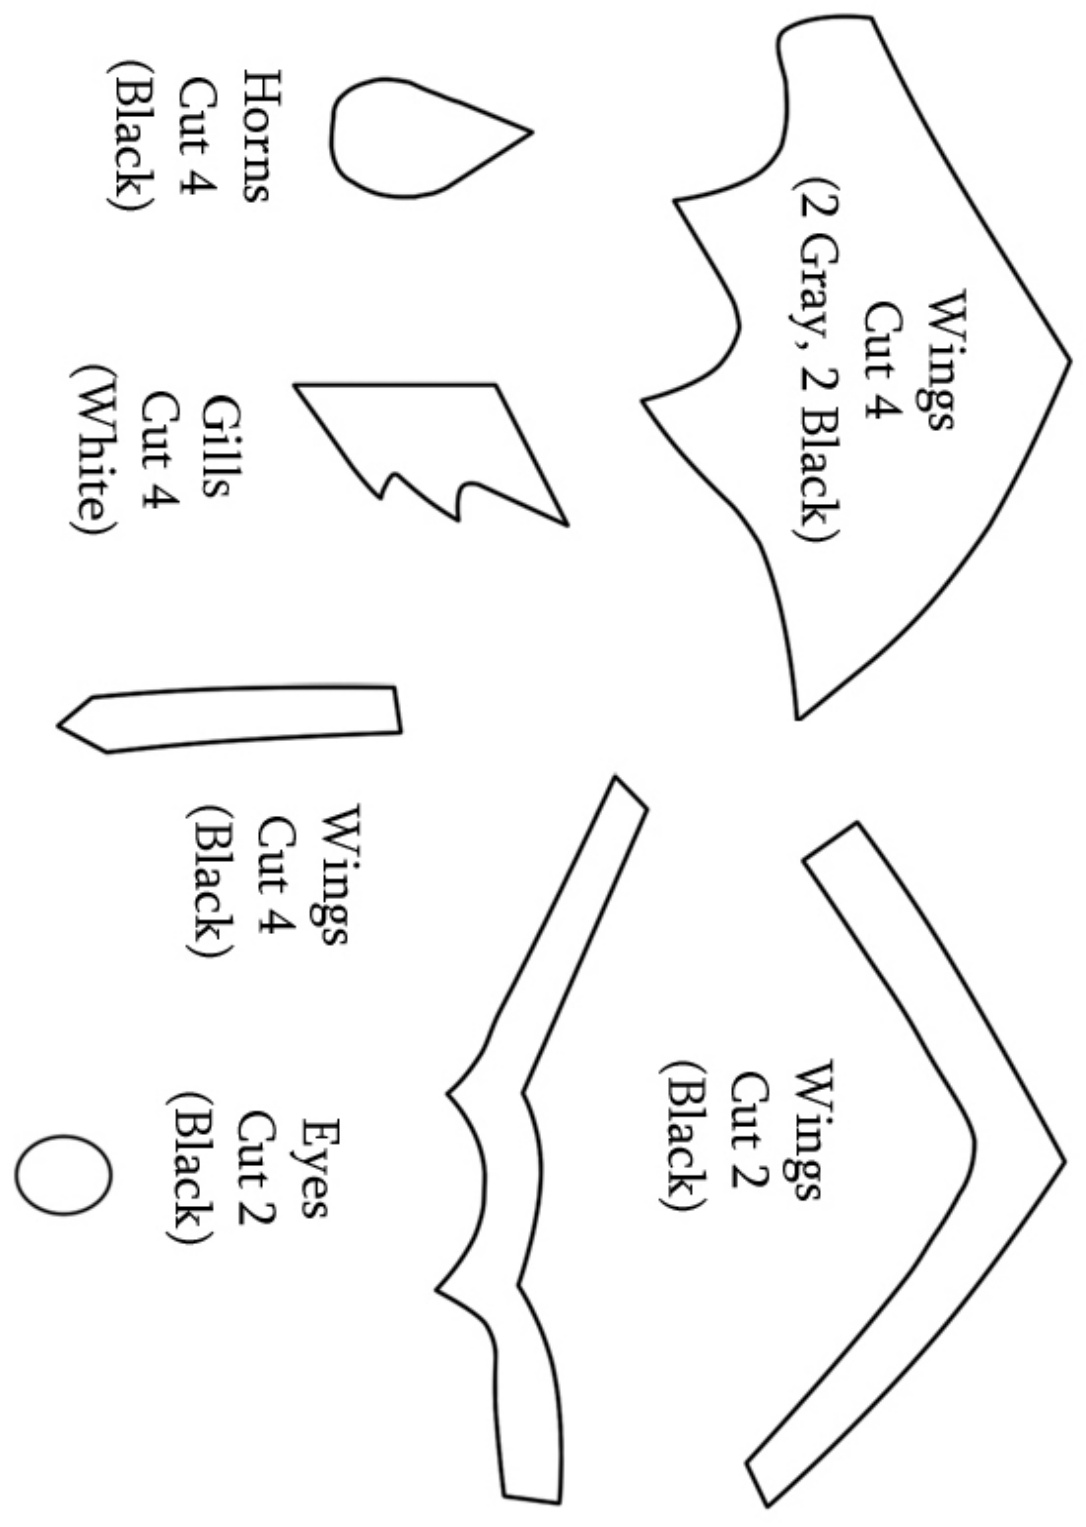
Felt Pieces:
See the last page for the felt piece templates. 1. Sew on the eyes using black embroidery thread. 2. Sew the edges of 2 horn pieces together with blanket stitch using black embroidery thread. Rep for the second horn. Sew them onto the head. 3. Sew the edges of 2 gill felt pieces together with blanket stitch using white embroidery thread. Then use a strand of MC to sew 2 horizontal lines on the gill. Rep for the second gill. Sew them onto the head. Note: The pieces for the wings appear to not align properly but you are to sew them down into place, pulling and holding down the pieces while sewing. 4. Hold the big gray and black wing pieces together. With the gray facing you, sew the bottom black outlining piece onto the wings with running stitches through both the big gray and black wing pieces. 5. Sew the two black vertical wing pieces in the middle only though the big gray felt piece. 6. Sew the top black outlining piece through both the big gray and black wing piece. 7. Sew the wings onto the back of the dragon, right below the head.
@ Adorably Kawaii. Pattern is for personal use only. Please don't redistribute/resell the pattern in any way or form. If you post the finished items you make online, my only request is that say something like “Pattern designed by Adorably Kawaii - www.adorablykawaii.com"