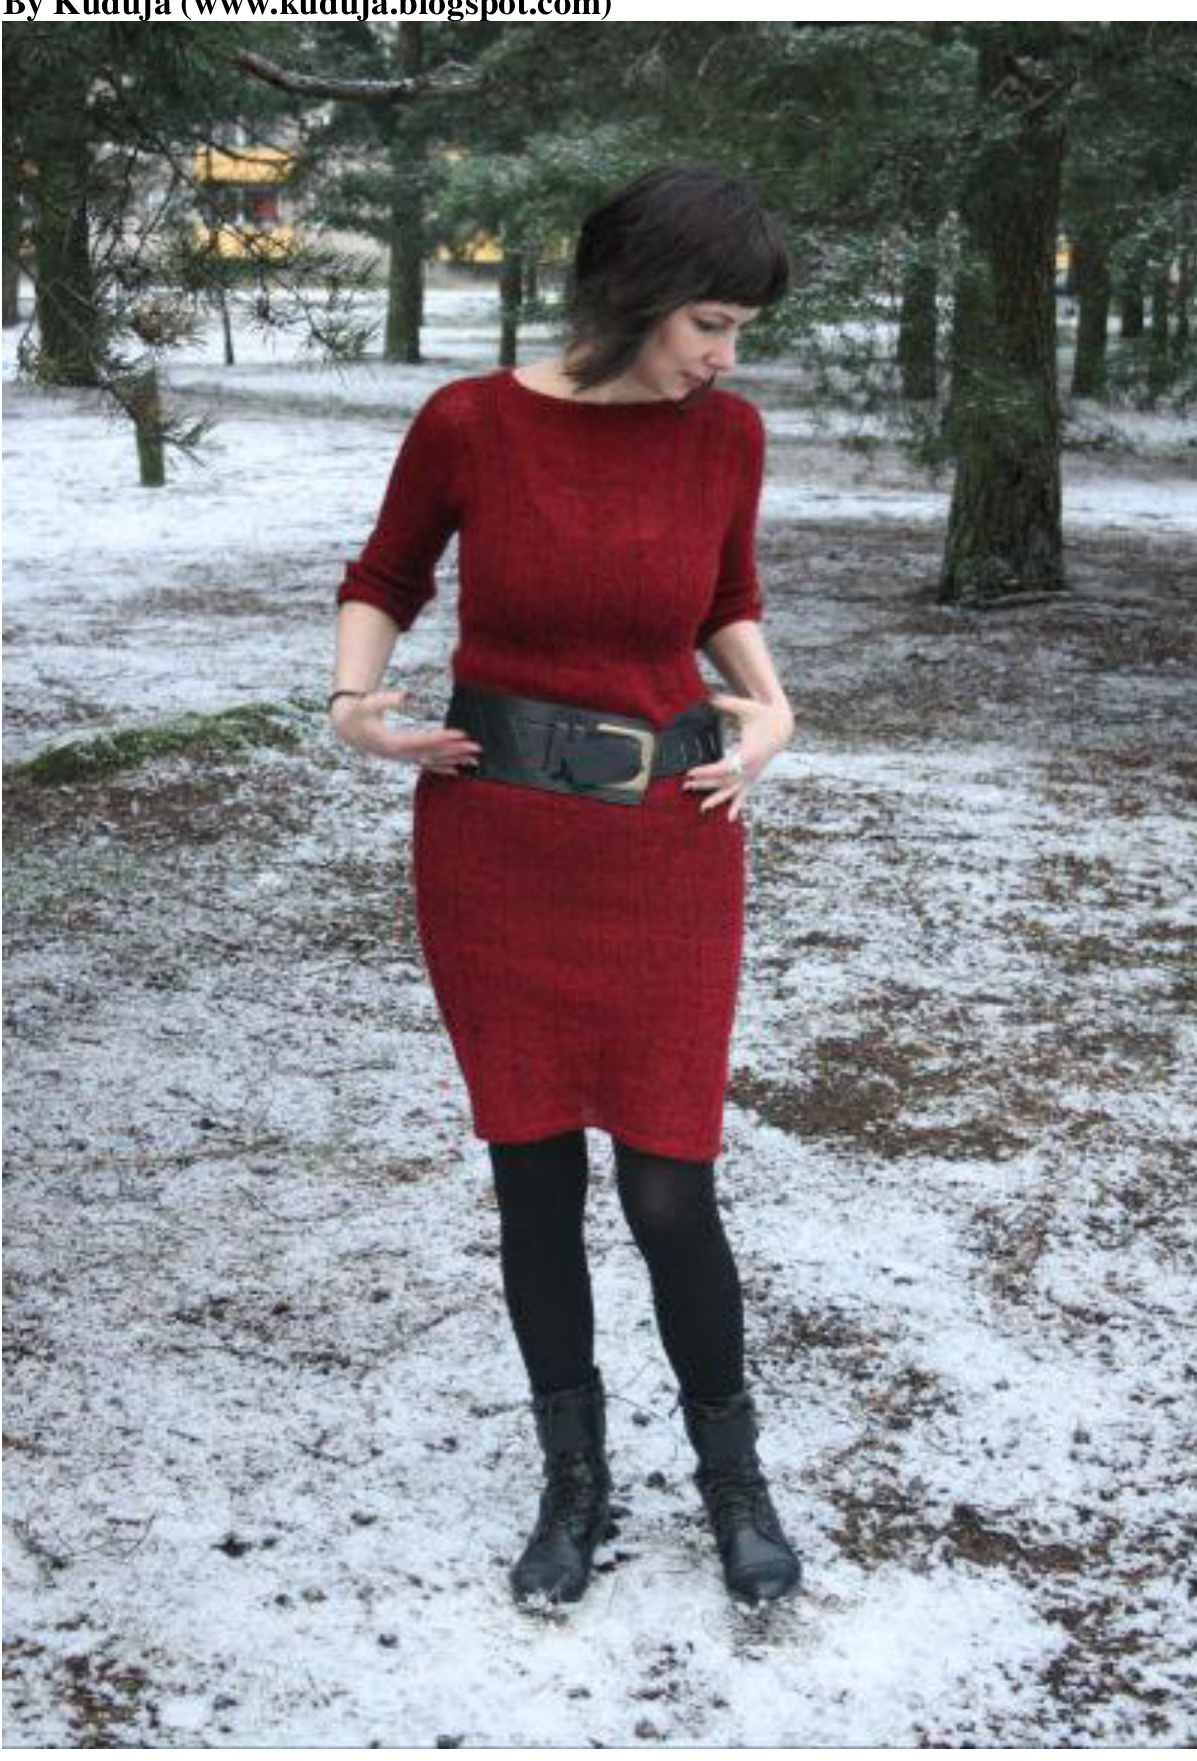
Kimono dress/ sweater By Kuduja (www.kuduja.blogspot.com) By Kuduja (www.kuduja.blogspot.com)
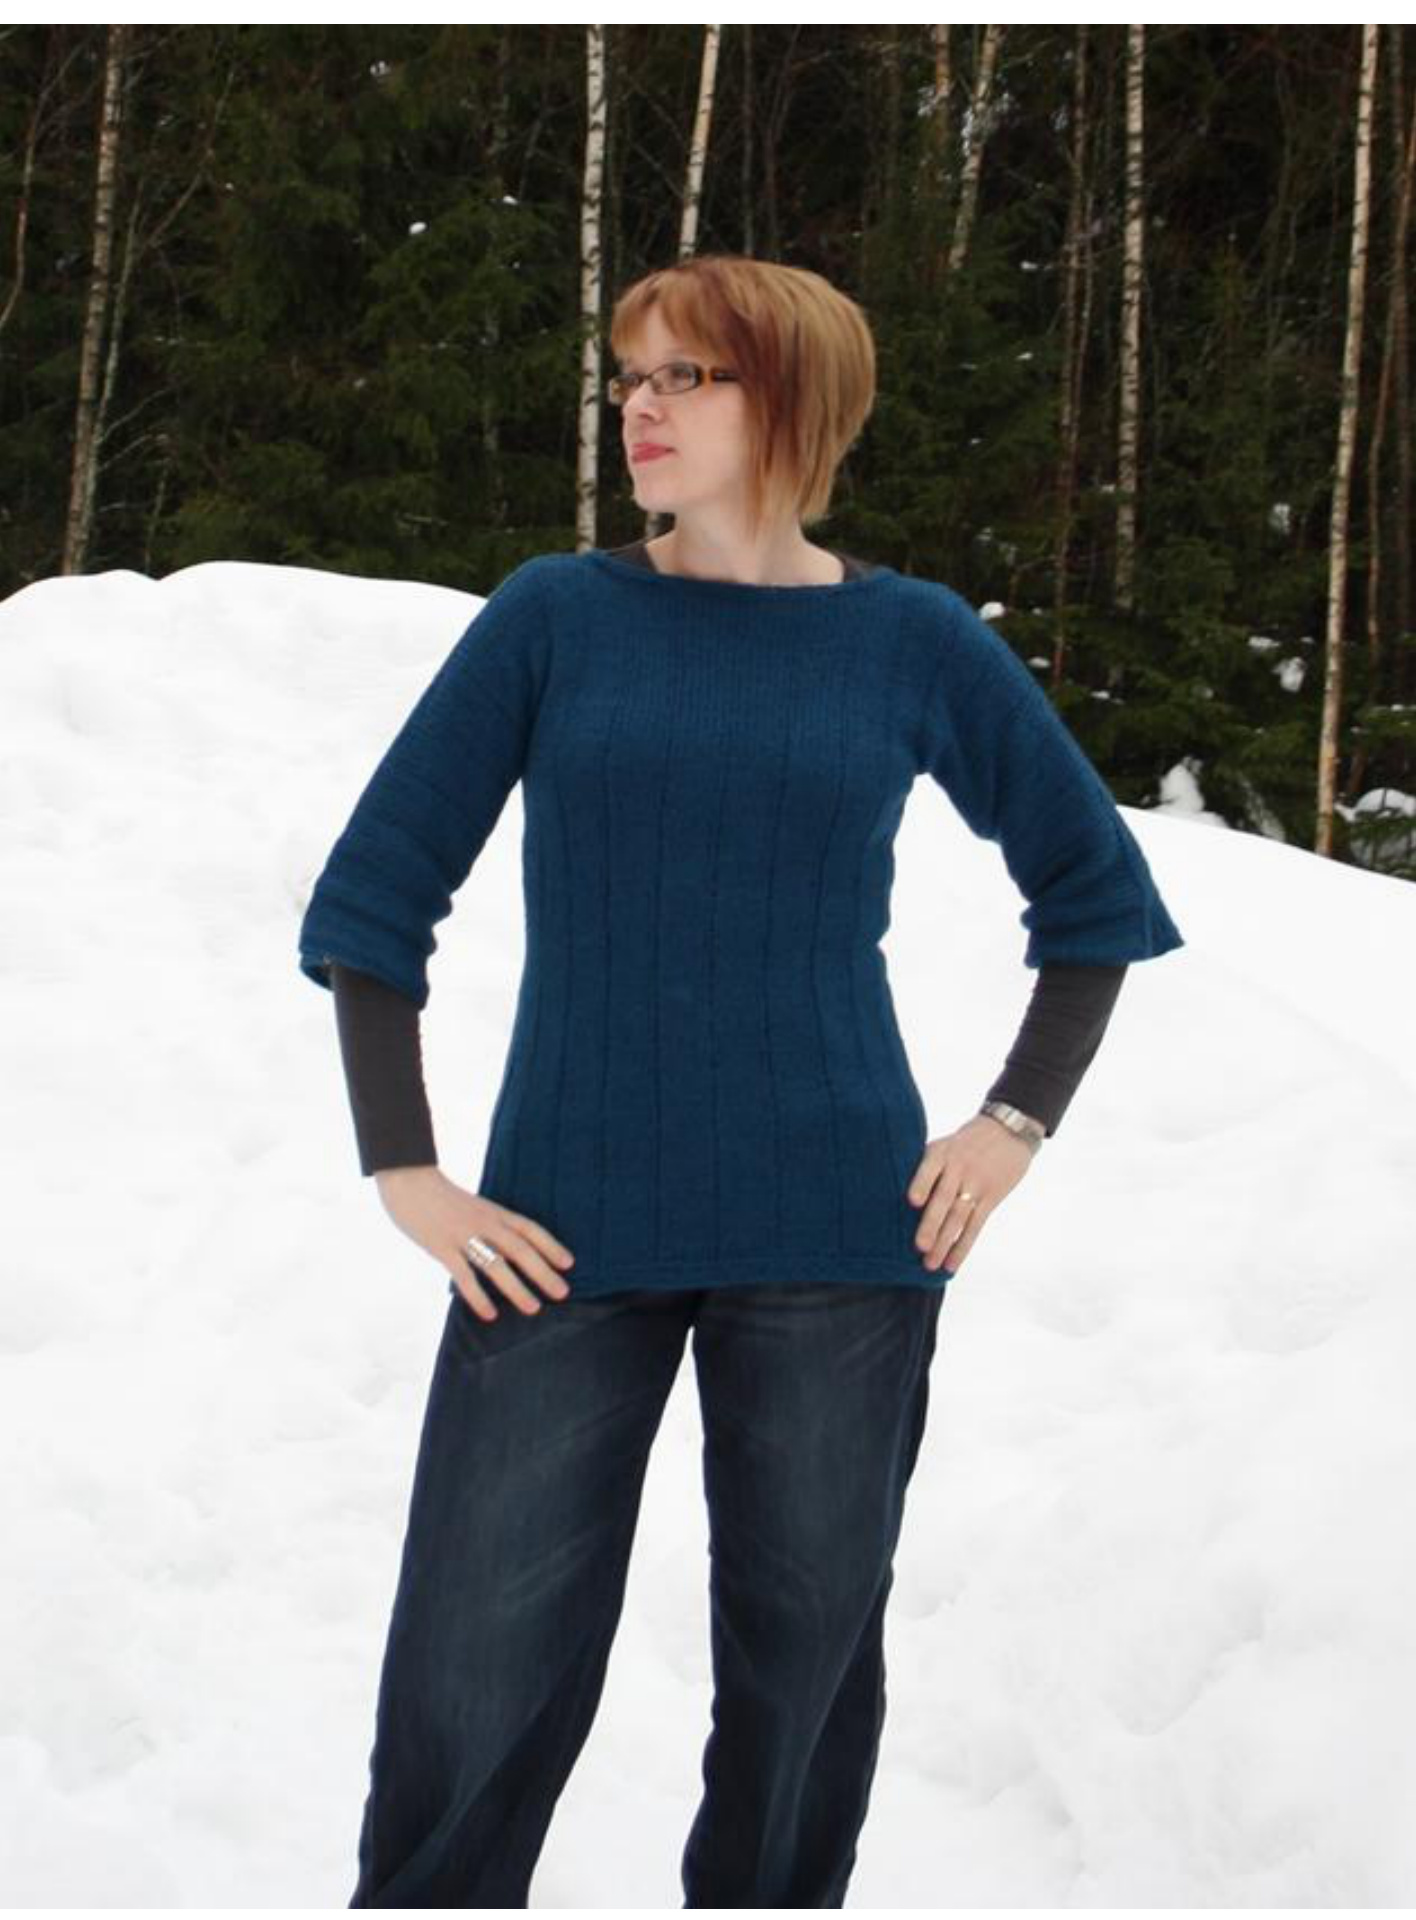
Sweater knitted by Mia Saranen (thank you!). Yarn: Aade Long 8/2 (100 % wool, 100 g/400 m) For size S 300 g, size M 330 g, size L 350 g For a sweater, you will need less (180/230/280 g respectively) Fits chest circumference: 84 (93, 102) cm The yarn used for Mia's sweater is Rauma Finullgarn (100 % wool, 50g /175 m, 250 g for size M) Needles: 3.75 mm Gauge: 1 pattern repeat (knit 6, purl 1) = 4.5 cm. Row gauge is not critical. I recommend several sets of circular needles so that you can try the garment on as you go. Figures for alternative sizes are given in parenthesis. If a figure applies to all sizes, then only one figure is given.
General remarks
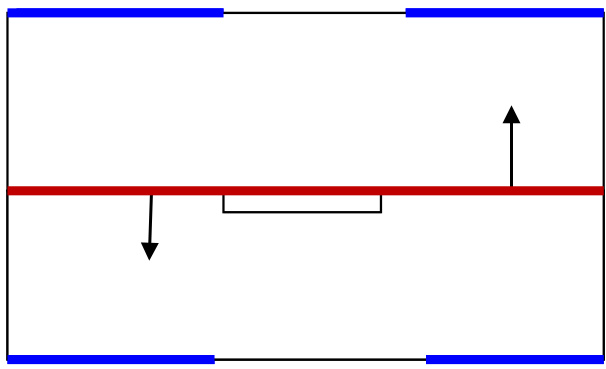
The dress/sweater is knitted seamless, top down. You start at the shoulder line (a place where the shoulder seam would be) with a provisional cast on. As it is kimono and the sleeves are worked together with the torso, the cast on line equals the length of both sleeves plus the distance from one shoulder to the other. First, you work the back part from the shoulder line (red line on the graph) and knit a piece that reaches your underarms or equal to the wished width of the sleeve (the arrows indicate direction of knitting), then you knit from the shoulder line in the other direction an almost identical piece that will be the front piece. Then you fold the work, mark the point where the sleeves end and with 3 needle bind off make the sleeves ,seams" (the blue lines). You are left with stitches for the torso and work in rounds top down. If you wish a dress, you just workdownwards.
Step 1: back piece
Odd rows: knit 6, purl 1.Even rows: work stitches as they appear. With a piece of scrap yarn, cast on 164 (171, 178) stitches. Later the scrap yarn will be removed and live stitches used for the front piece and collar finishing. Knit 6 rows in garter stitch. After that, distribute the stitches in the following way: 2 edge stitches (always in garter), 22 (23, 24) pattern repeats (that is, 154 (161, 168) stitches), 6 knit stitches, 2 edge stitches. If you want longer sleeves, cast on for more pattern repeats. In this way, work 18 (19, 20) cm.
Step 2: front piece neck opening
Let the back piece stitches wait. Take the work as to knit from the cast on edge. From the left edge, count 67 (69, 71) stitches towards the middle. These stitches form the left sleeve and the left shoulder. Remove provisional cast on from the stitches. Right side facing you, attach a new yarn to start knitting. Knit 6 rows in garter stitch. Put on wait. Now it is time to start the right sleeve and the right shoulder in the same manner. Counting from the right edge, remove provisional cast on from 67 (69, 71) stitches. For the collar, you have 30 (33, 36) stitches waiting On the scrap yarn.
Step 3: joining the front piece
Now you are going to join the left and the right half of the front piece. Start from the right half. Knit the stitches. With a piece of scrap yarn, cast on 30 (33, 36) stitches. These stitches form the neck opening in the front. With the main yarn, knit the stitches you have just casted on. With the same yarn, work the stitches of the left half (break the yarn of the left half). Now the number of stitches of the front piece and of the back piece is equal. Knit the next row (wrong side) and distribute the stitches to work in pattern as you did for the back piece. Work until the length of the front piece is identical.
Step 4: forming the sleeves
Now try the work on. Decide whether the width of the sleeve is suitable and whether the back and front pieces meet under your arms. If it is too narrow, add some rows to the back and the front piece. To join, fold the work along the shoulder lines, wrong side facing you. Using the 3 needle bind off technique (see tutorial at http://www.youtube.com/watch?v=X4YHlniX4vU&feature=related), bind off 50 stitches from the edge towards the middle of the work (see the graph above). For the other sleeve, bind of the same number of stitches. You end up with 64 (71, 78) stitches.
Step 5: working the torso
Now turn the work so that you can knit on the right side. The front piece and the back piece have now stitches for 9 (10, 11) pattern repeats + 1 stitch. This 1 stitch will be a purl stitch. In order to fill in the sections between the front and the back piece, pick up 3 stitches. Decide whether to mark the beginning/end of a row under the left or under the right arm (it is up to you). Place maker at that point, work in pattern. Work the new 3 stitches as follows: purl 1, knit 1, purl 1. Work in round until the desired length. There is no shaping. If you want a sweater instead of a dress, just stop knitting at the desired point. If you want to make increases towards the bottom, you can increase purl stitches (that is, between knit stitches sections) but don't add too much to0 fast! When the length is sufficient, make 4-6 rows of garter stitch (remember, when working in round, garter stitch means purl 1 row, knit 1 row).
Step 6: finishing the sleeve edge (garter stitch)
Pick up stitches on the edge of the sleeves. Place marker, work in round. Purl the 1st row. Knit the next row, decrease 4 stitches (distribute decreases more or less evenly). Purl next row. In the next knit row, decrease 2-3 stitches. Purl one row. Knit one row. Bind off.
Step 7: finishing the neck opening
Remove the provisional cast on, place the stitches on the needle. Starting from the back piece, knit the stitches. Pick up some stitches between the back and the front piece (be careful to pick up enough stitches! The neck opening should not be too tight!). Knit the front piece stitches. Pick up stitches between the front piece and the back piece. Place a marker, work in round in garter stitch for 2-3 rows. Bind off. Wash the dress/sweater and put it on a flat surface to dry.


