Seamless Circular Cloth—and Seamless Hexagonal Cloth.
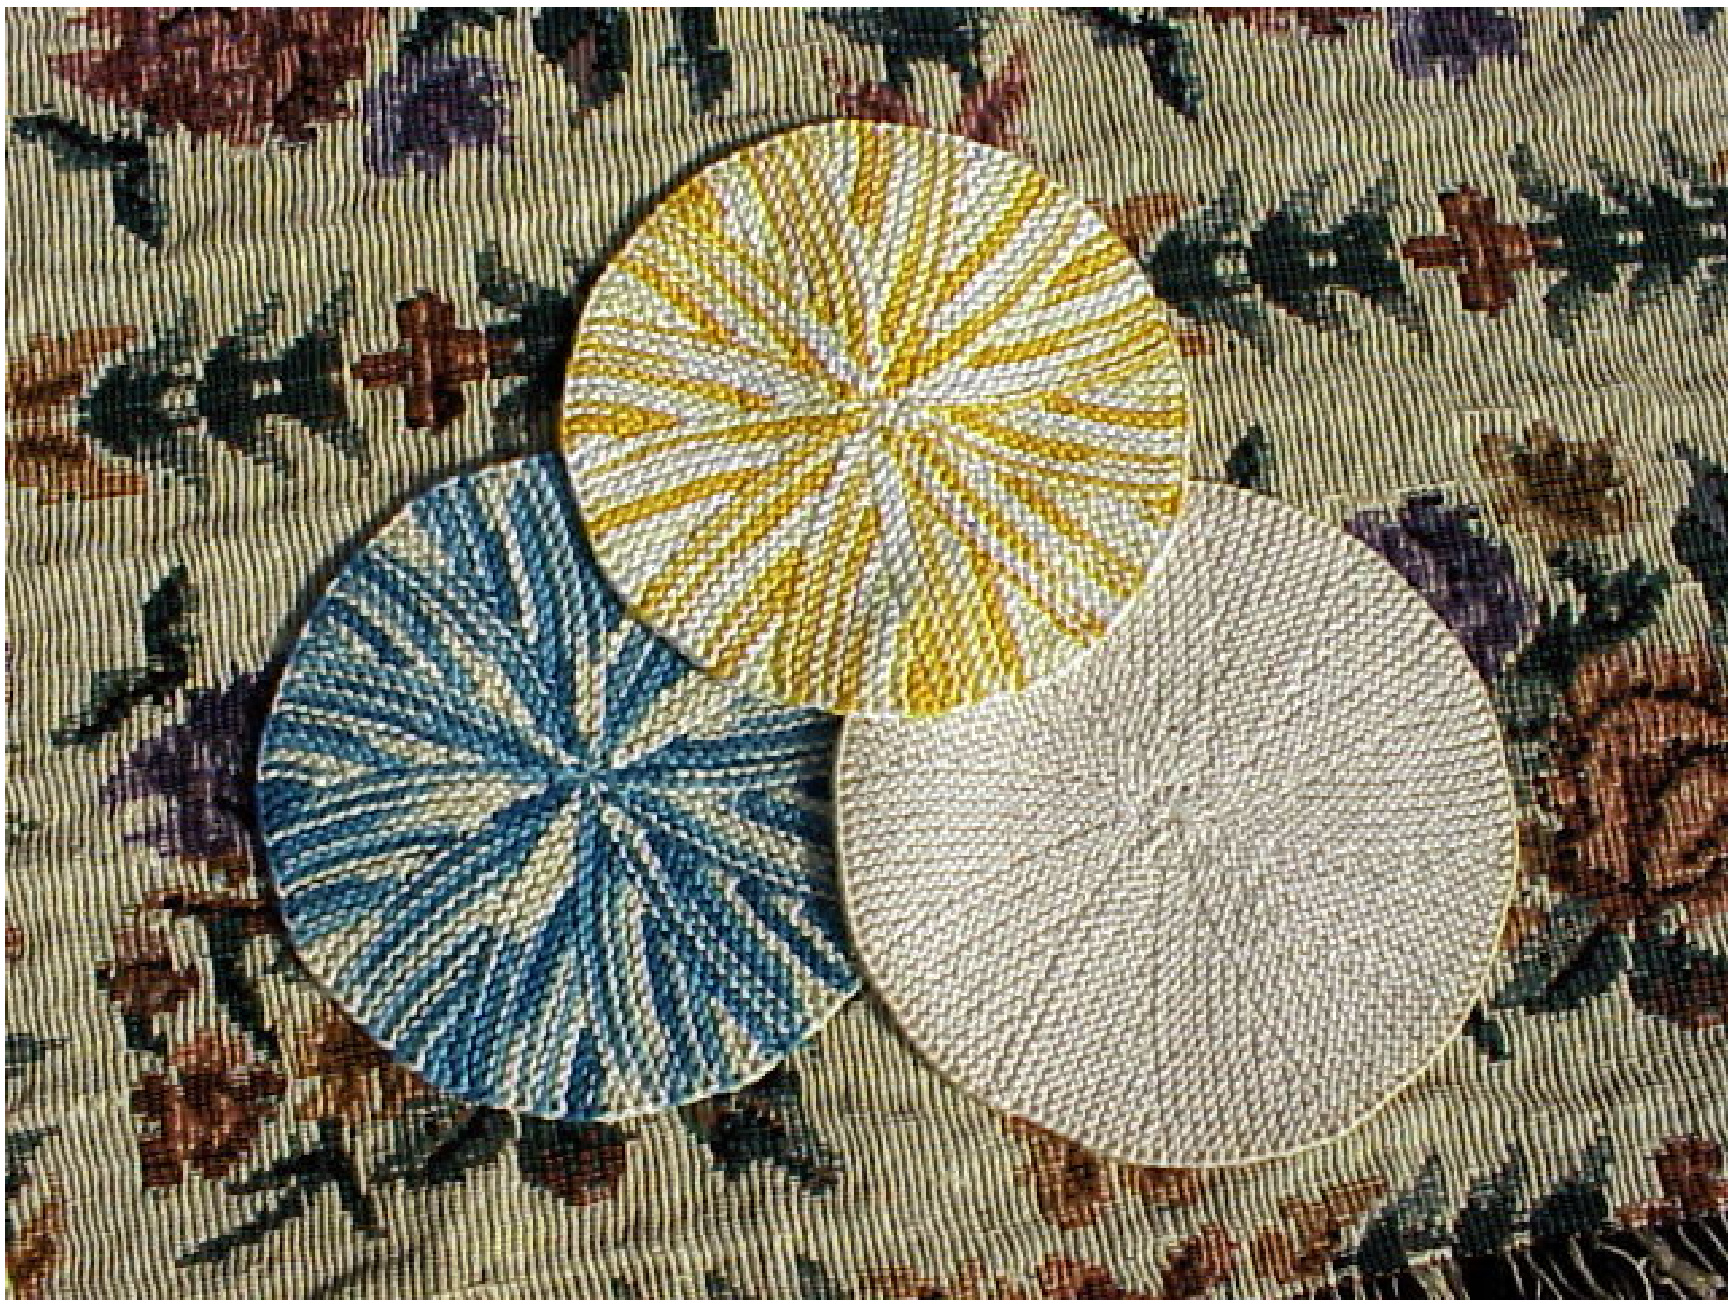
Here's a pattern for a circular garter st cloth finished with grafting. When you get the grafting right, most folks will have a hard time finding the start/finish point. Other knitters will be intrigued. Grafting the twisted chain selvedge is challenging, and may take a few tries to get it right. The directions are for "on the needles" grafting. I use worsted weight cotton (Peaches & Creme or Sugar \*n Cream) and US size 6 (4mm) and the finished cloth is 7 1/2 inches in diameter. There are 12 sections. A nice placemat (or even a rug) can be made by casting on more sts and adapting the instructions to the new number. Slip all sts purlwise. The WS short rows start with a YO that is made "automatically" when you knit the first st because the yarn is to the front. This is a sort of wrapped st that doesn't require any manipulation when you knit them together with the next stitch on row 19. WYIF= With Yarn in Front. Yarn is on the side facing you. YF= Bring yarn between the needles from back of work to front. Instructions: Crochet cast-on 20 sts with ravel cord over the size 6 needle. I prefer to use size 3 cotton works for the ravel cord since I usually have some, but other slick, hard twist yarns will work. Set up row (worked only once): Leaving about a 10' tail, attach working yarn to ending of crocheted cord and K19, YF, S11. Row 1 (RS): K18. Turn. Row 2 (WS): With yarn if front, K17, YF, Sl1. Turn. Row 3: K16. Turn. Row 4: WYIF, K15, YF, Sl1. Turn. Row 5: K14. Turn. Row 6: WYIF, K13, YF, Sl1. Turn. Row 7: K12. Turn. Row 8: WYIF, K11, YF, Sl1. Turn. Row 9: K10. Turn. Row 10: WYIF, K9, YF, S11. Turn. Row 11: K8. Turn. Row 12: WYIF, K7, YF, S11. Turn. Row 13: K6. Turn. Row 14: WYIF, K5, YF, Sl1. Turn. Row 15: K4. Turn. Row 16: WYIF, K3, YF, S11. Turn. Row 17: K2. Turn. Row 18: WYIF, K1, YF, Sl1. Turn. Row 19: K1, (K1, K2tog) 9x, YF, Sl1. Turn. Row 20: K19, YF, Sl1. Turn. Repeat rows 1-20 eleven more times. Cut yarn with about 18" to graft with. You will have to find the right amount of tension on the grafted row with experience, but it easier to get it too loose than too tight. But don't overdo that caveat and go too tight. Check your work after a few sts to see if you need to adjust it. Now begin to ravel the cord starting at the cloth center and place the freed sts onto a spare needle, entering each freed st from back to front. You can let the "half st" made with the yarn tail go for now and weave it in later. This needle will have 19 sts, not 20, and that's right. When you get to the last st, you will have to work the ravel cord out it. Put needle through the freed loop. The selvedge st will be sort of hanging in mid-air beside the last st or just over the needle above the last st, depending, but counts as the 2Oth st. Thread yarn end on blunt needle. With wrong sides together, the working yarn is to the right. The freed sts are on the "back" needle. Take the first st off the front needle, twist it one half turn counter-clockwise and replace on needle so that it is twisted like the other selvedge sts. Take the yarn needle and enter the back leg of the first st on the front needle from right to left (as if you were putting your knitting needle through the st to purl in the back of the loop), leaving st on needle. On the back needle, enter the selvedge st from left to right through both the loops. (The needle slides behind the two legs of the st. Remember, the selvedge st isn't really on the needle.) Draw yarn through and snug up yarn. Re-enter first st on front needle as if to purl (through front leg) and drop from needle. Go through next st on front needle as if to pur leaving the st on needle. Draw yarn through and snug up. Now we can do the same thing on each of the remaining sts: 1) Go through the first st on the back needle knitwise and drop from needle. Enter next st purlwise and leave on needle. Draw yarn through both sts and snug yarn. 2) On the front needle, take needle through 1st st as if to knit and drop it off and go through the next st as if to purl, leaving it on the needle. Draw yarn through both sts and snug yarn. These two steps are repeated, first on one needle, then on the other. "Knit off, purl" is the chant to tell you what to do. Just keep chanting ;-) After grafting a few sts, go back and look closely at the first few grafted sts to see that it all looks right. If not, try to figure out what needs to be done to fix it. You will have to un-graft the sts, but that's what's needed to get a perfect graft. When you have just one st on each needle at the finish, go through each knitwise and drop off. Neaten up center sts, tightening them if they have loosened. Take the same yarn and go through the topmost loop of the center selvedge sts, a few at a time, until all are done. I do this counter-clockwise. Pull firmly together and go through all loops a second time. Take needle to back of work. Take other yarn to back if it isn't there already, thread the needle with it, go twice through all the loops on the back and cut close. Go through some loops with the yarn used to secure the RS and cut close. Boom, we're done. Even though there is an extra garter ridge in one section, it's still hard to tell which one it is, especially with marled or hombre yarns. In trying to get the same number of ridges in each section, I added a short row and a knit back row (would be rows 21 and 22) but the extra rows made the cloth “ripple” and the center of the cloth didn't look so great. Although all the sections had the same number of ridges, I think the final cloth lost some of the clean simplicity of this version.
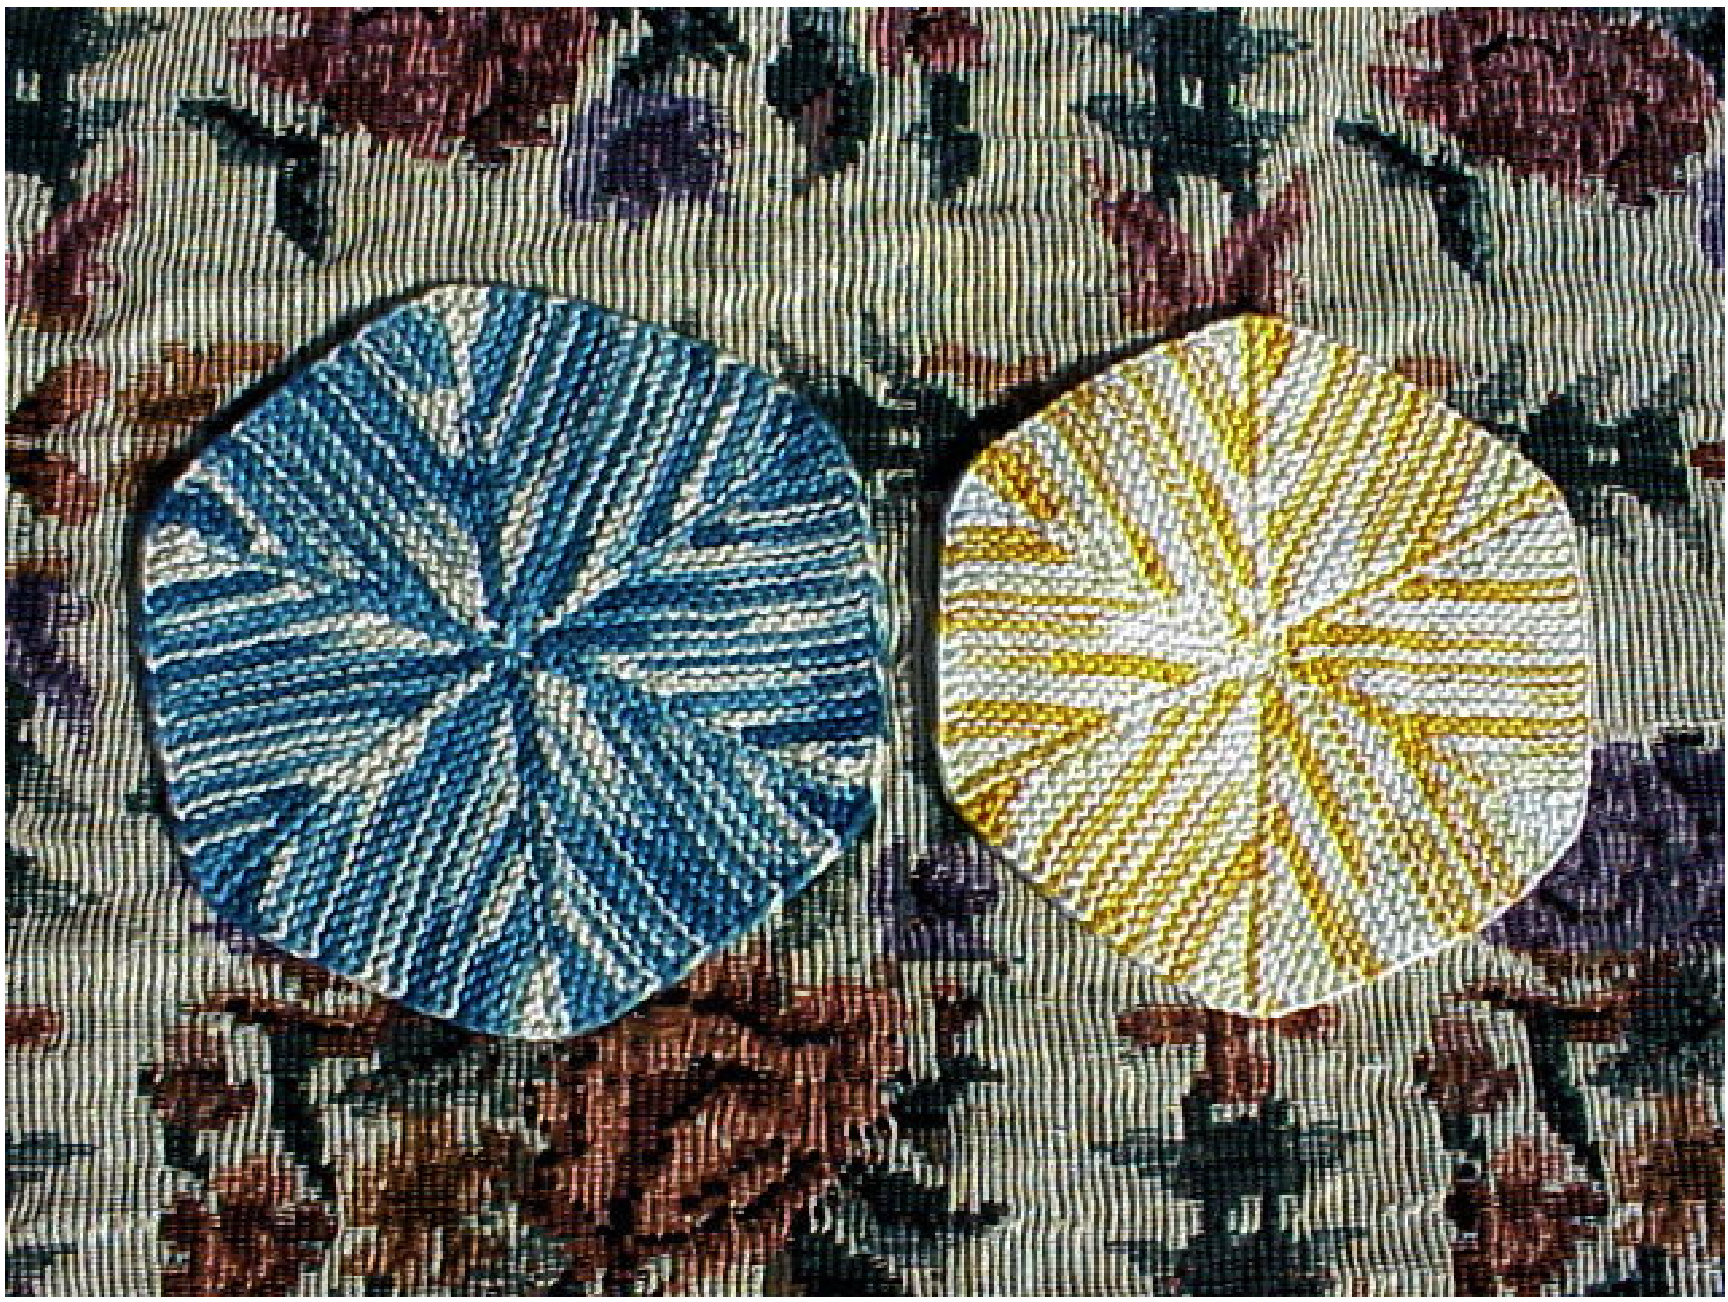
To make the Seamless Hexagonal Cloth, proceed as given above for the first section, knitting the set-up round and rows 1-20. Knit the next 20 rows as given below. Alternate the two patterns until you have knitted the 12 sections that make up the six pie-wedge sections of the finished cloth. Note: the first section you knit is actually the second half of the sixth “wedge". You'll see the first full wedge after you finish the third section. Increasing short-row section: Row 1: K2. Turn. Row 2: WYIF, K1, YF, Sl1. Turn. Row 3: K2, K2tog, K1. Turn. Row 4: WYIF, K3, YF, Sl1. Turn. Row 5: K4, K2tog, K1. Turn. Row 6: WYIF, K5, YF, S11. Turn Row 7: K6, K2tog, K1. Turn. Row 8: WYIF, K7, YF, Sl1. Turn. Row 9: K8, K2tog, K1. Turn. Row 10: WYIF, K9, YF, S11. Turn. Row 11: K10, K2tog, K1. Turn. Row 12: WYIF, K11, YF Sl1. Turn. Row 13: K12, K2t0g, K1. Turn. Row 14: WYIF, K13, YF, S11. Turn. Row 15: K14, K2tog, K1. Turn. Row 16: WYIF, K15, YF, Sl1. Turn. Row 17: K16, K2tog, K1. Turn. Row 18: WYIF, K17, YF, Sl1. Turn. Row 19: K18, K2tog, K1. Turn. Row 20: Knit 19, YF, Sl1. Turn.


