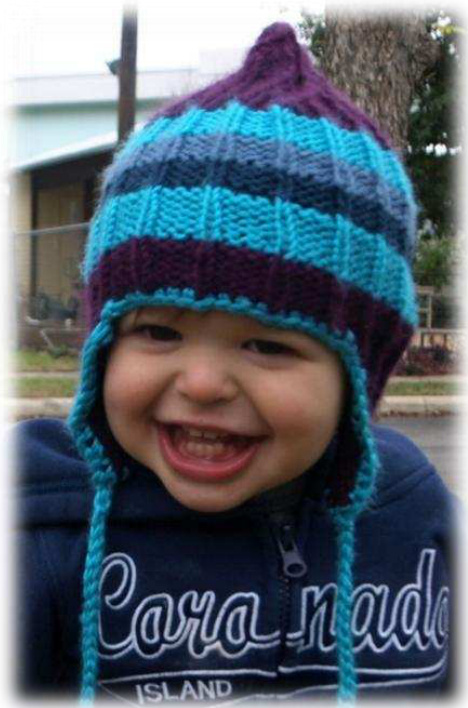
A happy, seamless use of your scrap yarn!
Scrap Hatty is a simple, seamless hat that is worked in the round. It has both texture and color but no complicated stitch or color work. Dig out those little balls of worsted-weight yarn and have fun!
Materials
US 8 (5 mm) 16- to 24-inch circular needle or size needed to obtain gauge US 8 (5 mm) 40-inch or longer circular needle to use as magic loop, or a set of doublepointed needles Size H (5 mm) crochet hook Stitch markers Scrap yarn or stitch holder Tapestry needle
Yarn
Worsted weight scraps!
Sizes
Toddler (Child/Small Adult, Large Adult) 16" (17.75",19.5") around
Gauge
18 sts and 28 rows = 4" in k1, p3 ribbing For pattern support, contact Danna Rachel at knitknerddesigns@gmail.com
Directions
Notes
1. For neater color changes between stripes worked in ribbing, k all sts in the first round in the new color. Resume ribbing pattern in the second round. 2. To minimize "jogs" in stripes knit in the round, work color changes as follows: With the new color, knit one round. Before knitting the first stitch of the second round in the new color, pick up the stitch below that stitch (it will be in the old color) and place it on the needle without twisting. Knit or purl the picked-up stitch together with the first stitch of the round. 3. The earflaps are worked back and forth, with the first and last stitch of each row worked in SS (k on RS, p on Ws). 4. When only one number is written, it applies to all sizes. 5. M1: increase one stitch my making a backward loop (or your preferred increase method). 6. The ties are optional. Some parents might not be comfortable with tikes and strings.
Earflaps (Make 2)
In main color, cast on 5 (7, 7) sts using a long-tail cast-on. Row 1 (WS): p1, k1 (2, 2), p1, k1 (2, 2), p1 Row 2 (RS): k1, M1, p1 (2, 2), k1, p1 (2, 2), M1, k1. 7 (9, 9) sts. Row 3 (WS): p1, k2 (3, 3), p1, k2 (3, 3), p 1. Row 4 (RS): k1, M1, p2 (3, 3), k1, p2 (3,3), M1, k1. 9 (11, 11) sts. Continue working earflap, working the first and last st in SS and the sts in between in k1, p3 ribbing pattern with a k st in the center of the earflap (Rs). Incorporate the increase sts into the ribbing pattern as you go. The outermost k1, p3 st groups will be incomplete on most rows. Work increases after the first st and before the last st on each RS row until there are 19 (23, 23) sts. End on a WS row. Do not bind off. Place first earflap on a piece of scrap yarn or stitch holder. Work second earflap, ending on a WS row. Do not bind off or cut yarn.
Hat body
Work 19 (23, 23) earflap sts in pattern (including the “edge" stitches previously worked in Ss). Cast on 17 (17, 20) sts using backward loop cast-on. Work 19 (23, 23) sts of second earflap in pattern (again, including the "edge" stitches previously worked in SS). Cast on 17 (17, 21) sts using backward loop cast-on. Join to work in the round and use a marker to mark the beginning of the round. 72 (80, 88) sts. Work one round, maintaining the ribbing pattern on the earflap and establishing the ribbing pattern on the cast on stitches. Work in pattern in main color until piece measures 0.75" (1.25", 1.25") from cast-on edge of hat body. Start working stripes of your choosing in contrasting colors. (See notes 1 and 2.) Work stripes for 3" (4", 4"). Hat measures 3.75" (5.25", 5.25") from top of earflap.
Hat decreases
Change to main color. (See notes 1 and 2.) K one round, placing markers to set up decrease rows as follows:
Toddler size
Remove stitch marker. K2 and replace stitch marker. [K24, pm] x2, k24. Child/Adult size and Large Adult size [K -(20, 22) sts, pm] x3, k -(20, 22) sts.
All sizes
[Work in pattern until 2 sts before marker, k2tog, slip marker] until end of round. 3 (4, 4) sts decreased; 69 (76, 84) sts remain. Continue to decrease 3 (4, 4) sts each round by working in pattern until 2 sts before marker, k2tog, slip marker. Switch to magic loop or double-pointed needles when necessary. Continue decrease rounds until 3 (4, 4) sts remain. Cut yarn and pull tail through remaining stitches with tapestry needle.
Finishing
Crochet border: In contrasting color with crochet hook, fasten yarn to hat with RS facing by inserting hook, pull loop through, and chain 1. Single crochet evenly along hat edge. When you reach the center tip of the first earflap, chain 34 (44, 52), slip stitch back down to beginning of chain, and continue single crochet border. Repeat at center tip of second earflap. Continue to beginning of crochet border, slip stitch into first single crochet and fasten off. Weave in ends and enjoy!
Abbreviations and Stitch Patterns
KKnitSt(s)stitch(es) PPurl PM Place marker K2tog K2tog RS Right side M1 Make 1 increase by making backward WS Wrong side loop K1, P 3 (4) ribbing K1, P3 (4) on RS, P1, K3 (4) SS Stockinette Stitch on Ws. K1, P3 (4) in round.