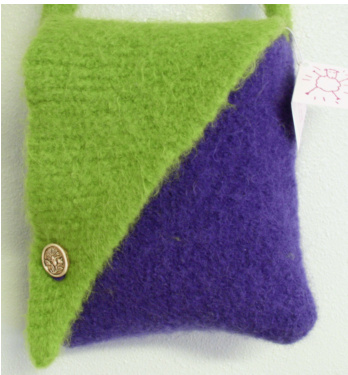
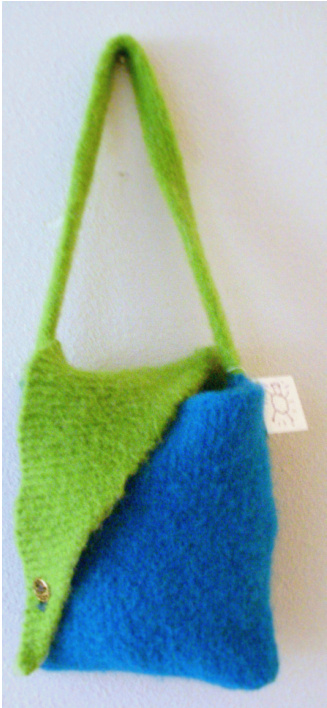
No-Sew Art Deco Felted Bag
Note: I have taken extreme measures to make sure that this bag was not sewn in any way. Many of the techniques can be replaced with sewing if desired.
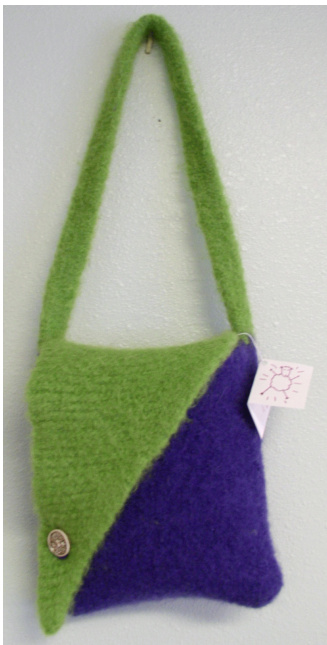
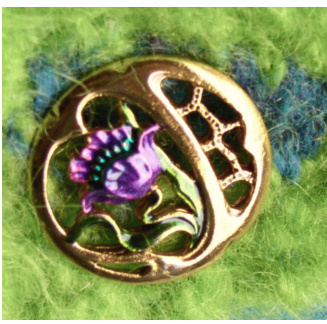
Materials: Lambs Pride Worsted in 2 contrasting colors & 1 button Needles: $24"$ circular & 4 dpns in size 11. Gauge: No Gauge, since it is felted to whatever size. Finished Size: $8.5"\mathrm{~x~}8.5"$ for main part of the bag and $25"$ for the strap. (Varies due to length of washing. Flap: Using CC: CO 1 st Row $1!\mathrm{K}$ into the front and back of the loop Row 2: K across Row 3: K to before last st, k into the front and back loop of the last st Repeat rows 2 & 3 until there are 40 sts, end on a Row 2.
Body:
Place Marker. CO 6 sts, cut a long tail (this is a provisional cast-on that willbe taken out later), change to MC CO 34 sts. Place marker and join in the round. This will be your beginning marker for all rounds. Round 1: K Round 2: K to marker, purl to the next marker Repeat round 1 & 2 once more. Continue to K every round until desired length. The bag shown was knit with entire ball of Lamb's Pride Worsted. It was about an inch longer than the flap when finished. When it is the desired length ending at either marker, turn inside out and do a three-needle bind off along the bottom.
Three Needle bind off: Divide the sts on the needles at the opposite marker so that there are 40 sts on each side of the circular needle. Line up the needles so that one is in front and the other is in back. Using one dpn k through one st on the front needle, then one st on the back needle. You should have one st on your dpn. Repeat this again. You should have 2 sts on your dpn. Slip the first st over the second like a regular bind off. Continue until you have bound off all of the sts. Cut your thread and pull through the last st. The main part of the bag is complete. Strap: Go back to your provisional CO at the top of the bag and take out the CC yarn for those 6 sts, pick up the sts on a dpn as you take them out (6 sts). Row 2: slip 1 st onto a new dpn, then slip 1 st onto a $2^{\mathrm{nd}}$ dpn. Repeat until all of the sts are divided onto 2 dpns. There should be 6 sts on each dpn. Then from the opposite end from where the working yarn is slip 2 sts from each of the 2 dpns onto a $3^{\mathrm{rd}}$ dpn. There should be 4 sts on eachf thJnroudadkt iredthTha When the strap is the desired length transfer back two sts from the 3rd dpn onto each of the first 2 dpns. There should be 6 sts on each of the 2 dpns. Make sure that your strap is not twisted. Using a modified three needle bind-off,atach the strap to the opposite side of the bag from where the strap was initially attached. Modified Three Needle Bind-Off: With the strap on the inside of the bag, k the yarn through the outside dpn, the inside dpn, then the bag a row down from the top, repeat. When there are 2 sts, slip the first st over the second st, like a regular bind off. When you have finished knitting through allthe sts, then cut your thread and pulli through the last st, like a normal Three Needle Bind-Off.
Finishing: To finish the bag tuck in any extra ends. Wash the bag in a washing machine with hot water. Check regularly because the bag will C.1- TT71 1 M with the point lined up with the bottom edge. It will look loose because it allows for items to be placed in the bag. With the point now lined up, place the button where it will look best. Cut a button hole in that spot a 1/4" bigger than the button. It will not unravel because the bag has been felted. For a nice finish, with either yarn, sew a buttonhole stitch around the buttonhole. Now that the buttonhole is complete, place the flap back down with the point at the bottom of the bag. Place your button on the buttonhole and sew the button through the buttonhole to the bag, being careful not to sew it to thefront flap. Trim offany extra ends that mayhave poked out. Your bag is now done!
Glossary:
$\mathrm{K}=\mathrm{Knit}$ $\textstyle\operatorname{\mathrm{P}}=\operatorname{\mathrm{P}}\operatorname{url}$ $\mathrm{CO}=\mathrm{Cast\,On}$ MC $=$ Main Color $\mathrm{CC=}$ Contrasting Color dpn $=$ Double Pointed Needle dpns $=$ Double Pointed Needles sts $=$ Stitches $\mathbf{st}=$ stitch


