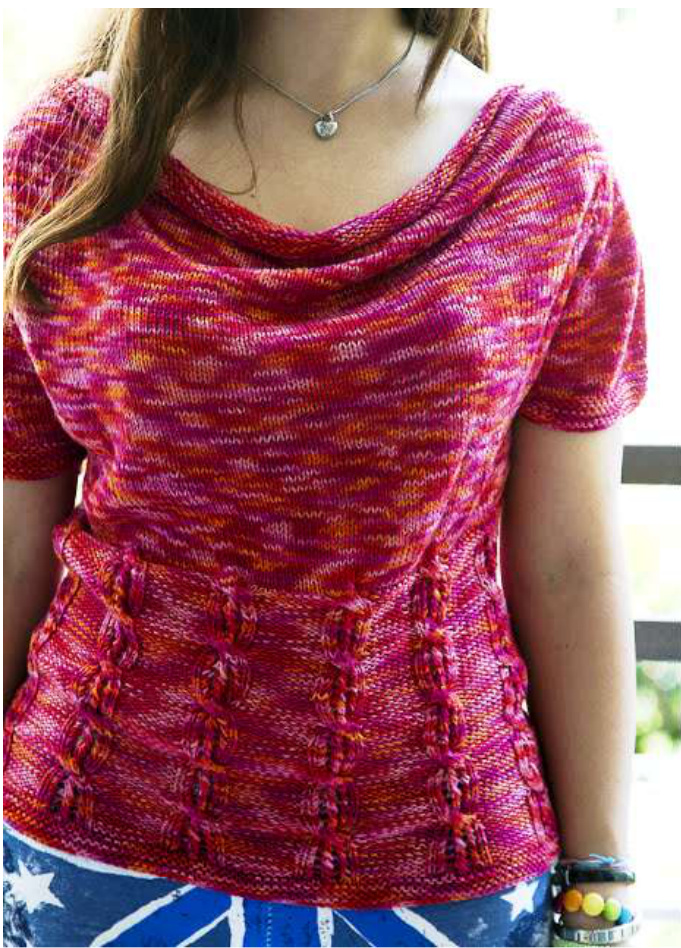
The pattern is very flexible and you can easily shape it for your own size by increasing or decreasing the number of stitches on each row. Instructions follow : Abbreviation: st = stitch R = row M1 = Marker for beginning of row M = Marker K = knit P = purl yo = yarn over k2t = knit 2 together Materials (S/M size) : 250 gr of TIRRENO yarn from Lane Borgosesia (50 gr = 125 m) col. n. 824 Circular needle 3,5mm 5markers Gauge 10x10 cm = 20st x 32r Cast on 144 st on the circular needle and join in a round being careful not to twist the stitches. Mark the beginning of the round with a stitch marker (M1).
1st R: Work in stockinette stitch. Insert the markers as follows: 30 st, M, 2 st, M, 80 st, M, 2 st, M, 30 St. Stitches are as follows: 60 st for the back, 2 st for the 1st sleeve, 80 st for the front, 2 st for the 2nd sleeve. R 2 - 3 - 4 - 5 - 6: Work in stockinette stitch, increasing 1 st before and after the 2 st between the Ms. [Explanation : \* knit to M, make 1, slip M, knit 2st, slip M, make 1\*, repeat from \*, then knit to end of row (M1)] R 7: Begin short rows on the front. Work as before until 2 st before 3"d M, turn and purl until 2 st before 2nd M, turn and knit until 3 st before 3rd M, turn and purl until 3 st before 2"d M, turn and knit to end of round, making all the usual increases for the sleeves. R 8 - 9 - 10 - 11 -12: as row 7. R 13: Work in stockinette stitch, making the usual increases. R 14: Work in stockinette stitch, at the same time place the 1" and 2"d M so as to have 4 st in between, and consequently, make all your increases inside the markers. Do the same for 3'd and 4'h M. R 15 - 16 - 17 - 18: Work in stockinette stitch, making the usual increases. R 19 : Short rows again. Work as before until 1 st before 3"d M, turn and purl until 1 st before 2"d M, turn and knit to end of round, making all the usual increases for the sleeves. R 20 - 21 - 22 - 23 - 24: as row 19. R 25 and following: Work in stockinette stitch, making the usual increases. When you reach a number of 50 st between the M, make the increases every other row. When you reach a number of 60 st between the M, put those 60 st on a stitch-holder (or on loose yarn), do the same for the second sleeve. Next row, when reaching the 1" M : cast on 3 st, skip the 60 st on the stitch-holder, join after the 2"d M, knit until 3rd M, repeat (cast on 3 st, skip 60 st), knit until end of round. Keep working in stockinette stitch for 20 rows. Start knitting the 12 cables on 192 st. [see cable instructions] Repeat 5 times the cable pattern. Work 10 rows in garter stitch and cast off. Pick-up the sleeve stitches and work 6 rows in garter stitch, cast off. · R1 - \*k 8, p 8, repeat from \* till end of round · R2 and all even rows: \* k 8, p 8, repeat from \* till end of round ●R3 - \*place 4 st on a stitch-holder in front, k 4, k the 4 st from the stitch-holder, p 8, repeat from \*发 R5 - 7 - 9 - 11 - 13: \*k 1, k2t, yo, k 2 st right-crossed (knit the 2"d stitch on the left needle without slipping it, knit the Ist stitch you just skipped, slip the 2 stitches) yo, k2t, k 1, p 8, repeat. Start R1 again] That's it ! Good luck to those of you who want to have a try! Word of advice: the amount of yarn was hardly enough for me, so if you want to make the garment a little wider or longer, you might need an extra ball!


