
Ingredients: Some left over sock yarn. 4 DPNS I used 2.5 cm Gauge: about 9 stitches per inch Top: Using a provisional cast on Knit 9 stitches purl back across knit to last stitch wrap and turn purl to last stitch wrap and turn continue like this tillall but one stitch is wrapped, then un wrap. Creating the "toe' unzip your provisional cast on and you're ready to knit in the round. Divide the stitches not so evenly around 3 needles. If you need to pick up stitches remember to K2tog so you have 18 stitches. Created out of necessity, it should help your kid stop sucking their thumb. (Well it helped mine at least!) This is probably the dorkiest thing I've ever written down. I made it for my DD to wear so she wouldn't suck her thumb. It was a good reminder for her. It's mainly just a thumb from a mitten or glove with out the rest of it.. DORKY I know! This is a great way to use up those yarnlets. This is a simple enough pattern, written really relaxed so have fun! Knit until it's about 2 inches from the top. (Or how ever long your kid's thumb is.) Finishing: On the last round K 3 on the 4th stitch, start to cast off. Cast off until you only have 4 stitches left.
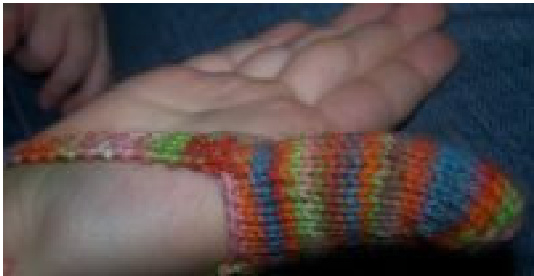
Knit back and forth (garter stitch) until it's about 4 inches or when it will fit around your kid's hand. (the ball of the hand.) Then using a 3rd needle pick up 4 stitches from the other side of The Thumb Thingy and using 3 needles bind off the 4 live stitches with the 4 picked up stitches. We want it to go over the thumb and around the hand to stay on. See the pix. I found that connecting the band to the thumb thingy it stays on better than the button I used for the first one. But if you want a button feel free to make a button hole and then use a button. Enjoy! I hope it works for you!


