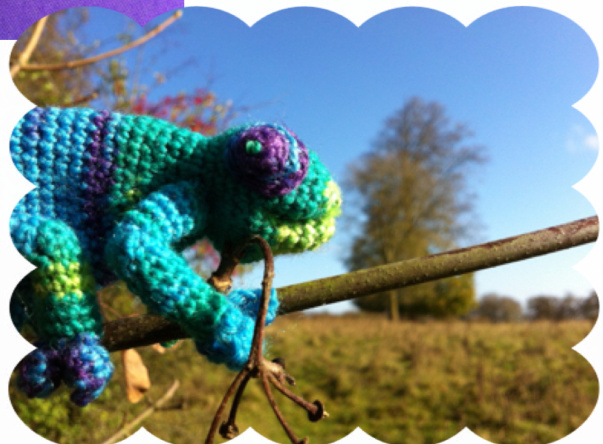
theodore - chameleon finger puppet
by annette brausch
materials:
25g Schachenmayr Regia, my first Regia (pictured here in Dominik - 01894) or other fingering weight/4ply yarn 2 mm (14/B) & 2.5 mm (12/C) crochet hooks tapestryneedle small amount of filling material
abbreviations
difficulty: intermediate (increasing, decreasing, short row shaping, sewing) time to complete project: circa 8-12 hours gauge/size: 34 sts x 36 rows = 10 x 10 cm; worked at this gauge the length of the chameleon, excluding tail, is roughly 8 cm; it should fit the index finger which is meant to reach either into the lower or beg begin, beginning ch st chain stitch dc double crochet (= US single crochet) pm place marker prev previous rep repeat rnd round SC single crochet (= US slip stitch) st(s) stitch(es) t ch turning chain tog together \* repeatbetween asterisks the number in brackets at the end of a round or row gives the total amount of stitches in that round or row unless otherwise specified the stitches worked are double crochet (= US single crochet) pictures show right hand version crocheted in continuous rounds from the tip of the tail to upper and lower jaw; eyes and legs are worked separately, then sewn onto head and body respectively - due to small parts the puppet is not intended to be used by children
tail
with 2mm hook - 3 ch sts, link with sc to form circle rnd 1 - 2 in 1; 2 (4); pull tail end of yarn through circle, bringing it to the front; tug it and push up sides to start tail shape of chameleon; place marker for rounds rnd 2 -(4) rnd 3 - 2 in 1; 3 (5) rnds 4-8 - (5) rnd 9 - 4; 2 in 1 (6) rnds 10-17 - (6) start stuffing the tail (be careful not to overfill so that it remains flexible enough to be curled up later) rnd 18 - 5; 2 in 1 (7) rnds 19-22 - (7) rnd 23 - 6; 2 in 1 (8) rnds 24 & 25 - (8) rnd 26 - 7; 2 in 1 (9) rnd 27 - 8; 2 in 1 (10) rnd 28 - 9; 2 in 1 (11) rnd 29 - 2 in 1; 9; 2 in 1 (13) rnd 30 - 12; 2 in 1 (14) rnd 31 - 3 sc; 8; 3 sc (14) rnd 32 -2 in 1; 12; 2 in 1 (16) rnds 33 & 34 - 4 sc; 8; 4 sc (16) rnd 35 - 2 in 1; 15 (17) rnds 36 & 37 -5 sc; 8; 4 sc (17) rnd 40 for right hand version - 12; to close the top of the tail(figs 3a, b & c) - 13th and 10th (2 in 1); 14th and 9th, 15th and 8th; 16th and 7th; 17th and 6th; 18th and 5th; 1st and 4th of prev rnd; 2nd and 3rd of prev rnd (2 in 1); pm for newrnd rnd 40 for left hand version -8;to close top of the tail (see fig. 3)- 9th and 6th (2 in 1); 10th and 5th; 11th and 4th; 12th and 3rd; 13th and 2nd; 14th and 1st; 15th and 18th of prev rnd; 16th and 19th of prev rnd (2 in 1); pm for new rnd
body and head
rnds 1-5 for left hand version rnd 1 - 11 ch sts; 2 in 1 into 1st st of closure; 4sc; 5 (22) (fig. 4) rnd 2 - 11 into ch sts; skip 1; 2 in1; 8; 2 in 1 (23) rnd 3 - (23); change to 2.5 mm rnds 1-5 for right hand version rnd 1 - 11 ch sts; 2 in 1 into 1st st of closure; 5; 4sc (22) (fig. 4) rnd 2 - 11 into ch sts; skip 1; 2 in1; 8; 2 in 1 (23) rnd 3 - (23); change to 2.5 mm
body and head, continued
rnd 1 - 6 ch sts; 1 sc into 17th st of prev rnd; \*3, 2tog\* rep; 4; pm (19) rnd 2 - 6 into ch sts; skip 1; 12 (18) rnd 3 - 2; \*2tog, 6\* rep (16) rnd 4 -7; 2tog; 3; 2tog; 2 (14) rnd 5 - \*2tog, 2\* rep; \*2tog\* rep; 2 (10) change to 2 mm rnd 6 - \*2tog\* rep 4 times (5) rnd 7 - 1 sc; bind off continue with lower jaw
lower jaw
start at left bottom corner of mouth (fig. 6c); leave long enough tail end to sew together upper and lower part later rnd 1 -3; \*2tog, 2\* rep; 2tog; 3; 5 ch sts (18); 1 sc into same loop as1t st; o rnd 2 - skip 1; 11; 2tog [2'ld st into ch st]; 4 into ch sts (16) rnd 3 - 2tog; 3; 2tog; 4; 2tog; 3 (13) rnd 4 -4; 2tog: 7 (12) rnd 5 - 1; 2tog; 2; 2tog; 5 (10) change to 2 mm rnd 6 - \*2tog\* rep 4 times (5) rnd 7 - 1 sc; bind off close gap between upper and lower jaw at the back and sew together front with a few stitches (fig. 7)
leg, make 4
with 2mm; 8 ch sts, link with sc; pm rnd 1 - 6; 2tog rnds 2-5 - (7) the following two rows form the knee (not counted as rounds) row a -3; t ch row b - 3; t ch rnd 6 - 3; 2tog [= 1 st into left side of row a, 1 st into rnd 5] (fig. 8); 2; 2tog [= 1 st into rnd 5 and 1 st into right side of row b]; pm rnd 7 - (7) rnd 8 - 2; 2 in 1; 4 (8) rnds 9-12 - (8) rnd 13 - 1 sc; bind off stuff leg with filling; adjust angle of knee with a few stitches if necessary (fig. 9)
foot, make 4
with double thread, 2.5 mm, 10 ch sts weave in ends; sew foot onto leg and leg onto body (fig. 12) note that on the front feet the two toes point inwards and the one toe outwards, whereas on the rear feet it is the other way round; the knees point towards each other
eye, make 2
2 mm hook; 3 ch sts, link with sc to form circle rnd 1 - 2 in 1, rep twice (6), place marker rnd 2 - 2 in 1; 1; rep twice (9) rnd 3 - 2 in 1; 2; rep twice (12) 1 sc; bind off shape eyes into cone form and stitch on 'pupil in contrasting colour (unless contrast is already provided by selfstriping yarn); sew eyes onto head (with gaze directed into diferent directions for maximum effect)
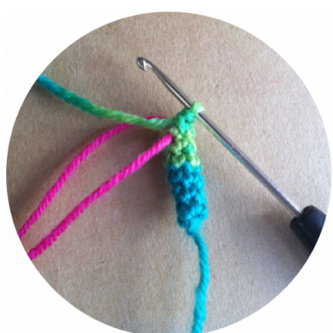
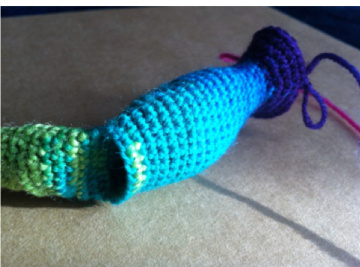
fig. 2 - tail with marker for round
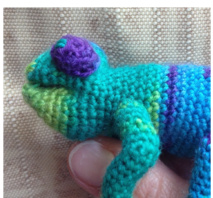
fig. 1a - finger in lower jaw (above) fig. 1b - finger in upper jaw (right) figs 3a & b - rnd 40, closing the top of the tail
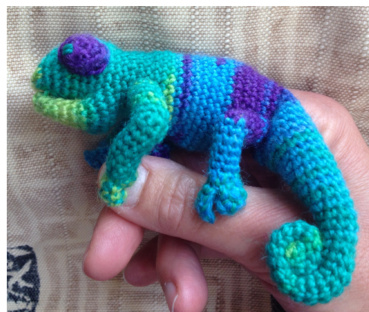
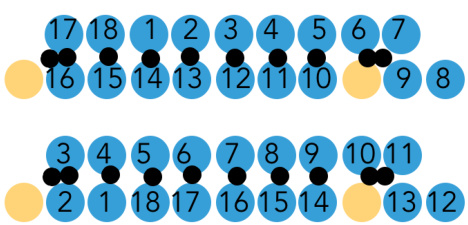
fig. 4 fig. 3c - rnd 40, right hand version (top); left hand version (bottom)

fig. 6c - start of rnd 1 for lower jaw
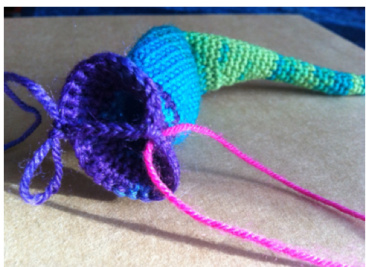
fig. 5a - rnd 1 of upper jaw
fiq. 5b - back view

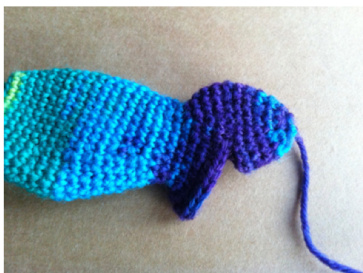
fig. 6a - upper jaw completed
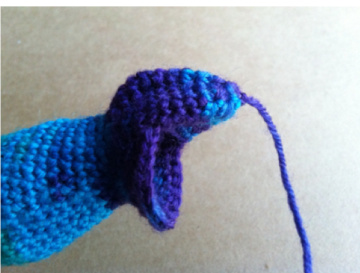
fig. 6b - and squeezed into shape
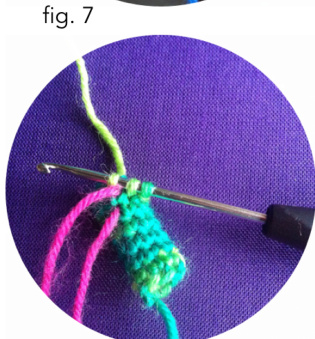
fig. 8 - rnd 6 of leg
fig. 9 - shaping of knee
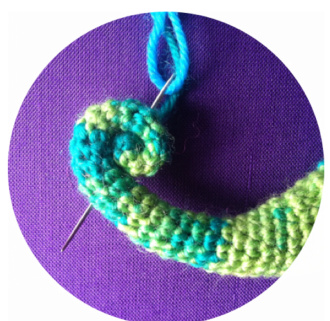
fig. 11 - curl tail and hold in place withafew stitches
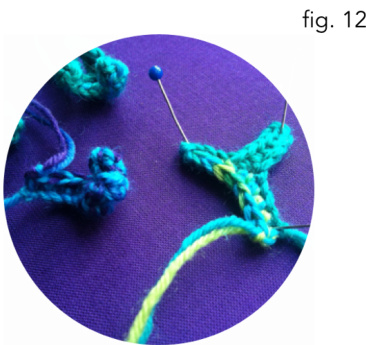
fig. 10 -foot