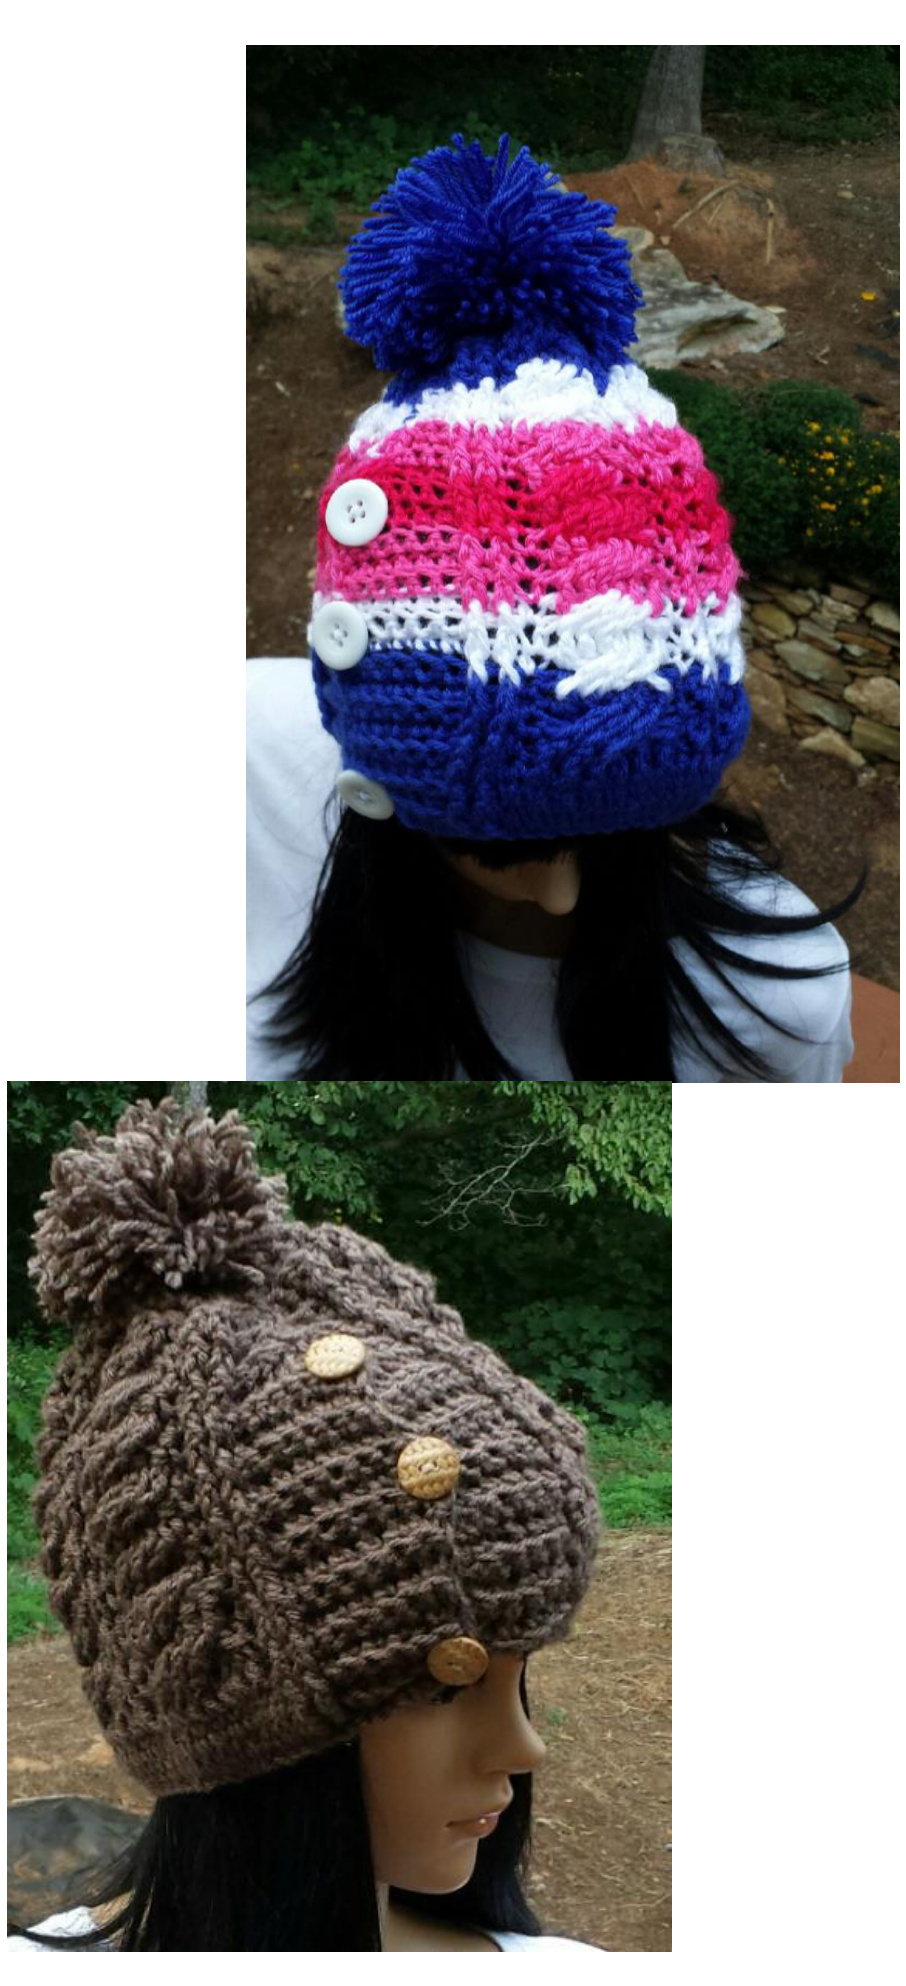
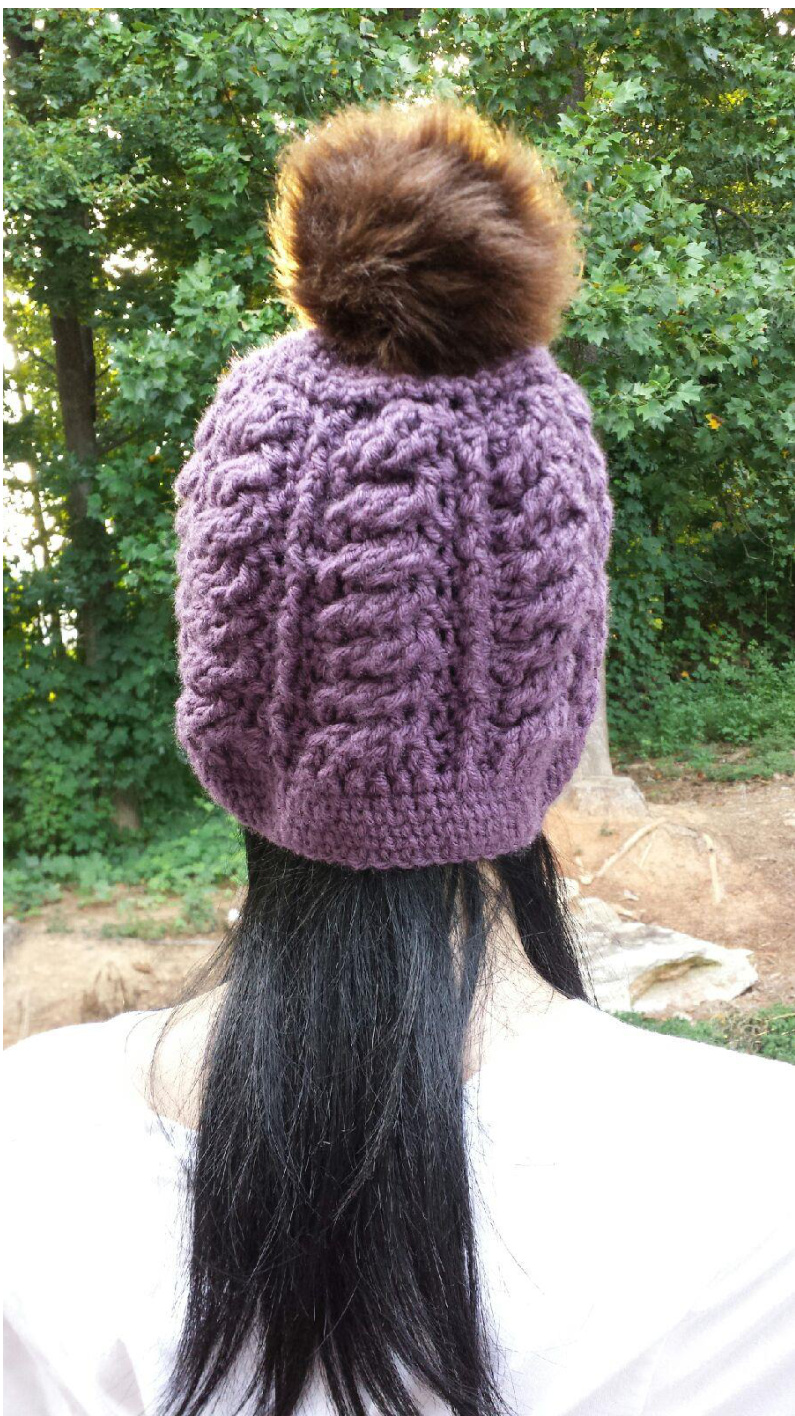
Crochet Cable Hat
Getting Started

SIZE: One size fits most adults and teens
YARN:
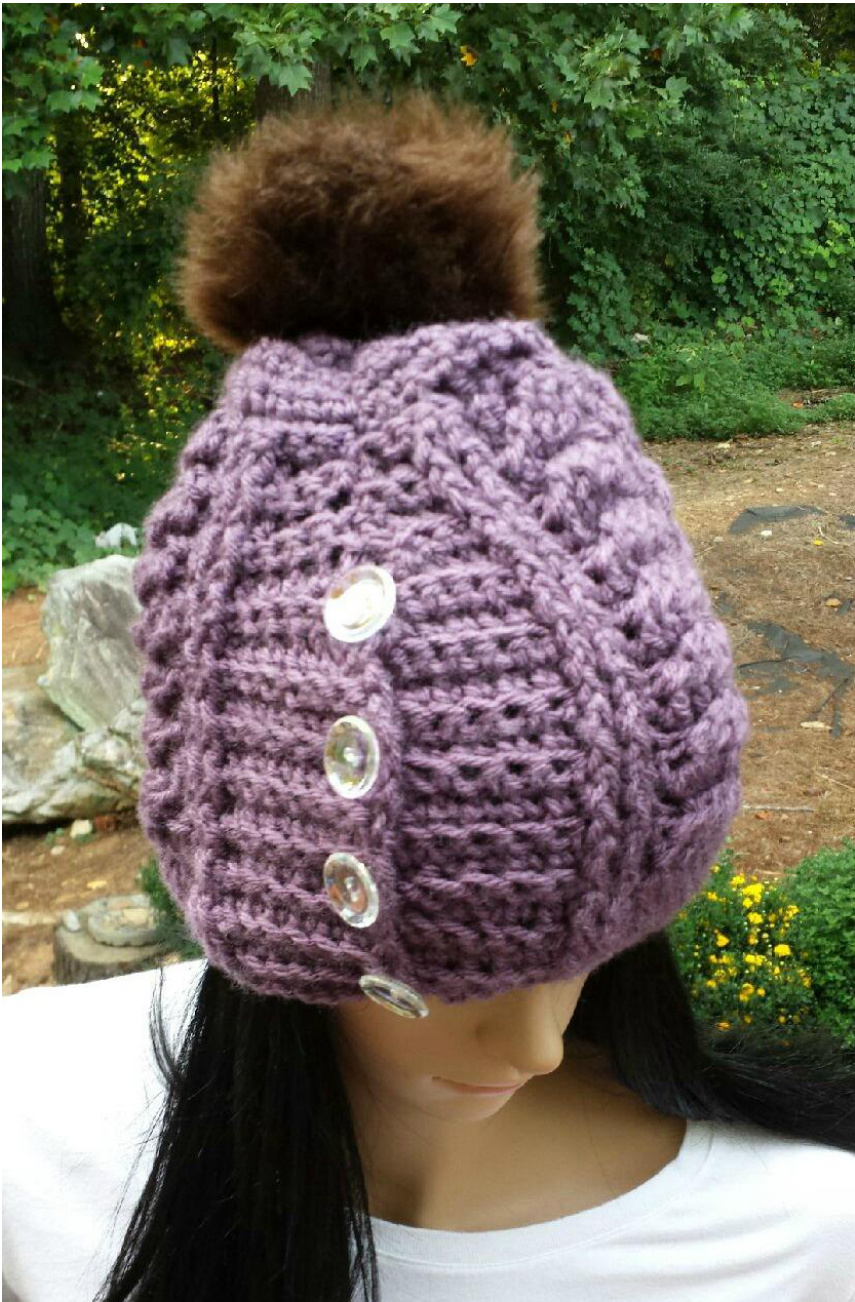
Approx. 250 yards of #4 Worsted Weight Showing In: Lions Brand, Vanna's Choice Dusty Purple #146 (2)-skeins 3.5oz/ 100g/ 170yd / 156m per skein FINISHED MEASERMENT: Finished Size: 22" (55.9 cm) circumferen CROCHET HOOKS: G6/(4.00mm) - Band 7/(4.50mm) - Remain of hat
NOTIONS:
Yarn needle (4) Buttons approx. size: 7/8" (22mm) (3) Stitch markers 1% yds. Elastic cord, size: (1 mm)
GAUGE:
14 sts and 15 rows= 4"/10cm over single crochet stitch pattern, using G6/(4.00mm) hook.
ABBREVIATIONS USED:
ch(s) chain(s) dec decrease RS right side SC single crochet slst slip stitch SM stitch marker st(s) stitch(es) YO yarn over
SPECIAL STITCHES USED:
SSC-Split single crochet: Insert hook between the 2 vertical legs of the next stitch (or the V), YO, pull up a loop, YO and pull through two loops on hook. You can see instructional videos of both the SSC here: http://www.youtube.com/user/Guchetdesigns
sc2tog-Single crochet 2 together: Insert hook into stitch and draw up a loop. Insert hook into next stitch and draw up a loop. YO, draw through all 3 loops on hook. Fpdc-front post double crochet- YO and insert hook from the front to the back around the post of the dc on the previous row. Complete as for regular dc. Bpdc- back post double crochet- YO and insert hook from the back to the front around the post of the dc on the previous row. Complete as for regular dc. Fptr- Front post treble crochet-Y0 2 times, insert hook from front to back to front around the post of the corresponding stitch below, YO and pull up loop [YO, draw through two loops on hook] 3 times.
LET'S KEEP IN TOUCH!
Email: crochetbyguchet@gmail.com Visit our store: http://GuChet.etsy.com Facebook:https://www.facebook.com/crochetbyguchet Twitter: http://twitter.com/GuChet Youtube: http://www.youtube.com/user/Guchetdesigns Pinterest: http://www.pinterest.com/guchet/boards/
LEGAL STUFF:
2009-2014Gu'Chet All Rights Reserved. Reproduction prohibited. This original design pattern is property of Gu'Chet and is intended for personal use only. Please so not reproduce this pattern or product for sale without written permission.

Crochet Cable Hat
Step 1: Creating the Ribbed Band
Using smaller size: G6/(4.00mm) hook Ch 71. Row 1 (RS): Sc in the second chain from the hook (skipped stitch counts as 1st stitch) and in each chain across—71 sts. Place SM to indicate RS. Row 2 (WS): Ch 1 (counts as 1"t stitch), turn; sc in back loops of 2nd stitch from hook and next 5 sts, SSC (see Special Stitches) in next 57 sts, sc in back loops of next 6 sts, end with sc in chain skipped at beginning of row one-71sts. Row 3 (RS): Ch 1 (counts as 1"t stitch), turn; sc in back loops of 2nd stitch from hook and next 5 sts, fpdc in next 2 sts one row below the row you are currently working on, SSC in next 53 sts, fpdc in next 2 sts one row below the row you are currently working on, sc in back loops of next 6 sts, end with sc in last chain stitch—71sts.
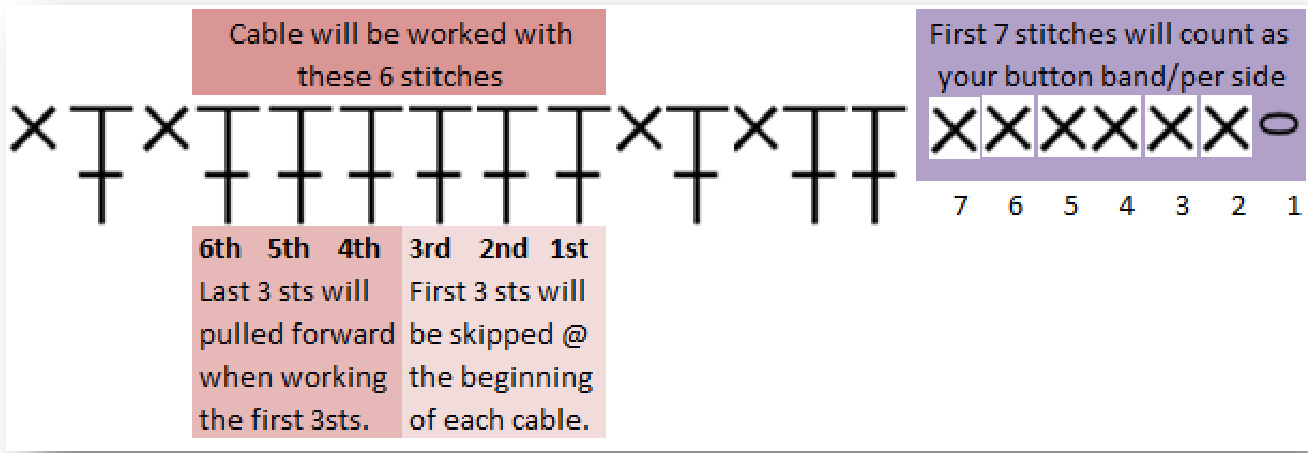
Row 4 (WS): Ch 1 (counts as 1"t stitch), turn; sc in back loops of 2nd stitch from hook and next 5 sts, bpdc in next 2 bpdc, SSC in next 53 sts, bpdc in next 2 bpdc, sc in back loops of next 6 sts, end with sc in last chain stitch71sts. Row 5 (RS): Ch 1 (counts as 1st stitch), turn; sc in back loops of 2nd stitch from hook and next 5 sts, fpdc in next 2 fpdc, SSC in next 53 sts, fpdc in next 2 fpdc, sc in back loops of next 6 sts, end with sc in last chain stitch—71sts. Row 6 (WS): Repeat row 4-71 sts. Note: You can replace regular single crochet (sc) for the SSC stitch if you'd like. Note: First 7 stitches at the beainning and end of each row
Step 2: Form Sides of Hat
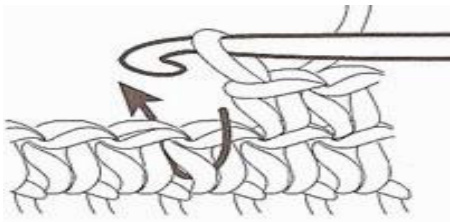
Switching to larger size: 7/(4.50mm) hook Row 7 (RS): Ch 1 (counts as 1st stitch), turn; sc in back loops of 2nd stitch from hook and next 5 sts, fpdc in next 2 fpdc, sc in next stitch, fpdc in next 6 sts one row below, sc in next stitch, \*fpdc in next st one row below, sc in next stitch, fpdc in next 6 sts one row below, sc in next stitch\*. Rep from \*to\* 4 more times. Fpdc in next 2 fpdc, sc in back loops of next 6 sts, end with sc in last chain stitch -71 sts and (6) 6 fpdc sets. Row 8 (WS): Ch 1 (counts as 1st stitch), turn; sc in back loops of 2nd stitch from hook and next 5 sts, bpdc in next 2 bpdc, \*sc in next sc, bpdc in next 6 bpdc, sc in next sc, bpdc in next bpdc\*. Rep from \*to\* 5 more times. Bpdc in last bpdc, sc in back loops of next 6 sts, end with sc in last chain stitch—71 sts. Row 9 (RS): Ch 1 (counts as 1st stitch), turn; sc in back loops of 2nd stitch from hook and next 5 sts, fpdc in next 2 fpdc, \*sc in next sc, skip next 3 fpdc, fptr (see special stitches) in the 4th, 5th and 6th fpdc, working behind last 3 fptr just made (fold last 3 fptr forward), fptr in the skipped 1t, 2nd and 3rd fpdc, sc in next sc, fpdc in next fpdc\*. Rep from \*to\* 5 more times. Fpdc in last fpdc, sc in back loops of next 6 sts, end with sc in last chain stitch —71 sts. Row 10 (WS): Ch 1 (counts as 1st stitch), turn; sc in back loops of 2nd stitch from hook and next 5 sts, bpdc in next 2 bpdc, \*sc in next sc, bpdc in next 6 bptr (Working straight across), sc in next sc, bpdc in next bpdc\*. Rep from \*to\* 5 more times. Bpdc in last bpdc, sc in back loops of next 6 sts, end with sc in last chain stitch—71 sts.
Row 11 (RS): Repeat row 9. Row 12 (WS): Repeat row 10. Row 13 (RS): Repeat row 9. Row 14 (WS): Repeat row 10. Row 15 (RS): Repeat row 9. Row 16 (WS): Repeat row 10. Row 17 (RS): Repeat row 9. M at beginning and end of row 17 to indicate the first and last (7) stitch button ban
Crochet Cable Hat
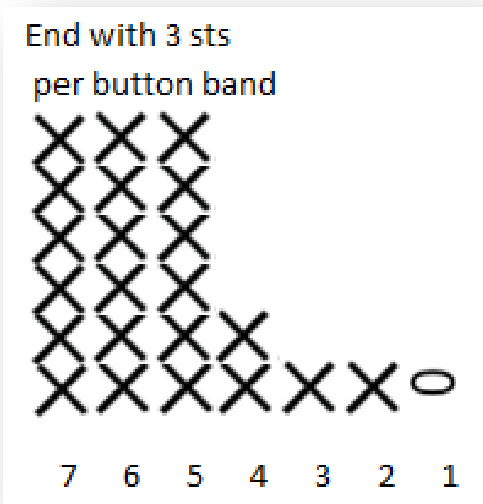
Decreasing Stitches to Shape Button Band
Decrease Row 18 (WS): Turn; Slst in first 2 sts (counts as 3 decreases (2 sts and 1 chain)), sc in back loops of next 4 sts, bpdc in next 2 bpdc, \*sc in next sc, bpdc in next 6 bpdc, sc in next sc, bpdc in next bpdc\*. Rep from \*to\* 5 more times. Bpdc in last bpdc, sc in back loops of next 3 sts, end with sc2tog (see special stitches)-65sts. Decrease Row 19 (RS): Turn; Slst in first st, sc in back loops of next 3 sts, fpdc in next 2 fpdc, \*sc in next sc, skip next 3 fpdc, fptr in the next 4th, 5th and 6th fpdc, working behind last 3 fptr just made (fold last 3 fptr forward), fptr in the skipped 1st, 2nd and 3rd fpdc, sc in next sc, fpdc in next fpdc\*. Rep from \*to\* 5 more times. Fpdc in last fpdc, sc in back loops of next 2 sts, end with sc2tog—63 sts. Row 20 (WS): Ch 1 (counts as 1st stitch), turn; sc in back loops of next 2 sts, bpdc in next 2 bpdc, \*sc in next sc, bpdc in next 6 bpdc, sc in next sc, bpdc in next bpdc\*. Rep from \*to\* 5 more times. Bpdc in last bpdc, sc in back loops of next 3 sts --63 sts.
Row 21 (RS): Ch 1 (counts as 1st stitch), turn; sc in back loops of next 2 sts, fpdc in next 2 fpdc, \*sc in next sc, skip next 3 fpdc, fptr in the next 4th, 5th and 6th fpdc, working behind last 3 fptr just made (fold last 3 fptr forward), fptr in the skipped 1st, 2nd and 3rd fpdc, sc in next sc, fpdc in next fpdc\*. Rep from \*to\* 5 more times. Fpdc in last fpdc, sc in back loops of next 2 sts, end with sc in last chain st--63 sts. Row 22 (WS): Repeat row 20.
: Decreasing Stitches To Shape Top of Hat
Decrease Row 23: Ch 1, turn; sc in back loops of next 2 sts, LoosELY sc2tog 31 times, skip last fpdc (counts as one decrease), sc in back loops of next 2 sts, end with sc in last chain st-33 sts remain. st stitch), turn; sc in each stitch across ending with sc in last chain st—33 sts remait Decrease Row 26: Ch 1, turn; sc2tog 16 times, —17 sts remain. Rows 27-28: Ch 1, turn; sc in each stitch across ending with sc in last chain st —17 sts remain. Fasten off leaving a 20"/50.8cm tail for weaving. Set hat aside to create pom pom (see page 7)
Step 6: Finishing
CLOSE TOP OF HAT:
·Thread the 20"/50.8cm tail of yarn through your yarn needle. With Rs facing, weave your yarn in and out of the stitches, working in the order that you would have crocheted the stitches. Once you have pulled the length of yarn through all the stitches, hold the string tight as you pull all stitches together. At this point, the top of the hat should be closed. With Ws facing, fold hat together and use the remaining tail of the yarn to join the sides together. Work from top down, until you've reached the SM at beginning of (7) stitch button band (this means join together the decreased part of the band but no part of the 7 stitch button band). If you have enough yarn left on needle, work your way back up the hat ensuring that you have nice, tight seam and that the top is closed off. Fasten off. Attach pom pom to top of hat.
ADDELASTICTOHATBAND:
Thread elastic cord through needle. With Ws facing, weave elastic in and out of the stitches, working in the order you would've crocheted the stitches. You only need to go around once however you can go around again for extra security. It's best to try it on when you do this so it's not too loose or too tight. Tie knot to secure ends.
ADD BUTTONS:
Sew buttons to on either side of button band at %", 2",3% and 5" from bottom of band (or desired locations). Since the stitches on the button bands offer a lot of "give" we did create dedicated button holes. Fabric on opposite band should offer enough give to accommodate your buttons. Fasten off.
Weave in all loose ends.
Crochet Cable Hat
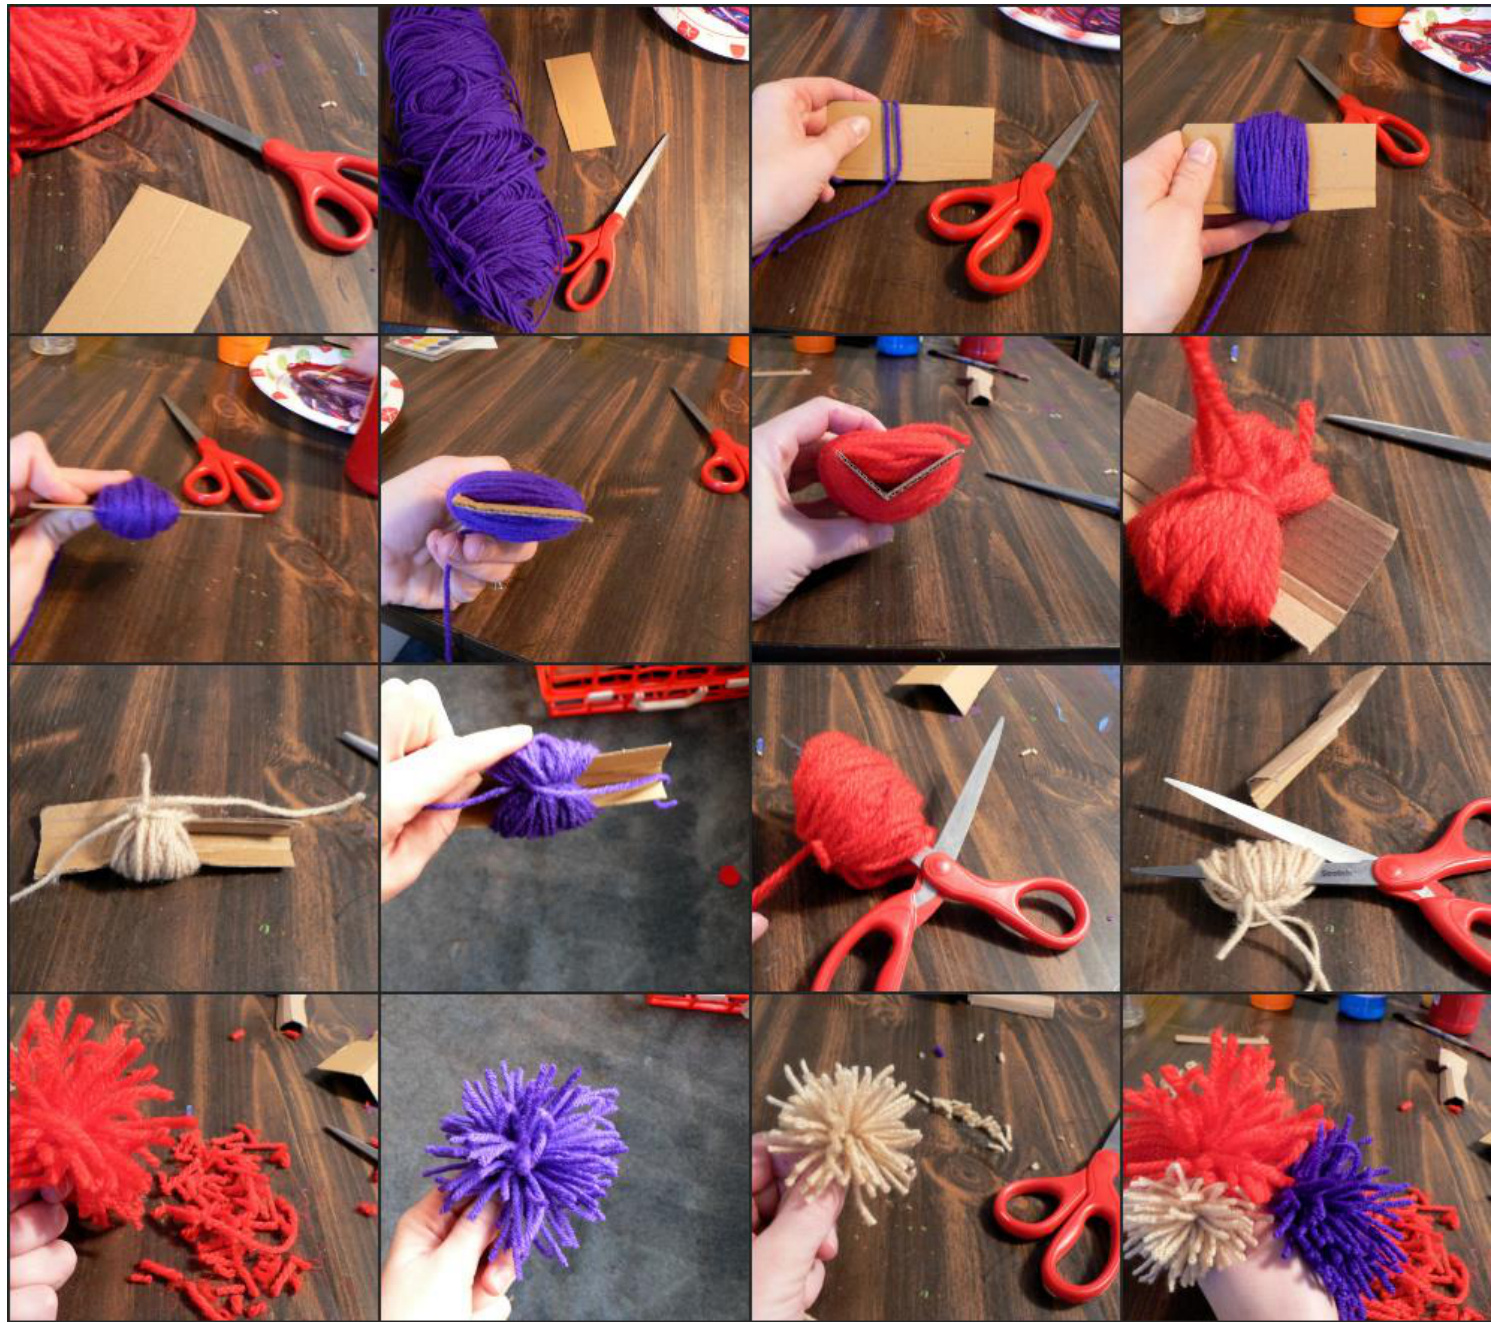
Step 5: Create Yarn Pom Pom


