Spice of Life Crochet Along #spiceoflifecal
Part Six - The Border & Finishing
Border
The border will be worked all the way around the edge of the blanket in one colour, in the round. Decide which side of the blanket you would like best to be the front of the blanket and work the border with this side facing you. To start the border take LIGHT GREEN and join the yarn to any corner stitch at the top of the blanket. \* The corner stitches are the first and last stitches of the top row and the bottom row of the blanket. You may like to mark these 4 stitches now with stitch markers.
Border Set Up Row
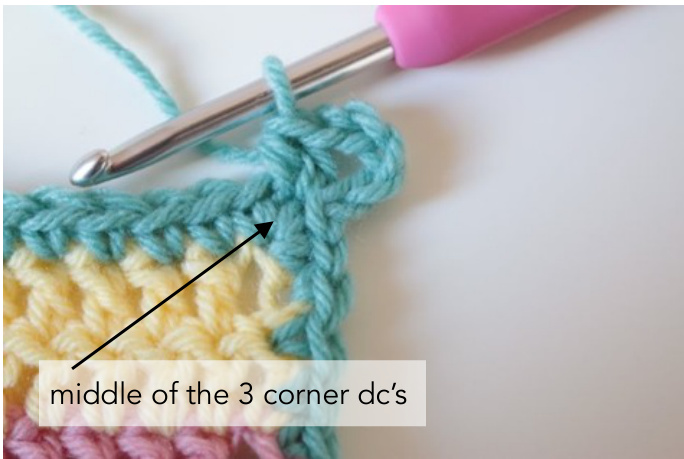
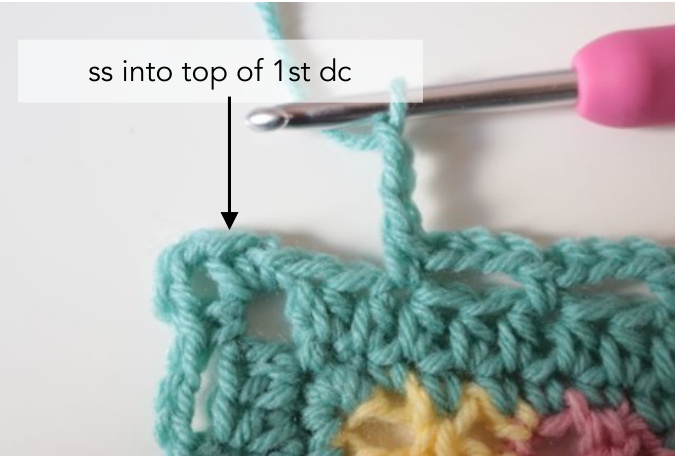
To provide a foundation to work the rest of the border from, first work a round of dc's all around the blanket. As the yarn is attached to a corner stitch, you will start with chain 1 and 3dc into this same stitch. You can then continue making dc's using the guidelines below: Corner Stitches: 3dc [if you are using stitch markers, move the marker to the middle one of these 3 dc's.] Top Edge: 1dc into each stitch (except the 1st and last stitch, which will be worked as corners) Bottom Edge: 1dc into the back loop of each starting chain (except the 1st and last stitch, which will be worked as corners) Sides: 2dc into the end of each tr row, 1 dc into the end of each dc row. \* There are only two pattern sections along the sides that are worked differently: Grannies: 2dc into the end of each row that ends with a 'shell' of 3tr's and only 1dc into the end of each row that ends with 1 tr. Waves: 1dc into the end of each dc row, 1dc into the row ending with a dc, 2dc into the end of the row ending with dtr. Once you have gone all the way around the blanket, make a ss into the 1st dc of the round. Then make a ss into the next st. This will bring you to the middle stitch of the 3 corner dc's.
Border: Round Two
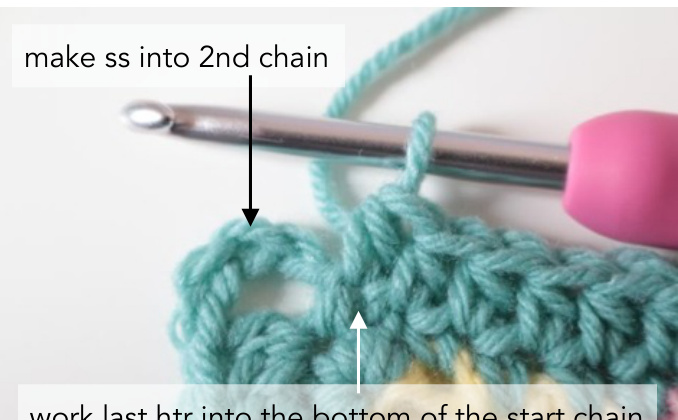
4ch [counts as 1htr, 2ch], 2htr into the same place, \*1htr into each stitch up to the middle stitch of the 3 corner dc's, work (2htr, 2ch, 2htr) into the middle dc,\* repeat from \* to \* around the blanket until you are back to the beginning, to finish make 1htr into the stitch at the bottom of the starting ch, then make a ss into the 2nd ch of the beginning 4 ch.
Border: Round Three
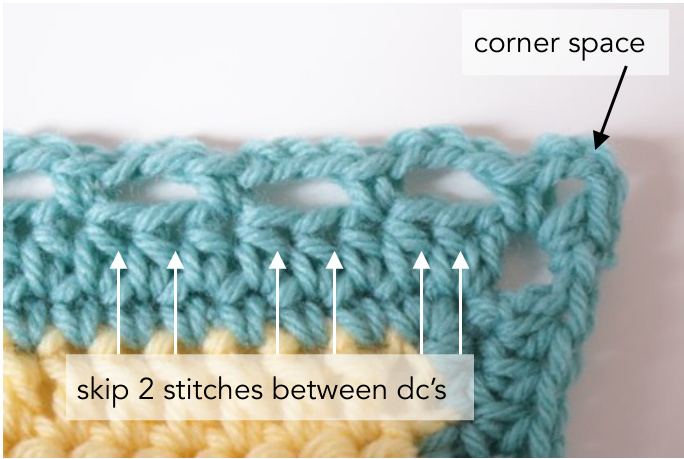
ss into the corner ch sp, 1ch, \*(1dc, 3ch, 1dc) into the corner sp, (3ch, skip 2 sts, 1dc in next st) all the way along the edge up to 2sts before corner space, 3ch, skip 2 sts,\* repeat from \* to \* around the blanket, ending the last repeat with ss into the top of the first dc of the round. \* Don't worry if you don't have exactly the right number of stitches to bring you correctly to each corner as written in Round 2 above. You can always skip 1 more or 1 less stitch if you need to. No-one will notice!
Border: Round Four
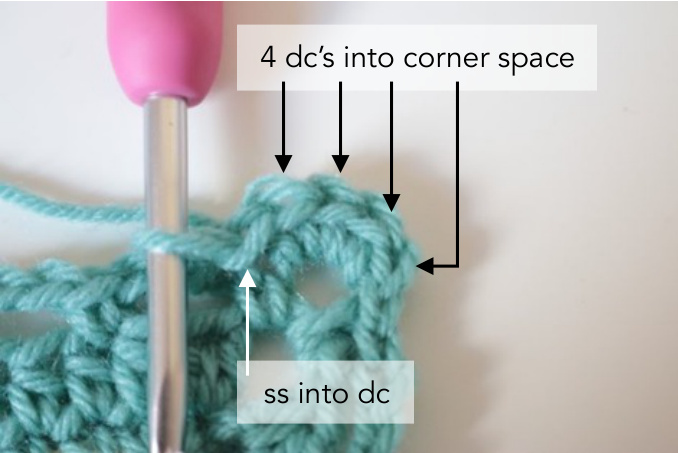
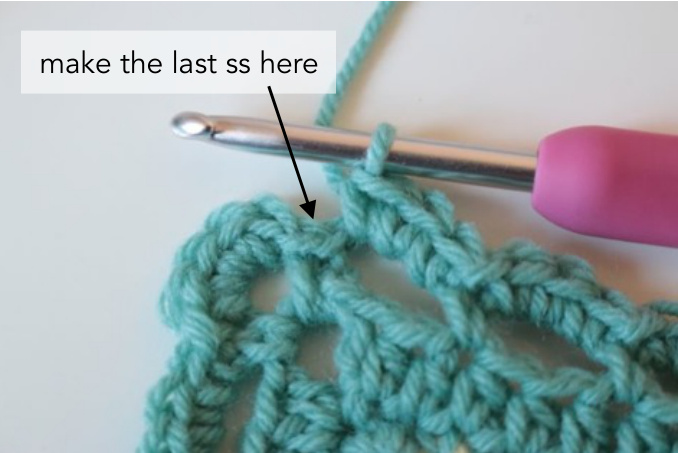
Make \*4dc into corner space, 1ss into dc, (3dc into next ch sp, 1ss into dc) along the edge until you reach the next corner,\* repeat from \* to \* around the blanket until you reach the beginning, making the final ss into the 1st ss of the round. Well done, you just made a blanket! Border
SET UP ROUND: ROUND 1
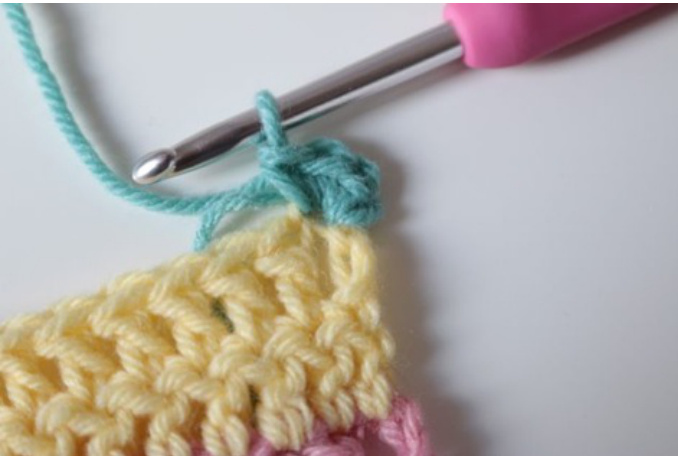
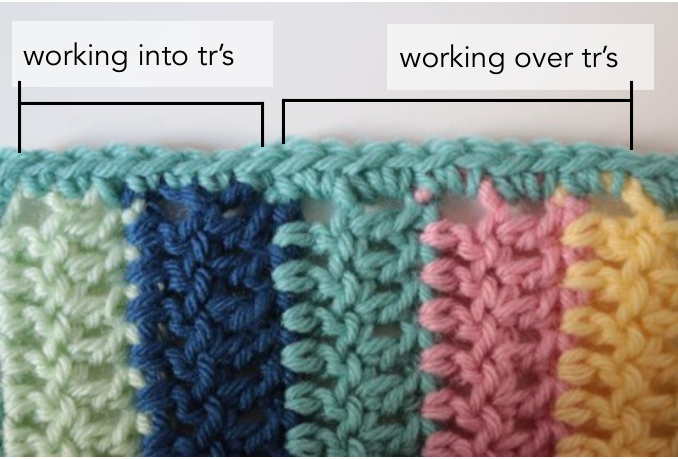
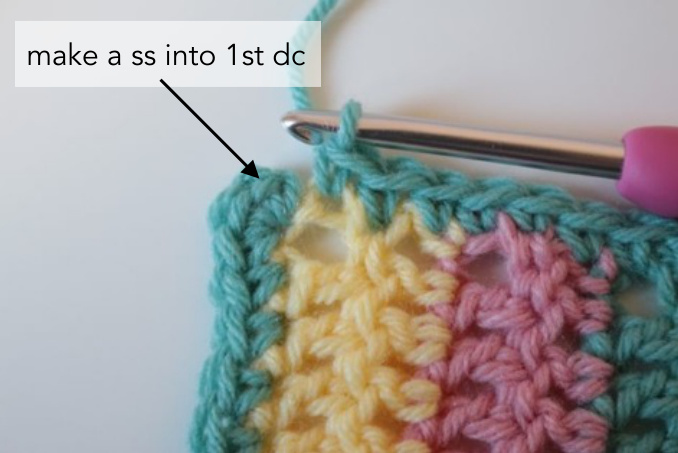
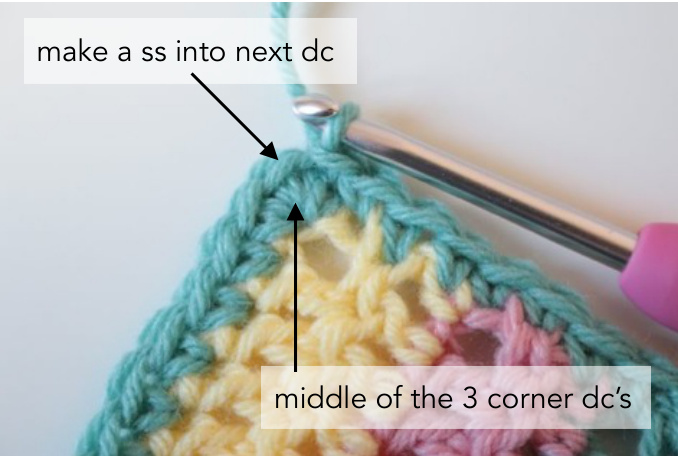
Start in either the first or last stitch of the top row. (Depending on which side of the blanket you want to be the 'right side'.) To begin, make 1 chain and then 3 double crochets in the same stitch. Work your way around the blanket, making the double crochet stitches as described in the pattern. When working into the ends of the rows for the sides of the blanket, you have a choice of working over the last stitch, or into the stitch, depending on which look you like best. If you want to work into the stitches, just push your hook between the loops making up the stitch. Aim to pick up 2 pieces of yarn with your hook and leave 1 behind. Once you are around to the beginning of the blanket you need to make a slip stitch into the very first dc you made, right back at the start of this round. Then, to get into position for the second round, you need to make another slip stitch so that you are in the middle stitch of the 3 corner stitches.
ROUND 2 Start with 4 chains, 2 of the chains count as a half treble and 2 are to make a corner space. Make two more half treble crochets into the same stitch.
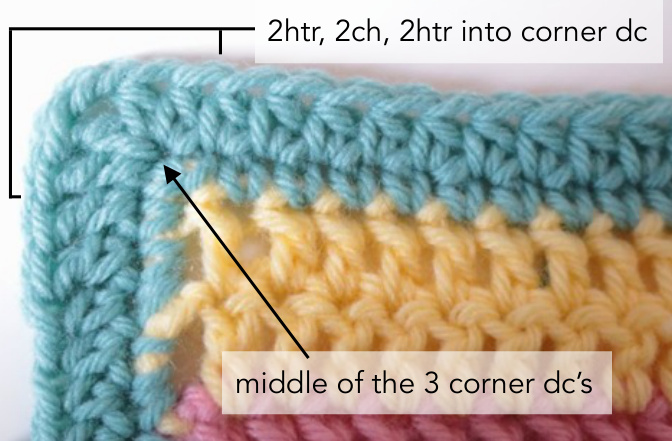
Carry on working a half treble into each stitch up to the middle dc at the corner. (You might have marked this with a stitch marker.) Work 2 half treble crochets into the corner dc, chain 2 and thenmakeanother 2half treblecrochetsinto the samestitch. Work in the same way around the blanket, 1htr in each stitch, then a corner as shown.
Once you get round to the beginning, work a last half treble crochet into the same stitch as the starting chain. The make a slip stitch into the 2nd chain of the chain of 4 at the start of the round.
ROUND 3
Start by chaining 1, then making 1 dc in the corner space. Chain 3 and make another dc into the same corner space. You now made a new corner. Work along the blanket, making a chain of 3, skipping 2 stitches and then making a dc into the next stitch.
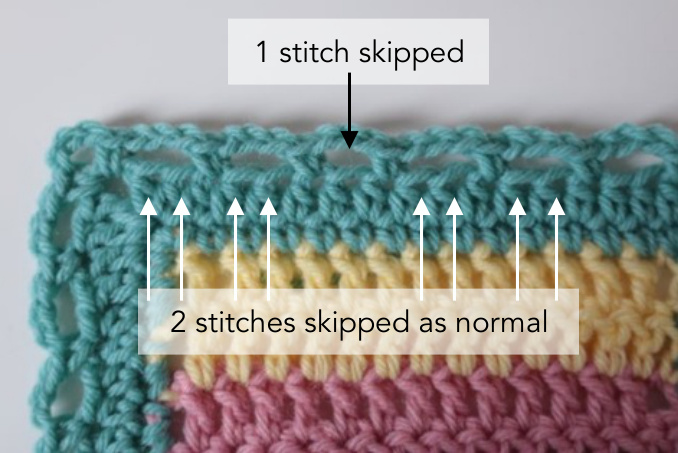
If your stitch count doesn't come out exactly right to the corner, simply adjust slightly to compensate. Skip either 1 more or one less stitch to bring you out right to the corner space. If you make this adjustment slightly away from the corner, it won't be noticeable. To end this round, make a slip stitch into the first dc of the round.
ROUND 4
Without making a chain as you normally would, instead make 4 double crochets directly into the corner space. Then make a slip stitch into the double crochet. Continue around the blanket, working 3dc into each space along the sides and 4 dc's into the corner spaces. When you have worked into the last space, finish the round with a final slip stitch into the dc from round 3.
Steam Blocking
If you wish you can also to block the blanket to help get a neater finish. It can also help straighten out any slightly cupped or imperfect edges a little. You'll need a protected surface to place the blanket on. I usually block blankets in sections over my ironing board, using a few old towels layered underneath to pin into. Shape the blanket to the shape required. You may just be able to smooth and pull the blanket into the desired shape. But if you need to, use stainless steel or blocking pins to hold things in place. Then, with your iron on the steam setting, holding the iron just above the blanket (approx 3/4cm or 2"), and let the steam only soak through the surface. It will dampen and warm the yarn and help it to relax into shape. \* Take your time with this and be careful to only ever use the steam. If the iron touches your blanket it will ruin the acrylic yarn. Once the area you are working on has dried out and cooled down completely you can move onto the next section.
DIFFERENTYARNSANDFIBERS:
This blocking method works well for the type of acrylic yarns that we are using for this blanket. If you have used a different yarn or fibre you will need to find out what method will work best for the yarn you are using.
Spice of Life Crochet Along - Stylecraft Colour Guide
#spiceoflifecal To help you make the alternative version of the blanket using the Stylecraft pack, the colours have been listed below following the layout of the original pattern. First the Rico colour is listed and then the equivalent Stylecraft Colour listed after, as shown: Row: RICO = STYLECRAFT
Part Six - The Border & Finishing
Border All RowS: LIGHT GREEN = STORM BLUE


