Sn@wman Bottler
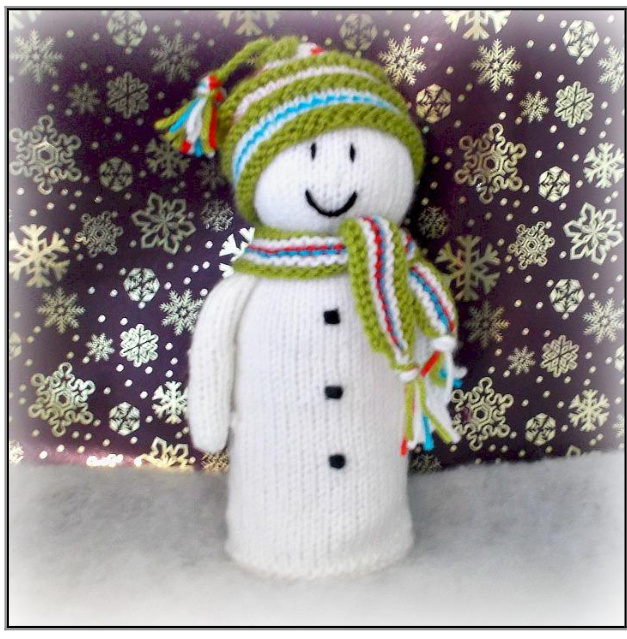
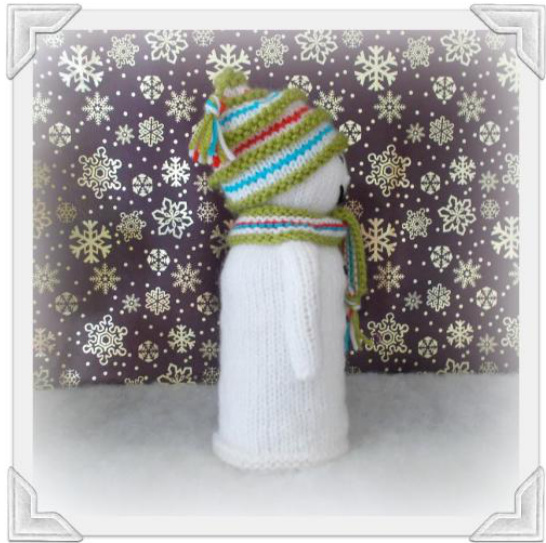
What are Bottlers? Festive knit characters who take their shape from water bottles! The knit bodies are placed over cut-off bottles, so they are rigid and stand up well. They can be used as an ornament on top of a Christmas tree (the bottle will slip over the tree top), as place settings with gifts hidden underneath them for your guests, or just as adorable decorations that won't fall over! Snowman is worked in the round except for his scarf. Features and buttons are embroidered on. Snowman is part of the 2014 Festive Bottler Collection. Look for my new patterns next festive season when a set of three new Festive Bottler characters will appear...
Yarn
DK weight yarn for the body/arms and hat/scarf in white (95 m/104 yards). Small amounts (up to 50m/55 yards) of green, blue, and red for the hat and scarf. Scrap pieces of black for the eyes and buttons.
Gauge
24 sts and 30 rows to 10 x 10 cm (4 x 4 in.) in st.st. Finished Size: approximately 19 cm (71/2 inches) tall.
Needles
3.25 mm (US 3). Double-pointed needles for working in the round (use long circular and magic loop method if preferred). Tapestry needle for sewing and for creating the embroidered features.
Abbreviations
k: knit p: purl k2tog: knit 2 together (decrease) Bind off: Cast off (UK)
Other
Fibre fill toy filling for stuffing Clean empty 5ooml water bottle. Textile glue (optional)
Body and Head
(worked in the round, bottom up) Cast on 44 sts in white. Join to work in the round, being careful not to twist. Place marker for start of round. Bottom trim Round 1: purl Round 2: knit Round 3: purl Knit for 44 rounds. Head Mark the next round with scrap yarn (this will indicate where to draw in the head later on, so don't forget to mark it) Knit for 16 rounds. Shape top of head Row 1: (k8, k2tog) 4 times, k4. (40 sts) Row 2: knit Row 3: (k7, k2tog) 4 times, k4. (36 sts) Row 4: knit Row 5: (k2, k2tog) 9 times. (27 sts) Row 6: knit Row 7: (k1, k2tog) 9 times. (18 sts) Row 8: knit Row 9: (k2tog) 9 times. (9 sts) Thread yarn through the remaining 9 sts, draw up and fasten off.
Arms
(worked in the round, top down) Cast on 8 sts, in white for Snowman. Join to work in the round, being careful not to twist. Mark the start of the round. Knit for 23 rounds Next round: k2tog, 4 times. (4 sts). Thread yarn through remaining 4 sts, draw up and fasten off.
Hat
(worked in the round, bottom up) Cast on 44 sts in green yarn. Join to work in the round, being careful not to twist. Place marker for start of round. Purl for 3 rounds, then work the stripe pattern below, once.
Stripe Pattern
Stripe 1: Change to white, knit 2 rounds. Stripe 2: Change to blue, knit 1 round. Stripe 3: Change to white, knit 2 rounds. Stripe 4: Change to green, knit 1 round. Purl 2 rounds. Stripe 5: Change to white, knit 2 rounds Stripe 6: Change to red, knit 1 round. Stripe 7: Change to white, knit 2 rounds. After finishing the stripe pattern once, work stripes 1-3 only, then follow the decrease instructions below: Decreases Change to green. k2tog to end of round. (22 sts). Purl for 2 rounds. Work stripes 5-7. Change to green. k2tog to end of round. (11 sts). Purl for 2 rounds. Draw yarn through remaining 11 sts, and fasten off. Weave in ends. Make a tassel out of all of the colours, to attach to the top of the hat. To make a twisted cord on the tassel, use a doubled over piece of yarn 3 times longer than you want for the finished cord and attach it to the tassel. Twist it tightly until it starts to kink, then fold in half and let it twist around itself.
Scarf
(worked flat, from side to side) Note: when changing colours, leave long tails, these will make the tassels at the ends when the scarf is finished. With green yarn, cast on 66 sts. Row 1 (WS): knit. Rows 2 & 3: change to white, knit to end of row. Row 4: change to red, knit to end of row. Row 5: change to blue, knit to end of row. Rows 6 & 7: change to white, knit to end of row. Rows 8 & 9: change to green, knit to end of row. Bind off all sts in knit. Knot the individual tails up to the knitting to secure them, and add 4 lengths of white to the end of the scarf that has no white tails on it. At each end of the scarf, tie all the tails from that end together in a knot and pull tight. Trim the ends to make a neat tassel.
Assembly, Embroidering Features & Attaching Details
Notes: Sewing and embroidery is done once the piece is stuffed and secured on the cut-off bottle. This makes it much easier to get the placement of the details right. The knitting is not totally attached to the plastic, so it is not too difficult to sew through it from the outside. However, you may prefer to do the embroidery and sewing before the piece is on the bottle. The bottle is cut-off to leave the bottom open. It is best not to cut the bottle first. Gather the head of the Bottler loosely to start with, so you can try your Bottler body over the top of the bottle. You can then mark where the bottom trim of the knitting sits, and cut the bottle to get the right length to suit your piece.
Assemble on Bottle
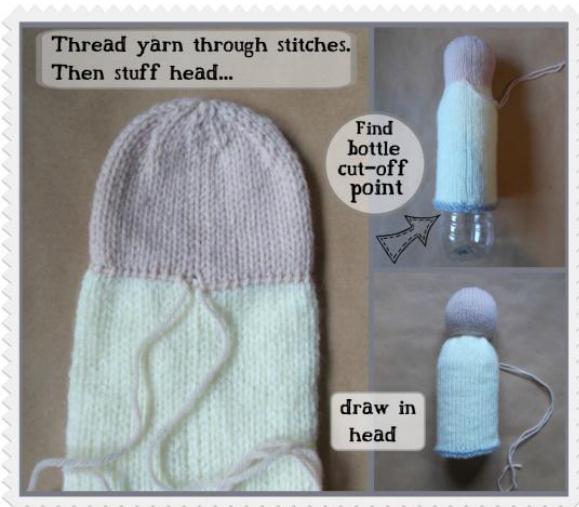
Referring to the photo above; thread a length of matching yarn through the first round of head colour stitches. Photo shows "Angel" colours but the process is the same for all Bottlers. Stuff the head and insert the cut-off bottle into your knitting, feeding the neck of the bottle right up into the head. You may need to rearrange the stuffing a little to help the bottle neck into the head. The bottle neck will provide support for the head. To form neck, draw up the yarn tightly to pull the knitting in firmly around the neck of the bottle, knot and weave in the ends.
Attach arms
Stuff arms and stitch on to the body. Start by sewing the tops of the arms shut flat. Then sew the tops of the arms to the body at about shoulder level. Secure each arm at the sides of the Snowman with stitches in as many places as needed to fix them into position, keeping stitches underneath the arm where they will not be visible.
Embroidering Features
Nose: Using white yarn, make three short horizontal stitches in the middle of the head, at the front. Eyes: Using black yarn, make two vertical stitches above the nose to form the eyes. Mouth: Using black yarn, embroider a mouth under the nose.
Attach Hat & Scarf
Fit the hat on to the head of the Snowman, angling it slightly for a jaunty look. Stitch through the brim to attach the hat securely to the head. Tie the scarf around the Snowman's neck.
Finishing Touches
Weave in any loose tails from the sewing and embroidery. If you find that the body slips around over the plastic, use textile glue to further secure the knitting to the cut-off bottle, only once all assembly & embroidery is complete.