Materials: 1 skein of a bulky wool yarn that will felt (such as Kraemer Mauch Chunky) 1 skein of Material Whirled bulky handspun yarn, no less than 75 yards Size 13 straight needles Size 10 1/2, 16 inch circular needles (longer will work also) Yarn sized darning needle Handles: \~ Using a single strand of the wool yarn, LOOSELY cast on 22 stitches. \~ Row 1, Knit \~ Row 2, (eyelet row), k1, \*yo, k2\*, repeat \* 10 times, yo, k1 (33 st on needle & you should have 11 yo total) \~ Row 3 knit \~ Continue to knit in garter stitch until piece measures 4 inches from the edge. Handle hole: \~ Row 1, k12, LOOSELY bind of 9 st, k12. \~ Row 2, k12, cast 9 st back on, k 12 (use a “cable cast on' to make the new 9 st, \~ Continue to knit in garter for 2 more inches. \~ Bind off LOOSELY. \~ Start over and make a second handle. \*To make a shoulder bag version, omit the handle holes. Holes can be poked in after felting to thread straps Felting: Set your washer on hot & add small amount of detergent. Toss in a few towels or a pair of jeans to better agitate the wool. You can put the pieces in a pillow case and rubber band or tie it shut. This makes it easier to find them and keeps the fuzzers out of your washer. Leaving the lid up, (so it does not spin out) agitate one complete cycle on heavy wash'. You should check the pieces before the cycle is complete to make sure they did not twist themselves through the handle hole. Careful! The water is hot. Once the cycle is completed, fish out your handles and check them again. I consider felting completed when the stitches are no longer visible. In my top loader it takes 2 agitation cycles to accomplish this. Your washer may take more or less so payattention. Spin out the water. Lay both handles flat to dry. Stretch out the edges if needed to make them straight. If the edges are curved somewhat it only adds to the charm. Once dry, take a scissors and give it a haircut to remove the fuzzers created from felting. Unless you want hairy handles Oof course. Now take the size 13 straight needle and find the eyelet holes you created. They are most likely pretty much felted shut, but if you feel you can find them. There should be 11 holes on each handle. Poke them open with your knitting needle. Bag Body: andle with the eyelet row facing UP and begin in the first eyelet hole on the right side \~ Using your 10 1/2 circ needle, put your needle through the hole, wrap the handspun yarn around it and knit it around the hole. \~Make 2 yarn overs (yo) by wrapping the yarn around the needle as if to knit 2 times. \~ Knit into the next eyelet hole. Continue in this pattern (K1, yo, yo, K1) until you have worked across the handle edge. \~ When you reach the end of the first handle, take the second handle (with eyelet row facing up) and knit into the first eyelet hole of the second handle, pulling your stitch tight so the 2 handles are pulled together. Do not yo between handles \~ Continue in the same pattern as the first handle (K1, yo,yo, K1) when you reach the end, connect and begin knitting in theround. \~ In your first round, when you come to the yarn over stitches, knit the first as normal and knit the second one in the back Of thestitch.
Voila! You now have a beautiful bag!
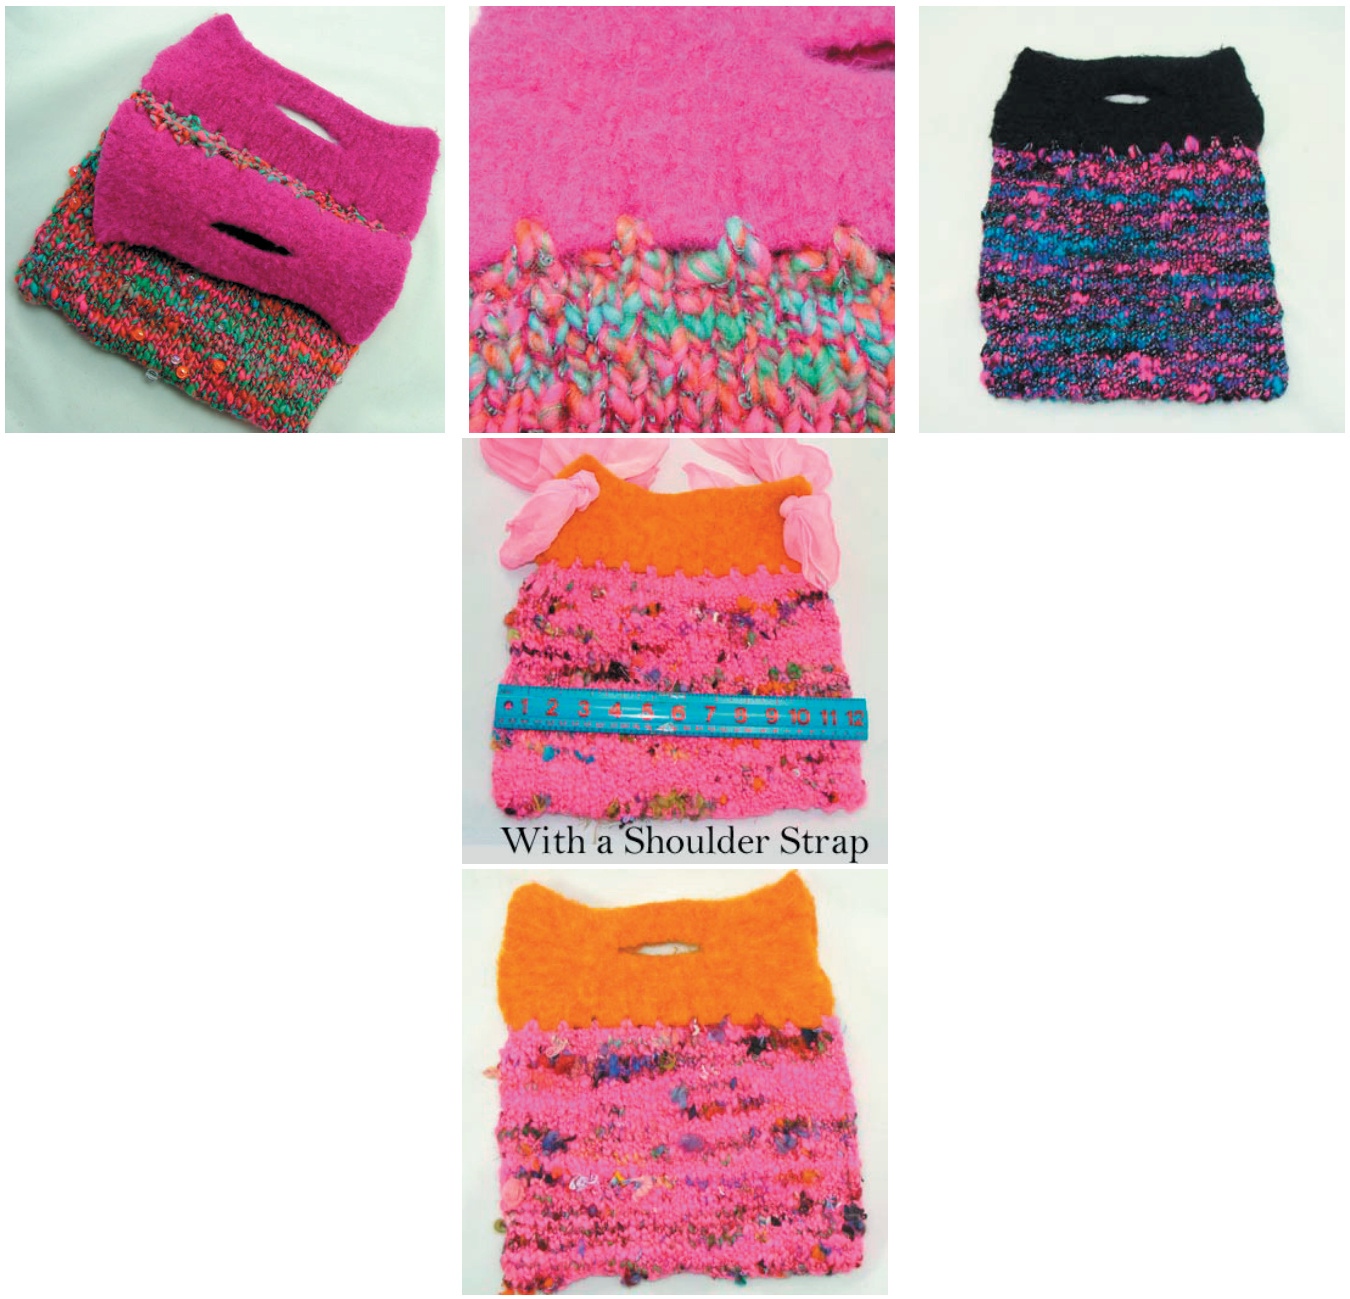
You can embellish the handles by holding a commercial novelty yarn when knitting (before felting) or by needle felting designs on after felting. Use scarves for handles if you make the shoulder bag version.