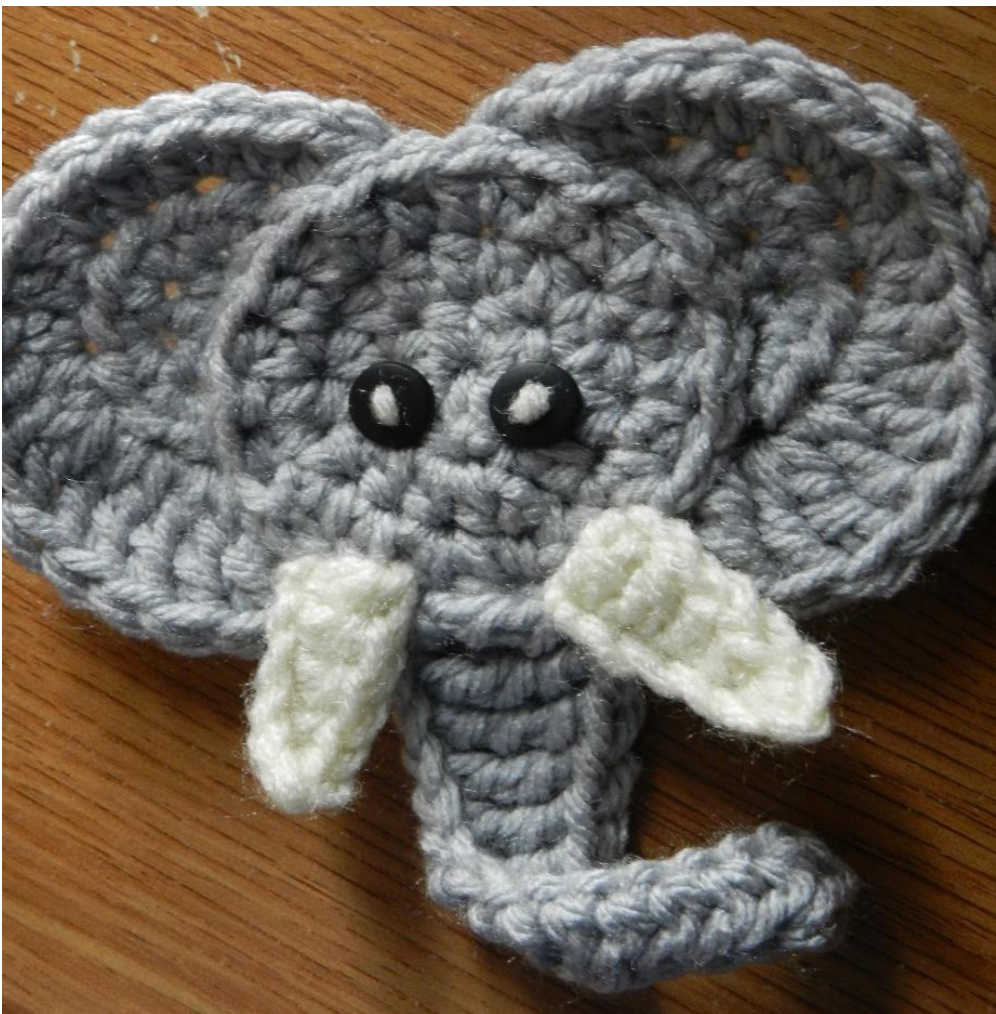
Elephant Applique
Pattern by Jamie Haas, Hooking Housewives ?2013
ot copy, sell, or redistribute pattern without our consent
Feel free to sell the items you make using this pattern, but please use your own photos. You are not allowed to use the copyrighted photos shown. All photos copyrighted by Sophisticated Snapshots. I you have any questions, please email us at HookingHousewives@yahoo.com
What you need:
Crochet Hook in your choice of size Medium worsted weight yarn Main color for the Elephant plus scraps of any shade of white for tusks YarnNeedle 2 Small Buttons for Eyes
Legend:
\* Chain (CH) \* Slip Stitch (SL ST) \* Single Crochet (SC \* Half Double Crochet (HDC) \* Double Crochet (DC) \* Triple Crochet (TR) \* Quad Stitch (Quad) - This is a stitch I made up, not really knowing if it actually exists. To complete this stitch, yarn over 3 times, insert into chain, pulling up a loop. (Yarn over, pull through 2) 4 times.
Notes:
- The starting chain at the beginning of the each round does count as a stitch in the rows. - When creating your starting slip stitch, make it so that you can pull the tail of the yarn to close up the hole. - The number in parenthesis at the end of each row indicates the number of stitches worked in that row. - If you are unfamiliar with the Invisible Join technique, you can view a step-by-step photo tutorial at: http://hookinghousewivescrochet.blogspot.com/p/crochet-stitch-techniques.html - If you're having difficulty understanding the Quad stitch, you can view my video tutorial here: http://www.youtube.com/watch?v=N3KGb3ppxKu
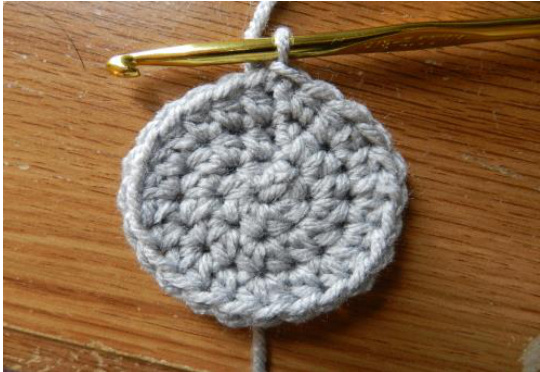
Head
1 - CH3, HDC 7 in first CH; SL ST into top of first HDC; pull tail to tighten center hole (8) 2 - CH2, HDC in same st; 2HDC in each st around; SL ST into top of first HDC (16) 3 - CH2, HDC in same st, HDC in next st; (2HDC, HDC) around (24); fasten off and use Invisible Join to finish; weave in ends. You will use a separate strand of your main color to sew the completed head onto your project of choice.
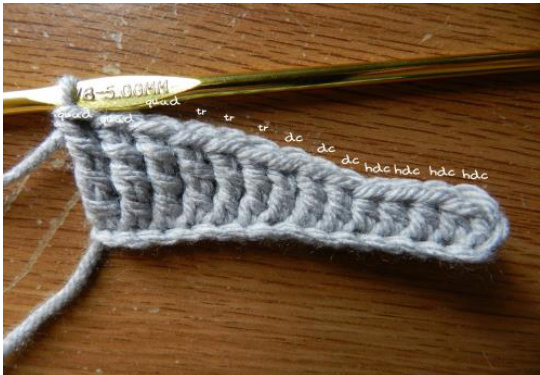
Trunk
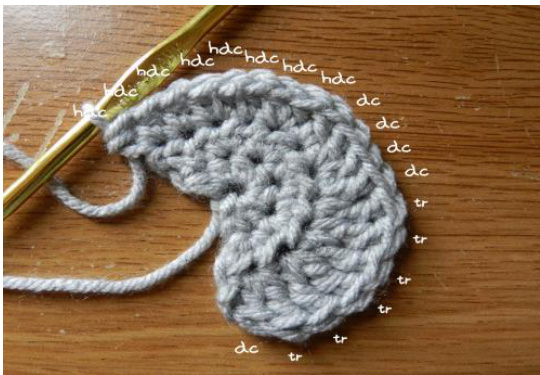
CH 15, HDC in third CH from hook; HDC in next 3 CH; DC in next 3 CH; TR in next 3 CH; Quad in next 3 CH (13)
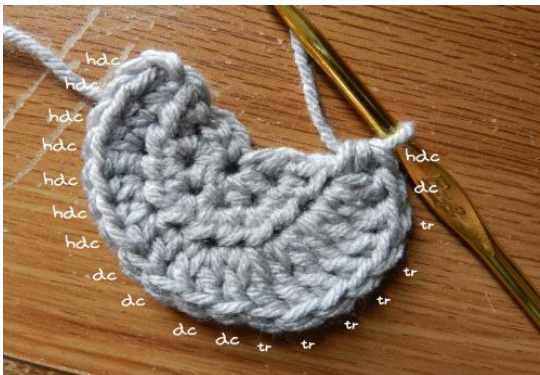
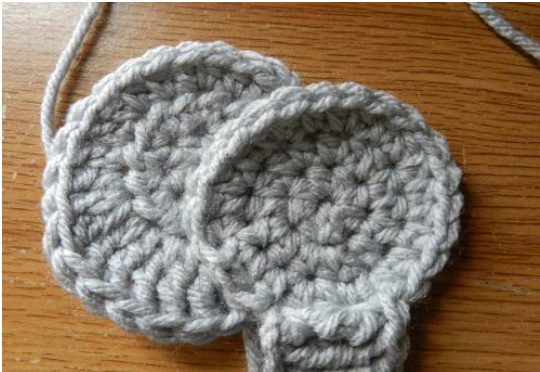
Left Ear
1 - CH3 (does not count as first HDC in this round), HDC in first CH 6 times (6) DO NOT JOIN! Pull starting tail to tighten the center hole. 2 - CH2, turn; HDC in same st; HDC in next; 2HDC in each of 5 remaining st (11) 3 - CH2, turn; HDC in same st; HDC, 2HDC, HDC, 2HDC, DC, 2DC, (DC,TR), 2TR, 2TR, (TR,DC,HDC) (19); fasten off, leaving tail for attaching ear to head; weave in center tail.
Right Ear
1 - CH3 (does not count as first HDC in this round), HDC in first CH 6 times (6) DO NOT JOlN! Pull starting tail to tighten the center hole. 2 - CH2, turn; HDC in same st; HDC in next; 2HDC in each of 5 remaining st (11) 3 - CH2, turn; (DC,TR) in same st; 2TR, 2TR, (TR,DC), 2DC, DC, 2HDC, HDC, 2HDC, DC, 2HDC (19); fasten off, leaving tail for attaching ear to head; weave in center tail.
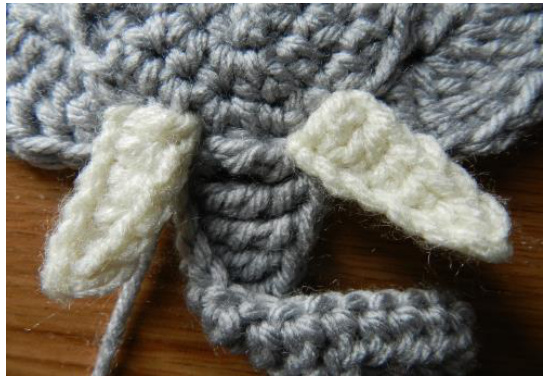
Tusks (make 2)
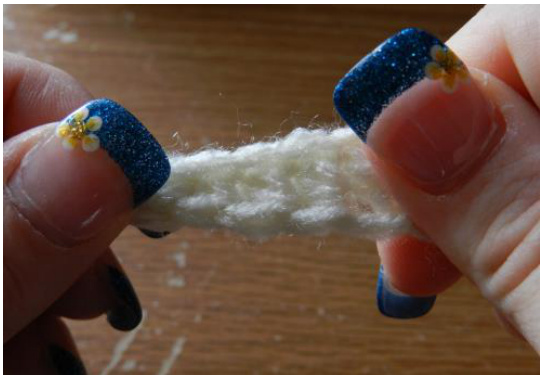
1 - CH6; SC in second CH from hook; SC in next st; HDC in next 2 st; DC in last st (5) 2 - fasten off, leaving tail for attaching tusks to head; hold each end of the tusk and tug gently - this will help give it a little length
Assembly
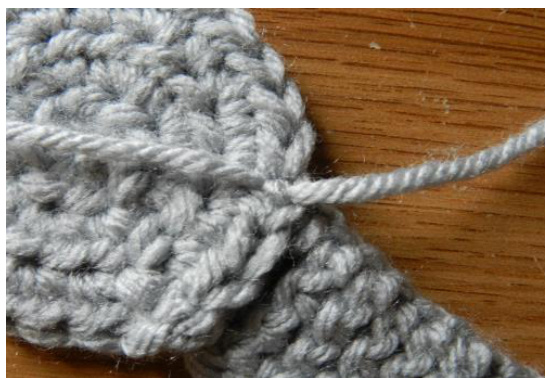
1 - lay out the head, trunk, and ears; put the tusks to the side for the meantime; the side of the ears with the triple crochet stitches should bedown 2 - begin by attaching the trunk to the front of the head (l put each of thetailsthroughonestitch along the outsideround of the head)
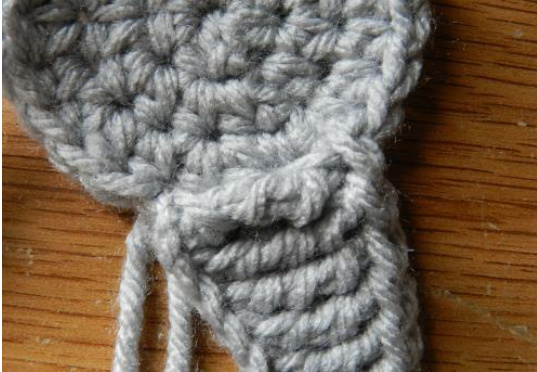
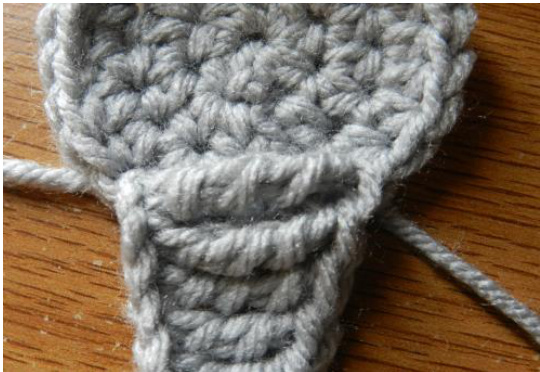
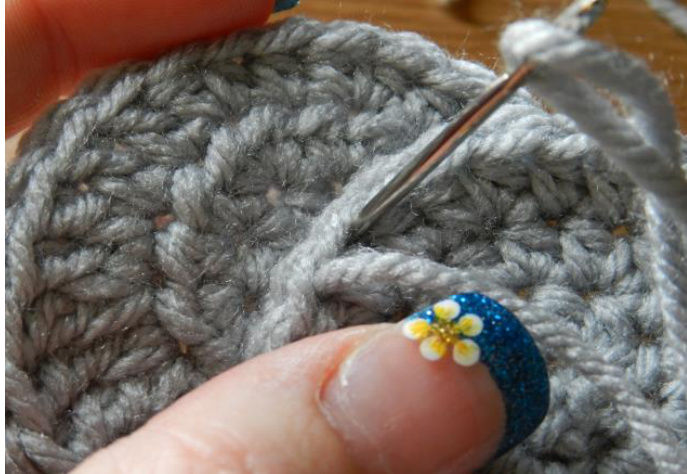
3 - use the stitches on the same round as a guide for stitching, wrapping around the last quad stitch of the trunk 4 - knot the two tails together at the base to help secure the trunk (thiswillnotbeenoughtofullysecurethetrunk);weaveinthe short tail leavetheremainingtailtouseforstitchingthelengthofthetrunk ontowhatever piece the appliquewill be attached; you will add the curvetothetrunkasyoustitchitdown
5 - attach the ears on the backside of the head; the bottom of each earshouldbe just off thecenter of the topof thehead and the bottom of each ear should attach where each side of the trunk is attached 6 - pick one ear at a time to assemble, holding it firmly in place while stitching; use stitches from the last round of the head as a guide for attaching the ears; repeat to attach second ear
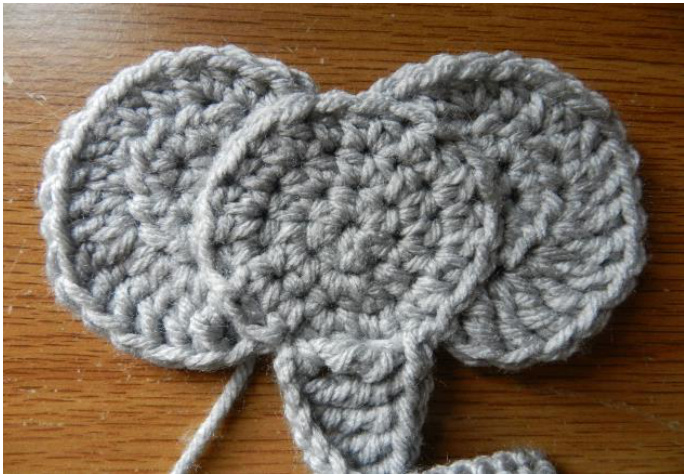
7 - attach tusks at corners of trunk, using yarn needle to pull each tail through to the back of the head 8 - knot the tails together and weave in neds or cut off ends
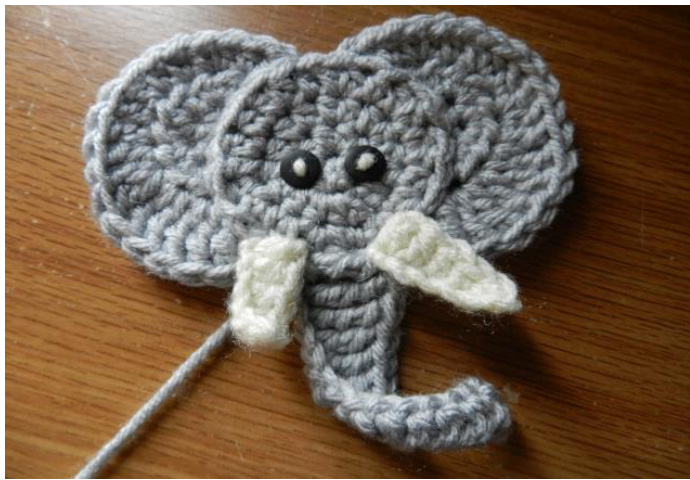
9 - use small buttons to add eyes to the head just off each side of the center hole YOURELEPHANTISNOWCOMPLETE!!


