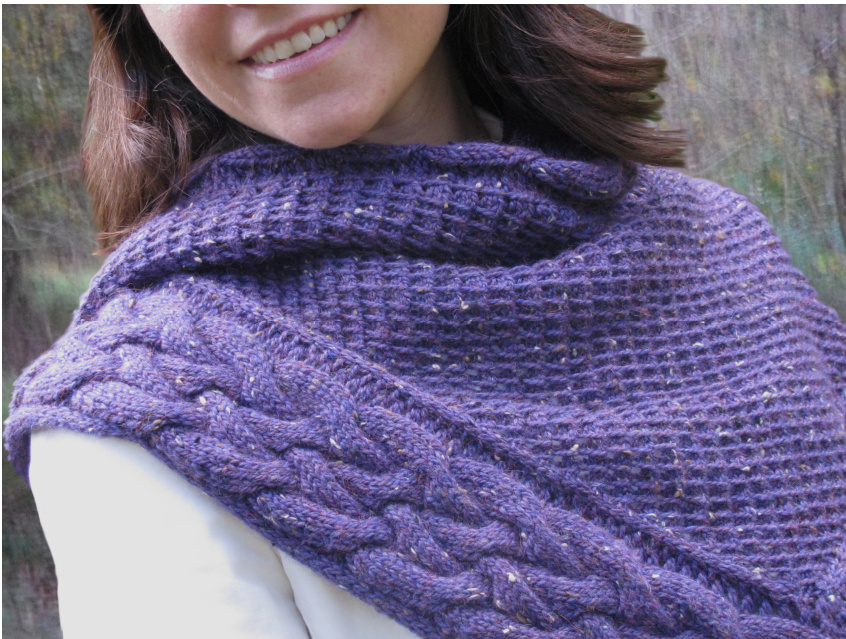
Solas Shawl by Sara Miller Solas is the Gaelic word for light, solace and reassurance. In the cold and dark days of winter this cabled and textured shawl will keep you warm and cozy. This shawl was designed by thinking of the final product as a whole and then deconstructing it into its different elements. Knit from the outside in, the shawl's borders are worked in three pieces, grafted together, and then the center stitches are picked up and knit. SIZE One
FINISHED MEASUREMENTS
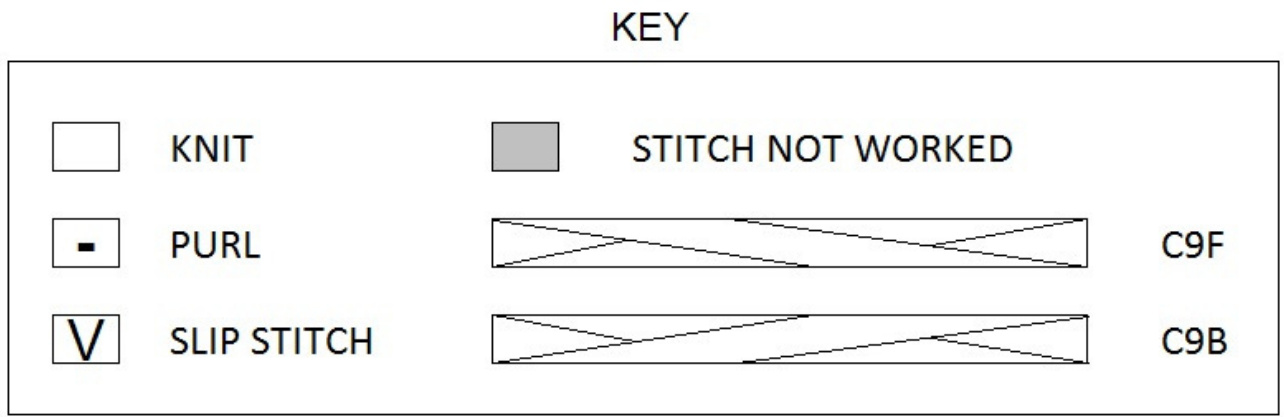
Width: 51 inches Length at center: 27 inches MATERIALS Knitpicks City Tweed DK [55% Merino wool, 25% superfine alpaca, 20% Donegal tweed; 123 yds/112 m per 50g skein]; color: Morning Glory; 7 skeins 1 36" or longer US #6/4mm circular needle notions required Smooth waste yarn, similar weight to working yarn Yarn needle 2 Stitch Markers GAUGE 17.5 sts/28 rows = 4" in stockinette stitch, washed and lightly blocked PATTERNNOTES This project uses a provisional cast on. Use your preferred provisional cast on technique. The borders of this shawl are worked with a three stitch i-cord along one edge. These stitches are knit on the right side row and slipped on the wrong side row with the yarn held in back. It is important that these stitches are worked very loosely so that the shawl will block properly. All stitches are slipped as if to purl with yarn held in back. The beginnings and ends of the border pieces are worked using short rows, increasing or decreasing the number of stitches work. The total number of stitches does not change. C9B- Slip five stitches onto a cable needle and hold in back. Knit four stitches from the left hand needle, purl one stitch from the cable needle and knit the remaining four stitches off the cable needle. C9F- Slip four stitches onto a cable needle and hold in front. Knit four stitches from the left hand needle, purl one stitch from the left hand needle, knit the four stitches off the cable needle. PSOP - On a wrong side row, lift the second stitch on the left hand needle over the first stitch and off the needle as if to cast off. Purl remaining stitch.
PATTERN
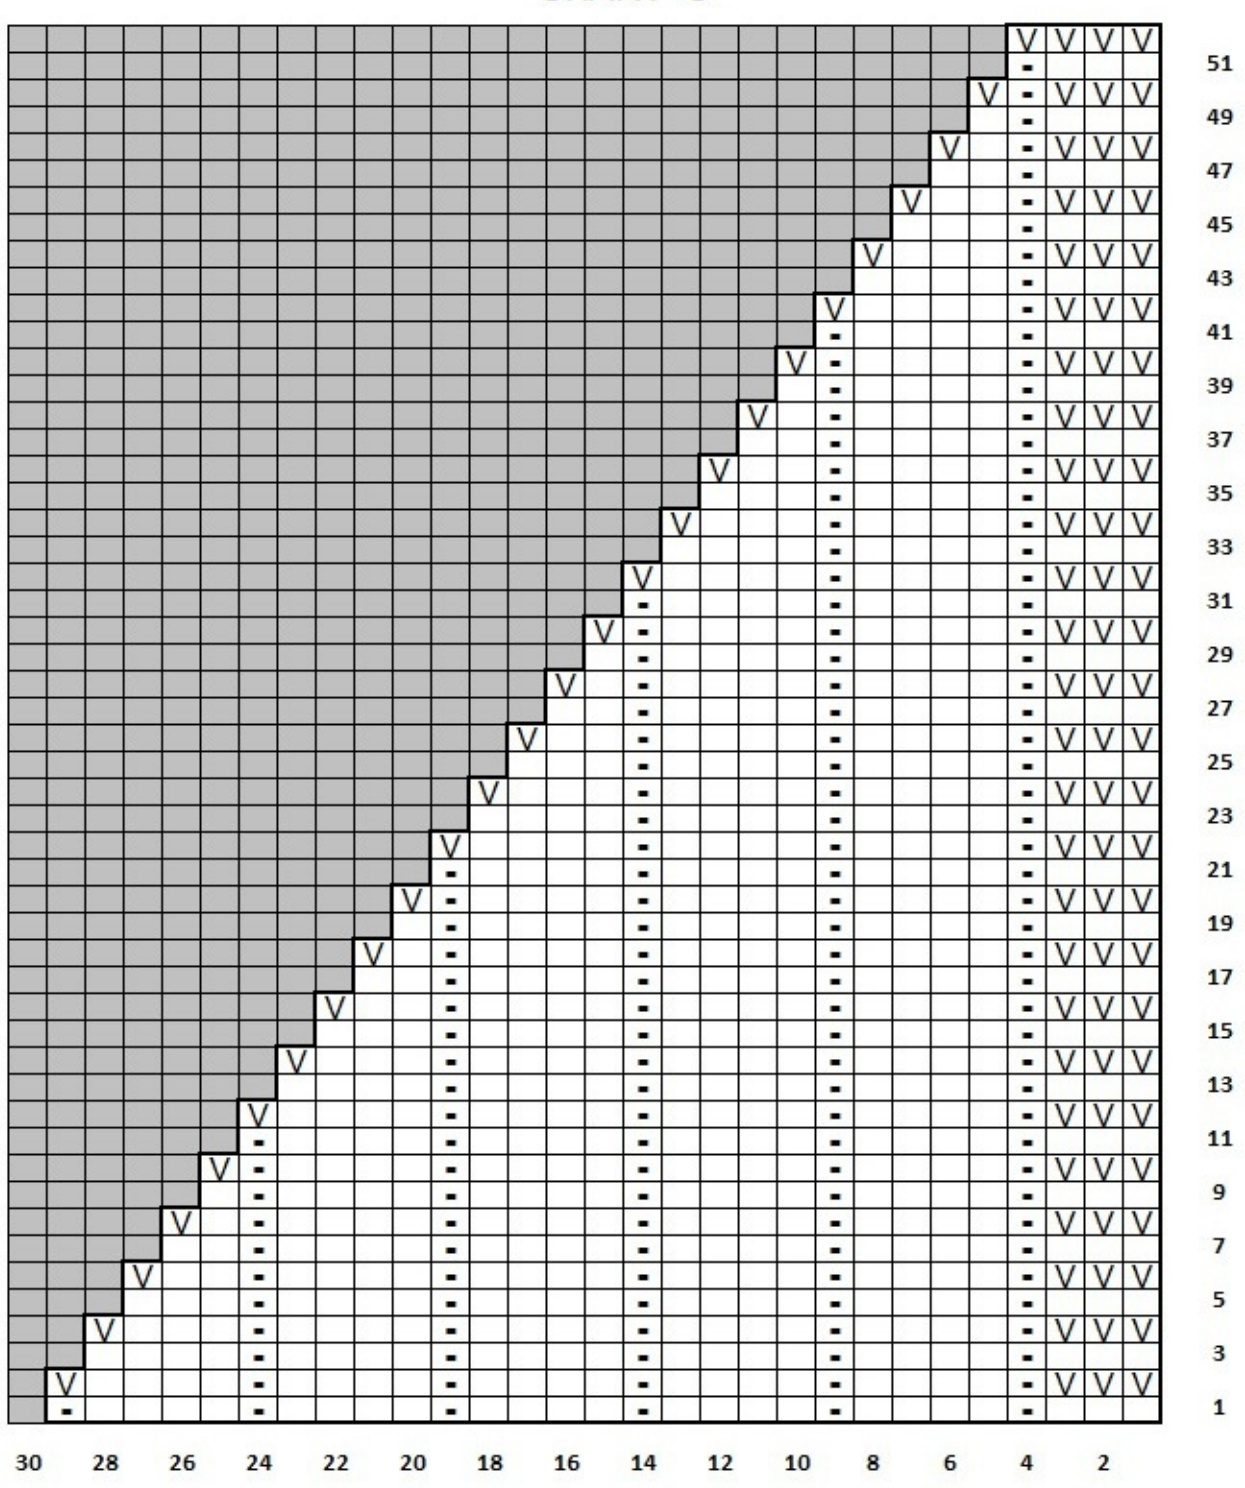
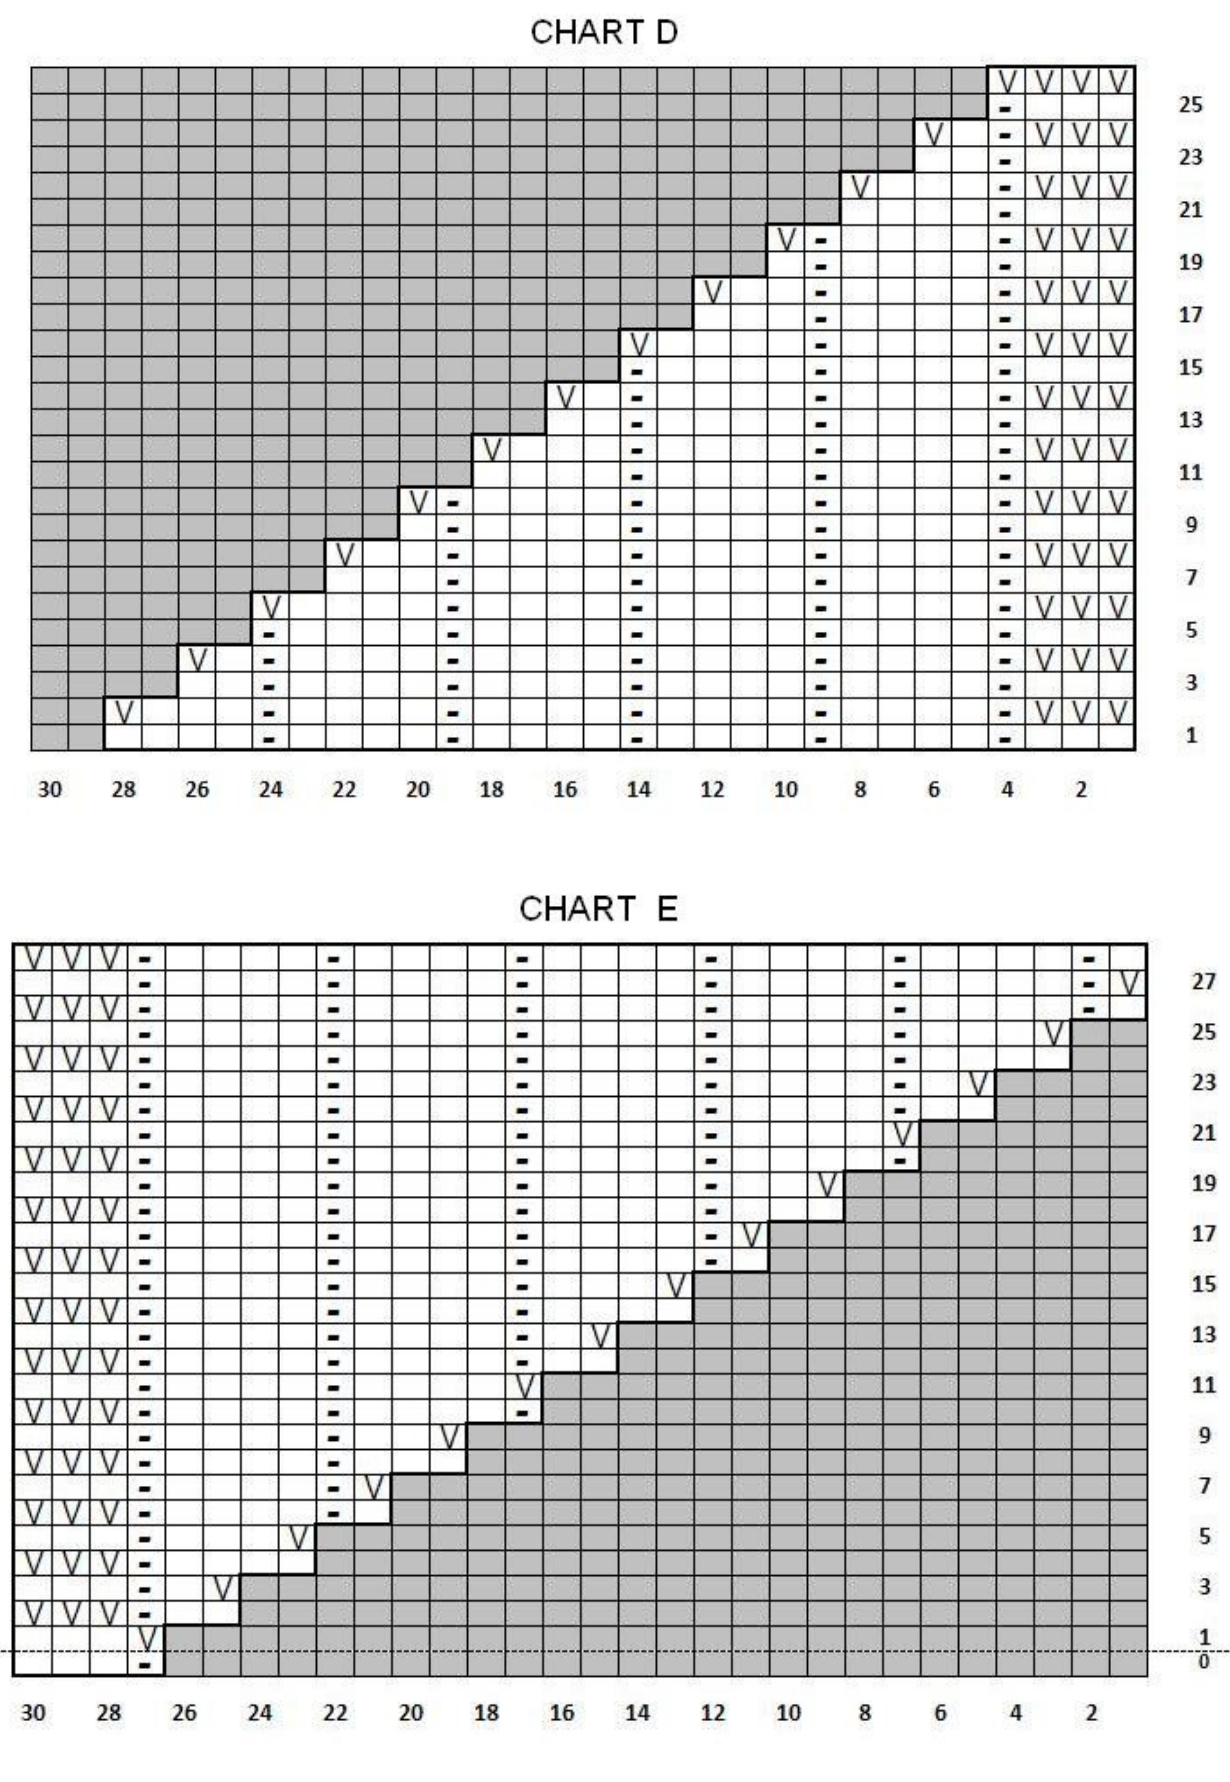
Border 1 Using provisional cast on and waste yarn, CO 30 sts. With main yarn work Chart A once. On RS work rows 3-12 of Chart B once. Work rows 1-12 of Chart B 10 times. Work rows 1-8 of Chart B once. Work Chart C once. Break yarn leaving a 15 inch tail and slip stitches onto a holder. Border 2 Using provisional cast on and waste yarn, CO 30 sts. With main yarn work Chart A once. On RS work rows 3-12 of Chart B once. Work rows 1-12 of Chart B 18 times. Work rows 1-8 of Chart B once. Work Chart D once. Break yarn leaving a 15 inch tail and slip stitches onto a holder. Border 3 Using provisional cast on and waste yarn, CO 30 sts. With mc yarn work Chart E once, leaving a 15 inch tail when joining mc yarn. (note: Chart E starts on a WS row, so row O is worked from left to right) On RS work rows 3-12 of Chart F once. Work rows 1-12 of Chart F 10 times. Work rows 1-8 of Chart F once. Work Chart G once. Break yarn and slip sts onto a holder. Graft together the edges of the three border pieces according to the garment diagram. Center Each stitch will be picked up and knit in the slipped stitches along the inside edge of the borders. Start in the inside corner where border 2 and 3 meet, and working across border 2, pick up and knit 1 st, place marker, pick up and knit 115 sts, place marker, pick up and knit 1 st. Pick up and knit 69 sts along border 1. Pick up and knit 69 sts along border 3. A total of 255sts. Row 1 [RS] K1, sl marker, [k5 kfb] 19 times, k1, sl marker, k1, sl 1. Turn. Row 2 [WS] P2tog, sl marker, p to next marker, sl marker, PSOP, sl 1. Turn. Row 3 [RS] SSK, sl marker, k1, k2tog, \*yo, k2, pass the yo over the k2\* rep between stars to 3 sts before marker, ssk, k1, sl marker, k2tog, sl 1. Turn. Row 4 [WS] P2tog, sl marker, p1, PSOP, p to 3 sts before marker, p2tog, p1, sl marker, PSOP, sl 1. Turn. Repeat rows 3 and 4 until 24 sts remain. Repeat row 3 again. Repeat row 4 removing the markers as you come to them and omitting the last slipped stitch. 16 sts remain. Break yarn leaving a 12 inch tail. At this point you should have 8 sts on your LH needle. Slide the other 8 sts onto your RH needle and graft together.
FINISHING
Weave in ends, but do not cut tails until after blocking. Block to measurements given (see Diagram), then trim yarn tail.

CHARTA
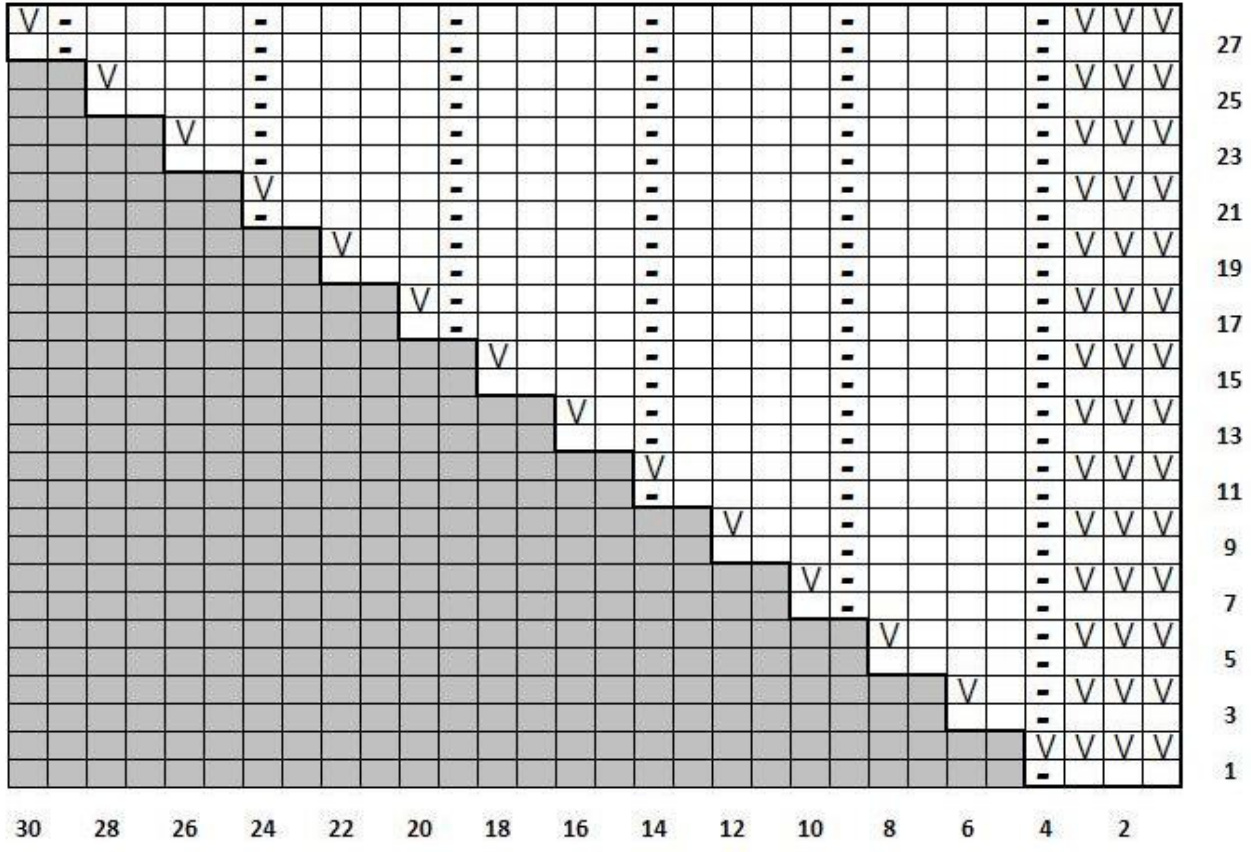
CHART B
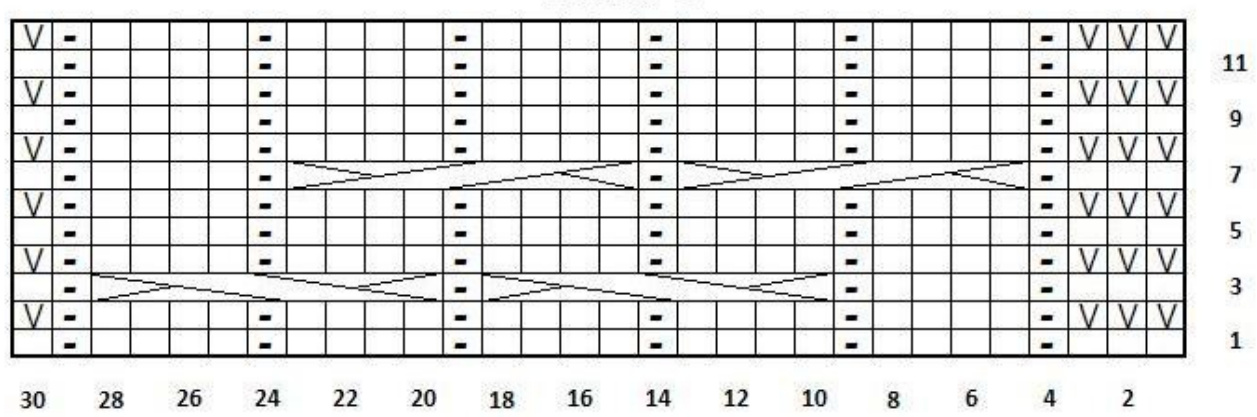
CHART C
| CHARTF | |||||||||||||||||||
| 11 | |||||||||||||||||||
| 6 | |||||||||||||||||||
| 3 | |||||||||||||||||||
| 28 | 26 | 24 | 22 | 20 | 18 | 16 | 14 | 12 | 10 | 8 | 4 | 2 | |||||||
| 30 | 6 | ||||||||||||||||||
| CHART | G | ||||||||||||||||||
| 53 | |||||||||||||||||||
| 51 | |||||||||||||||||||
| 49 | |||||||||||||||||||
| 47 | |||||||||||||||||||
| 45 | |||||||||||||||||||
| 43 | |||||||||||||||||||
| 41 39 37 35 33 31 29 27 25 23 21 19 17 15 13 11 9 5 3 | |||||||||||||||||||
| 30 28 | 26 | 24 | 22 | 20 | 18 | 16 | 14 | 12 | 10 | 8 |


