Love Grows Pillow
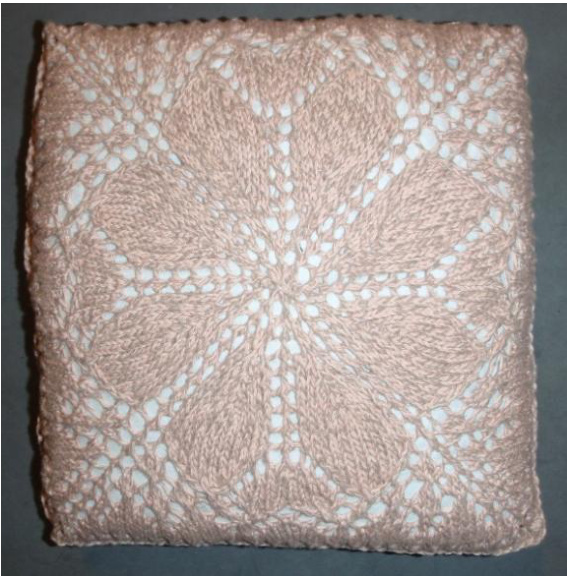
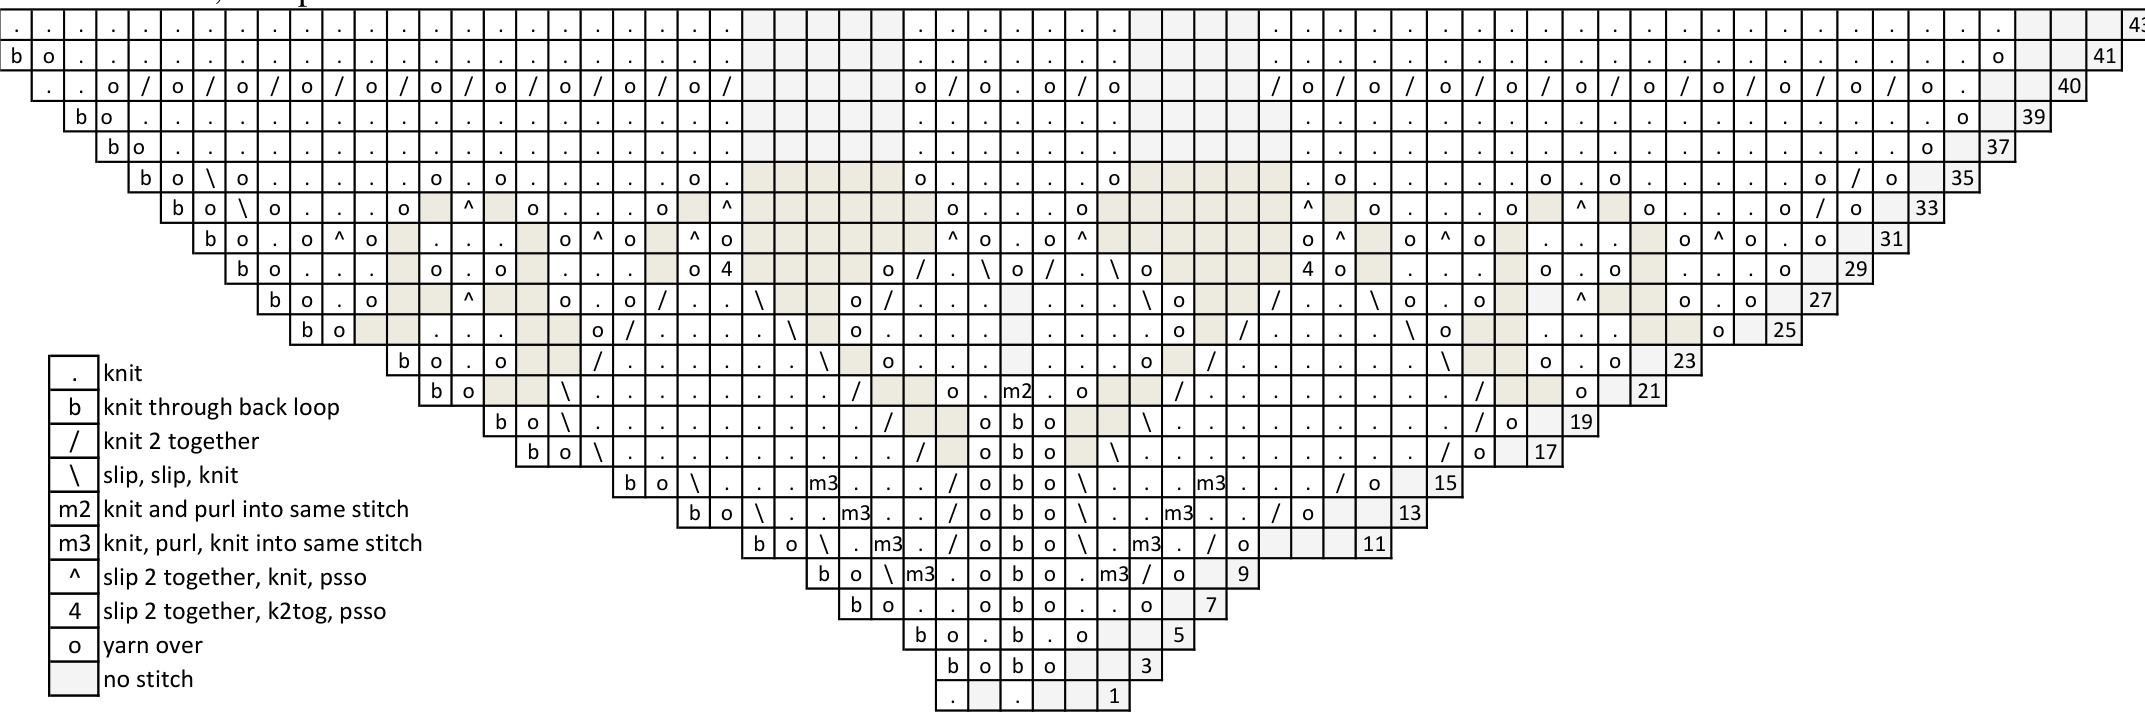
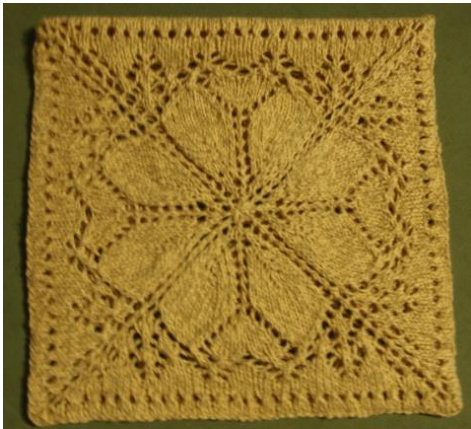
This is relatively simple pillow with some extra fullness in the center to accommodate an overstuffed pillow. Gauge is relatively unimportant and difficult to determine since the pillow must be blocked and differing yarns and people have a different amount of stretch. I got a 12" square pillow from a cotton-linen blend which sites gauge at 5 sts/in. I strongly recommend knitting two of these—one for each side of the pillow. If you want a stockinette back, block the patterned side before knitting up the back so that the two sides will match correctly. I also recommend blocking prior to buying (or making) a pillow form to be on the safe side. There are numerous doily (or "“closing") cast-ons. Don't sweat the cast on too much here, a small hole is OK and could be a nice detail in the lace. (Or a place for a center button's shank through the hole to hide it.) Pattern Cast-on 8 stitches Knit plain all rows not shown on the chart (even rows). ROW 40 IS AN ACCEPTION! Work through chart below, ending after row 43 (i.e., do not knit row 44)
Finishing
You will make two of these. However, before you just blindly end the first one, there are some options here. If you like grafting and are up to it, you can graft the two sides together. I did this because I like the finished results and prefer grafting to sewing together (I always end up misaligned somehow). However, there are LOTS of stitches here, so this option is not for fragile yarn or the faint of heart. I have given grafting instructions below——-graft in a way that creates a purl bump or the pillow will not form “seams" on the edges.
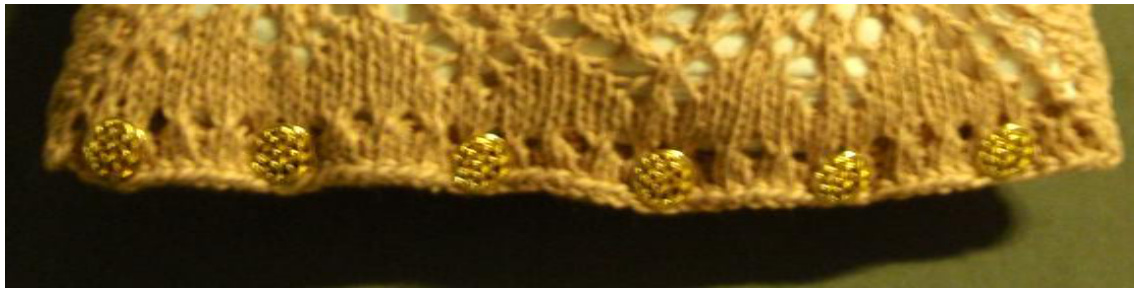
Piece 1: BO' one side of pillow (this is through one repeat of the chart, 52 sts). If you are grafting, leave the tail very long and move remaining stitches to waste yarn. If you are sewing the two halves together, BO remaining stitches in the same manner. 'BO with a stretchy bind off. I recommend k1, \*k1, knit the two stitches on the right needle together through the back loop\* Piece 2: Create a flap for attaching buttons...Knit across one side of the pillow (this is through one repeat of the chart, 52 sts). Turn work and knit back across (creating a purl “bump” for the fold). Continue band with 4-6 rows in stockinette. BO the band and cut yarn. If you are grafting, move remaining stitches to waste yarn. If you are sewing, BO remaining stitches. You can either block each side separately or after combining. If you block the combined unit it is likely that one side will not be perfect. I can live with this, and prefer blocking the sides together: I'm lazy, dislike blocking and never quite end up with matching dimensions if I block separately. Block hard. Check that each side of the pillow, and each piece, is the same length (well, account for button band on side 2). The final dimensions should be about 1’’ smaller than the final pillow form for good fullness. Attach buttons and use eyelet band as button holes.
Grafting
Graft so that a purl row on the right side is a result. To do this, place the stitches back onto needles. Put the right (knit) sides of the each piece together with both working needles together and the points going to the right. Work a standard Kitchener stitch (purl-knit set-up; knit-off, purl; purl-off, knit). [You can place the right sides out and switch the purls and knits around, but I think that most of us are used to the Kitchener order, so why risk messing up? Then again, you can't see the tension very well with the recommended way. I don't find that important for a pillow, but I'm sure it would drive some people crazy...]