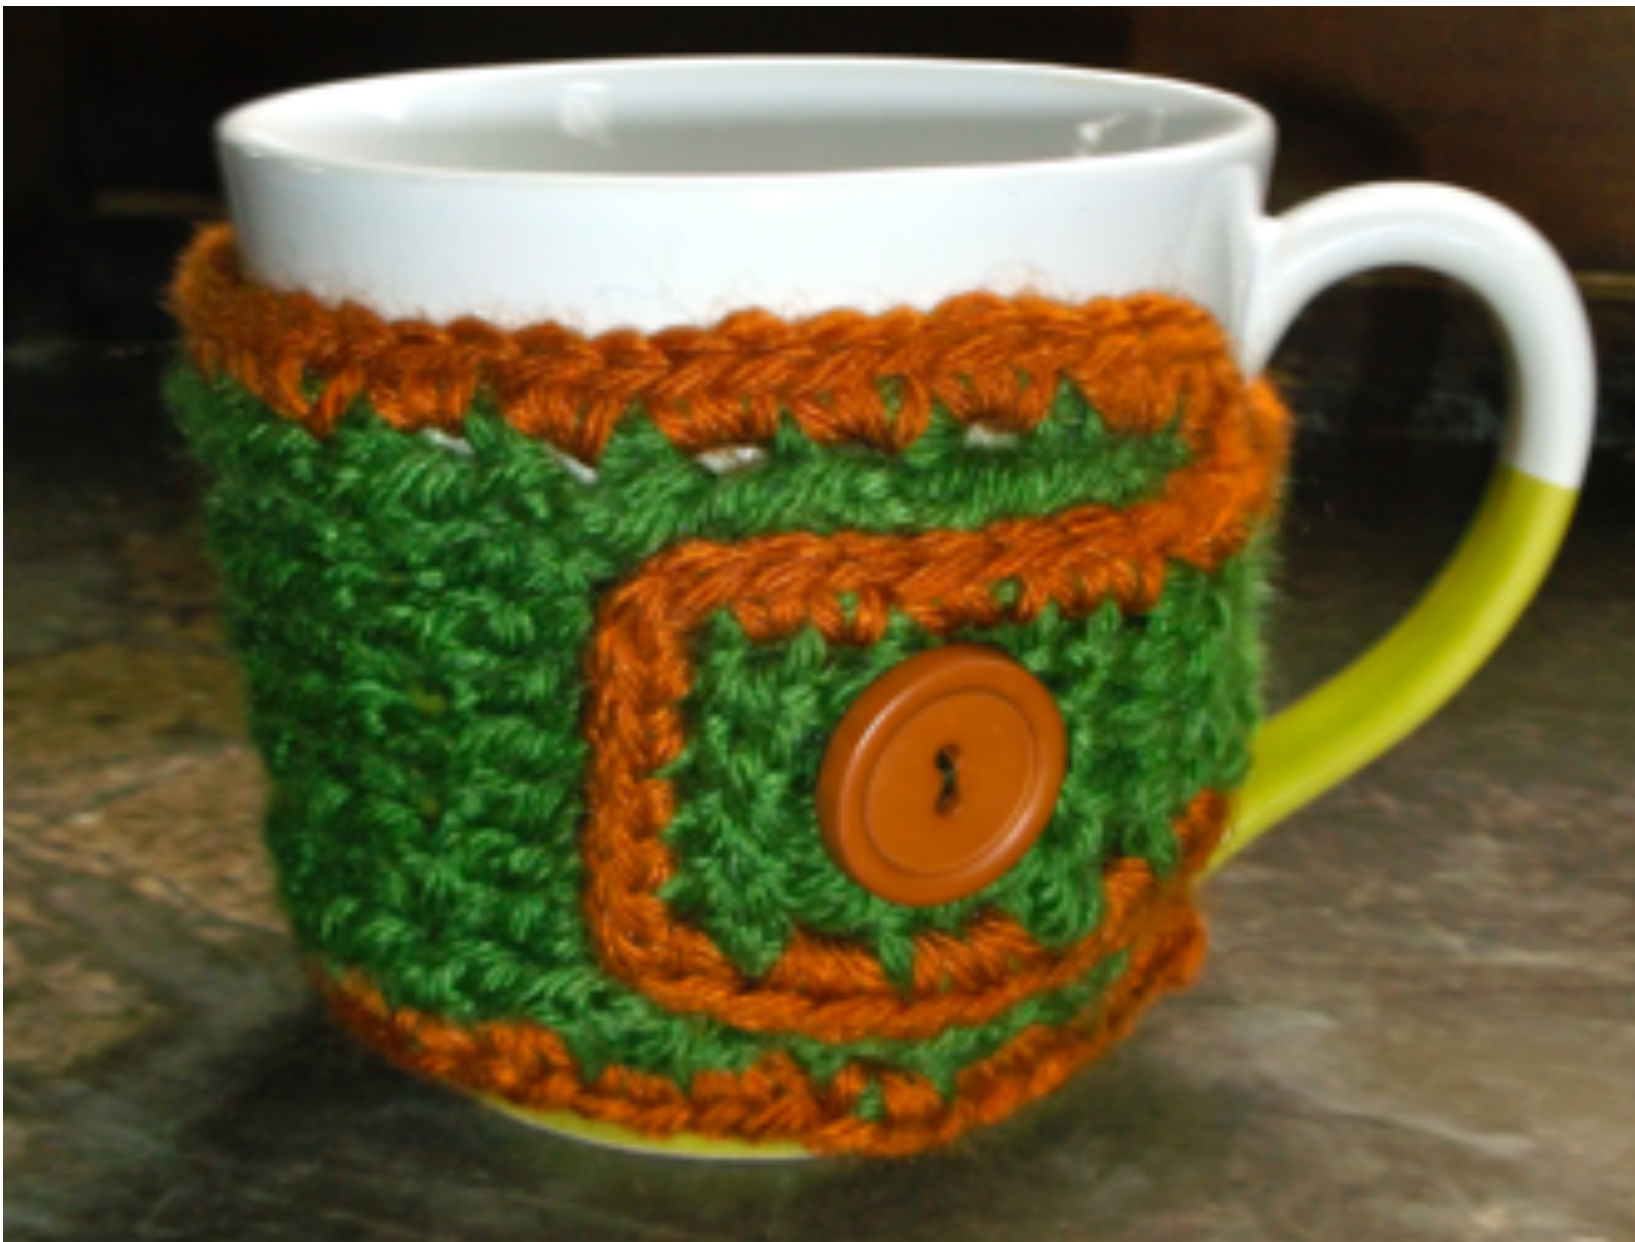
RIBBED MUG COZY
Warming your daily cuppa. BY: DYE LOT 23
This pattern is the property of DYE LOT23 and may be printed for personal use only. Distribution of this pattern, including, but not limited to, images, diagrams, and text for any reason is not permitted. This pattern may not be distributed in print or electronic form. Finished products created from this pattern may be sold by the maker of the finished item. Copyright @ 2014 What IUsed 2 Skeins\* Lion Brand Vanna's Choice Color A: Kelly Green ColorB: Rust \*One skein will make more than one cozy, but two skeins are required because you need one of each color. This is a great stashbuster.
Stitches
Skill Level Finished Measurements Easy Length (when flat): 13 inches Width: 3 inches
Special Stitches
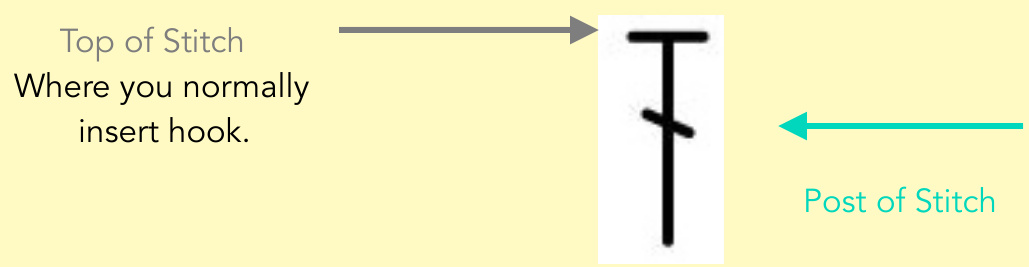
Back-Post Double Crochet (BPDC): Yarn over (yo), insert hook around the post of the next stitch from back-to-front-to-back, yo and pull up a loop. Yo, pull through two loops, yo, pull through last two loops. See the diagram below showing the post of the stitch. Front-Post Double Crochet (FPDC): Yo, insert hook around the post of the next stitch from front-toback-to-front, yo and pull up a loop. Yo, pull through two loops, yo, pull through last two loops. See the diagram below showing the post of the stitch.
How to Find the Post of a Stitch
Here is a regular DC.
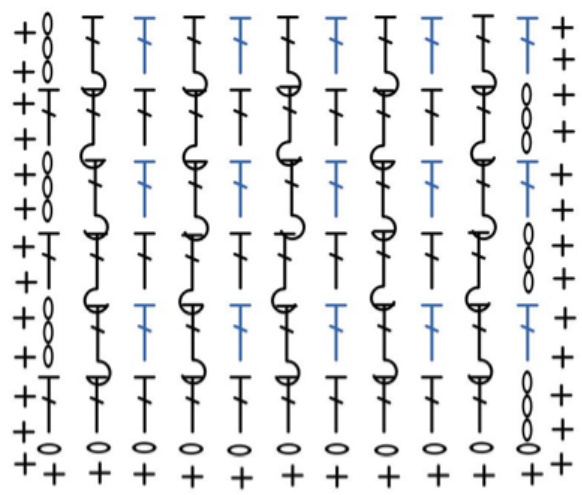
Ribbed Mug Cozy Stitch Diagrams
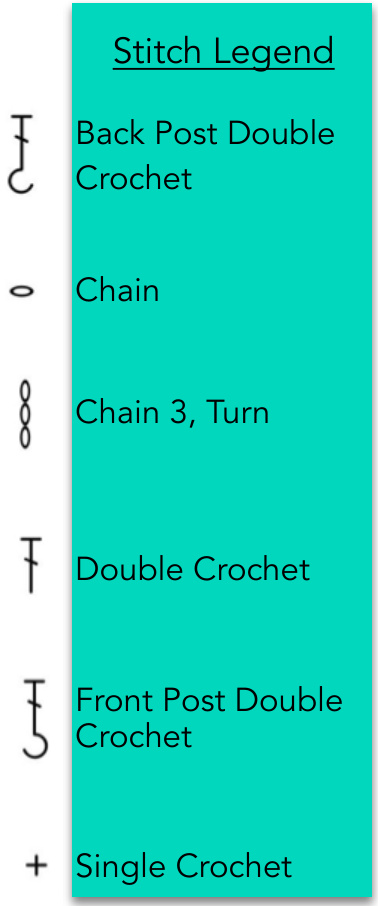
Section of Main Pattern with Edging
Section of Handle — Shown with Button Hole and Edging
Ribbed Mug Cozy Instructions
With color A, ch 13 Row 1: DC in the 4th ch from hook and in each ch across. (Ch 3 at the beginning of the row, counts as a dc here and throughout.) - 11 DC Row 2: Ch 3, turn. FPDC around the next stitch, dc, \*FPDC around the next stitch, dc. Repeat from \* acrosS. - 5 FPDC, 6 DC Row 3: Ch 3, turn. BPDC around the next stitch, dc, \*BPDC around the next stitch, dc. Repeat from \* across. - 5 BPDC, 6 DC Rows. 4 - 18: Repeat rows 2 and 3, alternating. Row 18 will be a repeat of Row 2. — 11 stitches in eachrow. Row 19: Ch 3, turn. BPDC around next stitch, dc, \*BPDC around the next stitch, dc. Repeat from \* across. - 5 BPDC, 6 DC . Slip stitch in the first 4 stitches, ch 3. DC in next 4 stitches. — 4 SS, 5 DC Rows 21 - 24: Ch 3, turn. DC in each stitch across. — 5 DC Row 25: Ch 3, turn. DC in next stitch, ch 2, skip next stitch, dc in last 2 stitches. — 4 DC, 1 ch2space Row 26: Ch 3, turn. DC in next stitch, 1 dc in ch 2 space, dc in last two stitches. — 5 DC Row 27: Ch 1, turn. SC in each stitch across, fasten off. — 5 SC Edging: Join color B in the corner of the foundation row with a slip stitch. Ch 1, sc across foundation ch to last stitch. Work 3 sc in the last ch of the foundation ch. Work 2 sc in the side of each row until you get to a corner. Work 3 sc in the corner, sc in each of the next 2 stitches. Work 3 sc in next stitch (a double crochet from Row 20 is also in this stitch). Work 2 sc in the side of each row until the next corner. Work 3 sc in the first stitch of row 28, sc to the next corner (last stitch of row 28). Work 3 sc in the last stitch of row 28. Work 2 sc in the side of each row to the next corner. Work 3 sc in the corner stitch (a double crochet from Row 20 is also in this stitch), sc in each of the next 2 stitches. Work 3 sc in the corner, work 2 sc in the side of each row until you get to a corner. Work 2 sc in the stitch you started in, join with a ss in the 1st sc, fasten off. Finishing: Weave in all ends, sew button onto a center FPDC/BPDC ridge. My button is on row 3. Block to shape if desired.


